
Removing
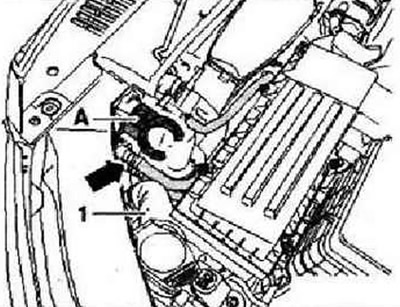
Remove soundproofing. Remove grille. Press washer fluid filler pipe -1- out of bracket -A- and secure behind headlight.
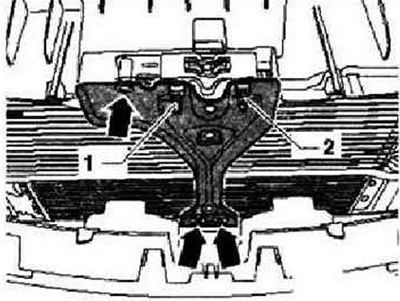
Remove bolts -arrows-. Unscrew bolt -1-, loosen bolt -2- only. Install drip tray for service cranes -VAS 6208-.
Note: Connect the flow and return lines to the ATF cooler with a quick coupling -arrow- and secure with a clip. To remove the lines, release the clamp. Do not overtighten the clamp - Replace the overtightened clamp, do not bend it. Otherwise, the clutch may become loose later on, causing ATF to leak.
Open clamp max. by -a- 16 mm and detach lines -2- from ATF cooler -1-.
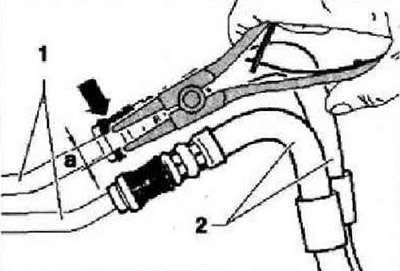
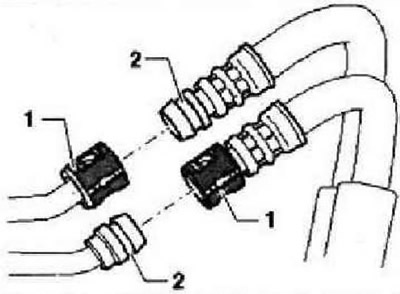
Instruction: In order not to confuse the supply and drain lines, the couplings -1- are located opposite each other.
Seal the line openings with suitable plugs.
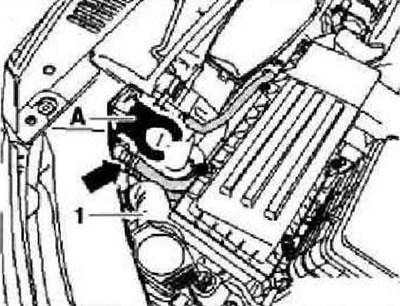
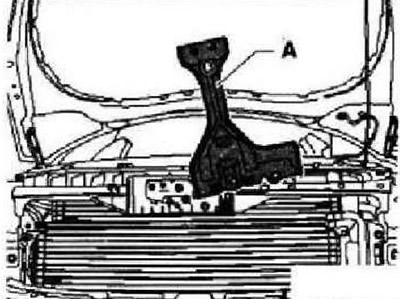
Unscrew lock support -A- clockwise upwards.
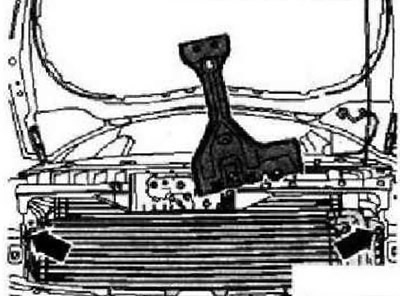
Unscrew ATF cooler -arrows-. The other two bolts are located under the ATF radiator. Pull ATF cooler forward.
Installation is carried out in the reverse order. Insert ATF cooler and secure. Push the supply and return lines onto the ATF cooler connections. When pushing on, the clamp is audibly fixed with a click and in the socket - check the correct fastening of the clamp
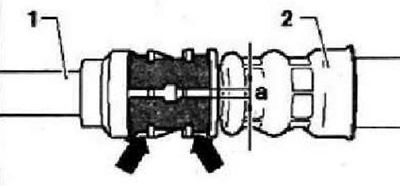
The clip must be fully seated in the groove of the coupling -2- and the dimension -a- of the socket must be max. 5 mm. If the size is more than 5 mm, the clip has been overstretched and needs to be replaced. Do not bend the clip. Otherwise, the clutch may become loose later on, causing ATF to leak. Adjust the lid lock. Check and top up the ATF level.
Visitor comments