
English Русский
Български
Беларускі
Український
Српски
Hrvatski
Română
Polski
Slovenský
Magyar
  |  Articles  |  Sitemap  |  Contacts  |    |
Car maintenance Ford Car maintenance Hyundai Car maintenance Chevrolet Car maintenance BMW Car maintenance Audi Car maintenance Opel Car maintenance AvtoVAZ
VWmanual.ru


Main   Passat   Golf   Polo   Touareg   Tiguan   Sharan   Transporter   Others  
LT 28 (1975-1991) LT 2D (1996-2003) Beetle (1960-1986) Caddy 3 (2003-2010)

Valve clearances — checking and adjustment (VW Lt 28)

  • Main
  • Volkswagen
  • LT 28
  • Power unit
  • Petrol engines 2.4L
  • Valve clearances — checking and adjustment
            0


153. Remove the valve cover.

154. Valve clearances are checked and adjusted on an engine at normal operating temperature.

155. After overhauling the cylinder head, it is necessary to set the valve clearances on a cold engine and then check and adjust them again after the first 1000 km of mileage.

156. The size of the gaps is adjusted using adjusting washers, which are inserted between the corresponding cam, camshaft and tappet.

157. The thickness of the washer is indicated on its back side (see photo).
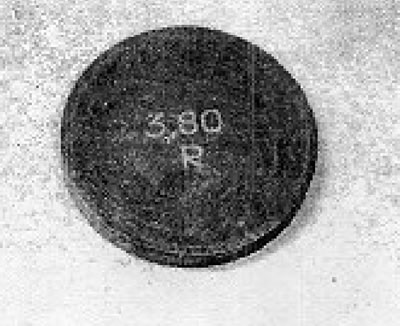
Photo 4B.157. Valve clearance adjusting washer: 3.80 = 3.80 mm.

Photo 4B.157. Valve clearance adjusting washer: 3.80 = 3.80 mm.


158. Check that the washers are installed with the numbered side facing the pusher.

159. If the old washers are in good condition, they do not need to be replaced after the engine is overhauled.

160. Before assembly, lubricate the working surfaces of all parts with oil.

161. To check the valve clearances, turn the engine with a screwdriver inserted into the hole in the clutch housing and resting on the flywheel so that both cams for the adjustable cylinder point upward at the same angles.

162. Check the clearance between the cam and the washer using feeler gauges.
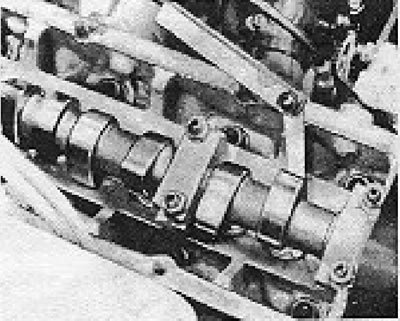


Figure 13.12. Checking valve clearances using feeler gauges (section 4B).

Figure 13.12. Checking valve clearances using feeler gauges (section 4B).


163. If the gap exceeds the specified value, the following must be done.

164. Turn the pushers so that the notches on their rims face inward (towards the spark plugs).
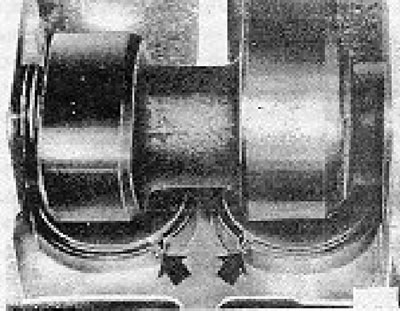
Figure 13.13. Turn the pushers so that the notches on their rims (shown by arrows) looked inside…

Figure 13.13. Turn the pushers so that the notches on their rims (shown by arrows) looked inside (section 4B).


165. There are special tools that can be used to press the tappets and remove the washers, but you can get by with two screwdrivers, which should be used to press the tappet on opposite edges.
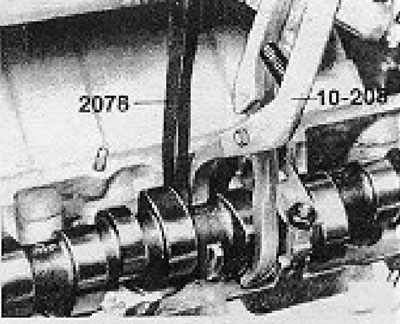
Figure 13.14. Special tool for removing/installing adjusting washers (section 4B).

Figure 13.14. Special tool for removing/installing adjusting washers (section 4B).


166. You will need an assistant to remove and install the washers.

167. Adjusting washers are available in various thicknesses to allow proper adjustment of valve clearance.

168. Check and adjust valve clearances on the remaining cylinders.

169. Once completed, reinstall the valve cover.

(View the original article on the resource VWMANUAL.ru)

This article is available at russian, bulgarian, belarusian, ukrainian, serbian, croatian, romanian, polish, slovak, hungarian
The text has been checked: Kolesnikov Artem

Share information:

Previous articles
Cylinder head and valve mechanism — overhaul
Cylinder head removal and installation
Camshaft — removal and installation
Timing belt — removal, installation and tensioning
Vibration damper — removal and installation
Oil pan — removal and installation (engine still on the vehicle)
Next articles
Oil pan and oil pickup tube — removal and installation
Oil dipstick tube — removal and installation
Flywheel — removal and installation
Crankshaft seals — replacement
Crankshaft — removal, inspection and installation
Low-compression engines (code HS)


Similar articles from other manuals for VW cars:
Checking and adjusting clearances in the valve drive mechanism Passat B2 (1981-1988)
Valve clearances — adjustment Golf 2 (1984-1993, petrol)
Checking the valve guide bushing Polo 3 (1995-2003)
Checking the valve timing Touareg 1 (2002-2006)
Checking the operation of the intake manifold flap Tiguan 1 (2007-2015)
Checking the engine oil level and replacing it Sharan 1 (1995-2000)
Checking the valve guides Transporter T4 (1990-2003)
Link to this page in different formats


Visitor comments


No comments yet


How much will 45 + 46 =


Caddy 3 
  • General information
  • User manual
  • Daily care
  • Maintenance
  • Petrol engines 1.4 l
  • Engine repair
  • Cooling and lubrication system
  • Power and exhaust system
  • Petrol engines 1.6 l
  • Engine repair
  • Cooling and lubrication system
  • Power and exhaust system
  • Diesel engines
  • Engine repair
  • Cooling and lubrication system
  • Power and exhaust system
  • Transmission
  • Mechanical gearbox 0AH
  • Mechanical gearbox 0A4
  • Drive shafts
  • Chassis
  • Car suspension
  • Steering
  • Brake system
  • Body and wiring diagrams
  • Interior and exterior
  • Electrical circuits
Beetle 
  • General information
  • Maintenance
  • Power unit
  • Engine repair
  • Cooling and lubrication system
  • Supply system
  • Exhaust system
  • Transmission
  • Clutch
  • Car gearbox
  • Chassis
  • Front suspension
  • Rear suspension
  • Steering
  • Brake system
  • Wheels and tires
  • Body
  • Exterior
  • Electrical equipment
  • Equipment and devices
  • Power devices
  • Electrical circuits
LT 2D 
  • General information
  • User manual
  • Maintenance
  • Power unit
  • Petrol engines 2.3 l
  • Diesel engines 2.5 l
  • Diesel engines 2.8 l
  • Injection system (diesel 2.8 l)
  • Transmission
  • Clutch
  • Manual gearbox
  • Differential
  • Chassis
  • Car suspension
  • Steering system
  • Brake system
  • Body
  • Body elements
  • Heating system
  • Electrical equipment
  • Equipment and devices
  • Electrical circuits
LT 28 
  • General information
  • Maintenance
  • Power unit
  • Petrol engines 2.0L
  • Petrol engines 2.4L
  • Diesel engines
  • Cooling and heating
  • Fuel and exhaust system
  • Ignition system
  • Transmission
  • Clutch
  • Car gearbox
  • Cardan shaft
  • Rear axle
  • Chassis
  • Brake system
  • Car suspension
  • Steering system
  • Body
  • Body elements
  • Doors, locks and windows
  • Electrical equipment
  • Power devices
  • Equipment and devices
  • Electrical circuits
VWmanual.ru © 2016-2026 | Mobile version | News and articles | Sitemap: EN BG BY UA RS HR RO PL SK HU | Write message | Site search
Passat B2 • Passat B3 • Passat B4 • Passat B5 • Passat B6 • Golf 1, diesel • Golf 1, petrol • Golf 2, petrol • Golf 2 • Golf 3 • Golf 4 • Golf 5 • Polo 3 • Polo 4 • Touareg 1 • Tiguan 1 • Sharan 1 • Transporter T3 • Transporter T4 • LT 28 • LT 2D • Beetle • Caddy 3 •
Our website uses cookies to ensure functionality and convenience.