



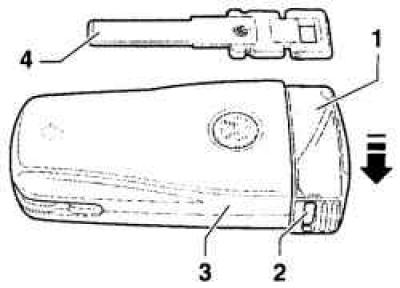
Fig. 1.8. Removing the remote control cover
Press the side button 2 on the remote control key 3 and remove the emergency key 4 (Fig. 1.8).
Remove cover 1 forcefully in the direction (arrows in figure 1.8) side button 2 with key 3.
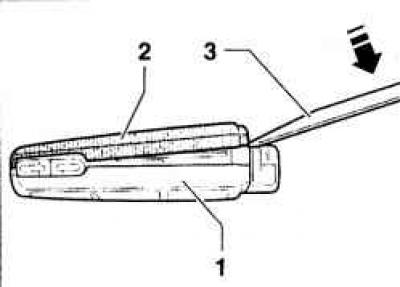
Fig. 1.9. Removing the upper part of the remote control key
Release the locks of the upper part 2 of key 1 (Fig. 1.9).
Using a thin screwdriver 3, remove the top part from the key.
Lift up the power element 3 using a small screwdriver 2.
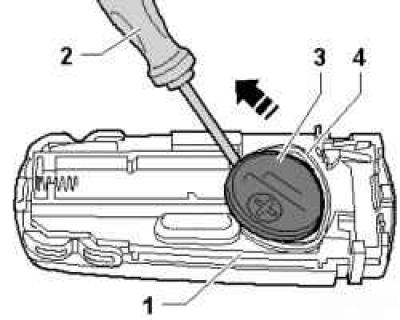
Fig. 1.10. Removing the battery
Remove battery 3 in the direction of the arrow from the holder (Fig. 1.10).
Installation
When installing the battery, observe the polarity and its position.
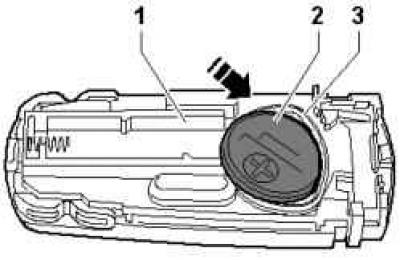
Fig. 1.11. Installing the power supply
Insert battery 2 with the positive pole facing up and tilted (arrow in figure 1.11) in the holder 3 keys 1 (the positive pole is marked in the housing).
Press lightly to secure the battery into the key.
After this, install and snap the top part of the key onto the key (do not damage the seal).
Then install the cover on the key. Insert the emergency key into the remote control key.
Visitor comments