



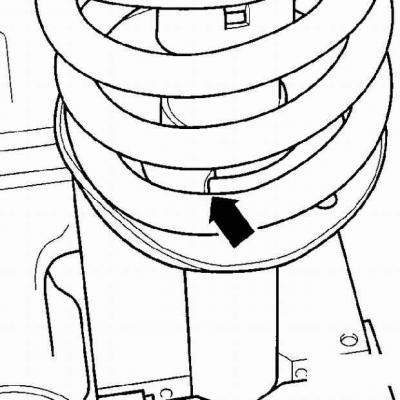
Correct positioning of the lower spring coil in the spring seat
Location of the upper shock absorber strut support
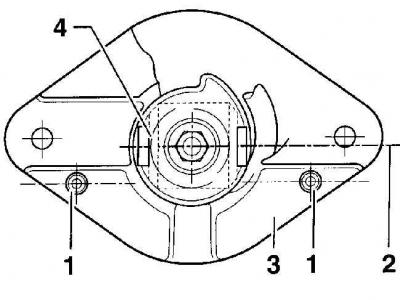
- 1 - centering fingers,
- 2 - lower strut mount axis,
- 3 - upper rack mount,
- 4 - lower rack mount
Execution order
1. Remove the shock absorber from the vehicle.
2. Secure the rear suspension strut in a vice with soft jaws and, using a special device, compress the spring so that it moves away from the top. When using a special device for compressing springs, make sure that the spring coils are firmly grasped and compress the spring from opposite sides. The spring has a very high compression force, so use only a very reliable tool. Never tie the spring with wire.
3. Secure the shock absorber rod with a wrench to prevent it from turning and, using a second open-end wrench, unscrew the central nut securing the shock absorber rod. Remove the upper support, buffer, upper spring support, spring, protective cover, rubber spacer and lower spring support from the shock absorber rod in sequence.
4. The shock absorber strut is assembled in the reverse order of disassembly, taking into account the following points.
5. Install the spring so that the outer coils of the spring are correctly positioned on the spring supports and are directed towards the center of the car (see fig. Correct positioning of the lower spring coil in the spring seat).
6. Install the upper shock absorber strut support so that the axis passing through the centering pins is parallel to the axis of the lower shock absorber mount (see Fig. Location of the upper shock absorber support). The centering pins (1) must be positioned on the outside of the vehicle.
Visitor comments