



Contents: Removal ↓ Installation ↓
The information presented in this subsection applies to front-wheel drive vehicles.
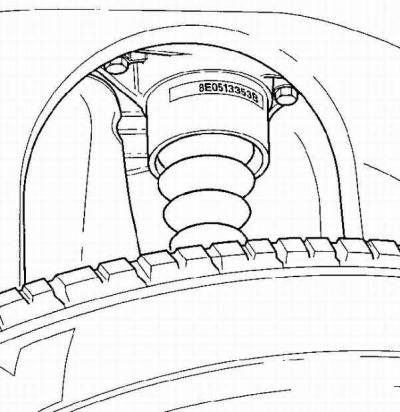
Rear shock absorber upper mounting bolt location
Lower rear shock absorber mounting elements
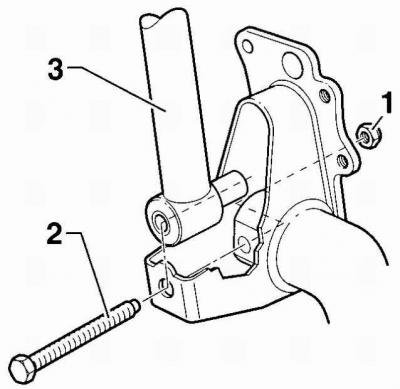
- 1 - nut,
- 2 - bolt,
- 3 - shock absorber
Removal
1. With the vehicle standing on its wheels, unscrew the bolts from underneath the vehicle that secure the shock absorber to the vehicle body (see Fig. Location of the rear shock absorber upper mounting bolts). To improve access to the shock absorber mounting bolts, you can slightly raise the car.
2. To relieve the rear suspension spring, raise the rear of the car so that the wheel is 10 cm off the ground. Remove the rear spring from the supports and remove it from under the car. If necessary, have an assistant turn the rear suspension beam downwards.
3. Unscrew the nut and remove the lower shock absorber mounting bolt. Move it upwards and remove the lower part of the rear shock absorber from the rear beam, lower the shock absorber and remove it from under the car, see Fig. Lower rear shock absorber mounting elements.
Installation
1. Install the shock absorber in place, insert the shock absorber mounting bolt and screw the nut onto it without tightening it completely.
2. Install the spring so that the outermost turns of the spring are located on the supports as shown in Fig. Correct location of the lower turn of the spring in the spring seat.
3. Bolt the upper shock absorber mount to the vehicle body.
4. Lower the vehicle to the ground just enough so that the rear wheels are on the ground but the rear shock upper mounting bolts are still accessible.
5. Tighten the rear shock absorber upper mounting bolts to 45 Nm. Tighten the rear shock absorber lower mounting bolt and nut to 50 Nm and then turn it through 90°.
Visitor comments