



Removal
Disassemble the engine crankcase.
Remove the camshaft.
Pull out the crankshaft and bearing shells and pull off bearing 1 from the flywheel side. Make sure that the stuck bearing shells do not fall or get damaged when removing the crankshaft. Mark the bearing shells.
Remove the connecting rods.
Disassembly
Clamp the crankshaft in a vice.
Remove the key from the belt pulley and remove bearing 4 together with the oil deflector ring.
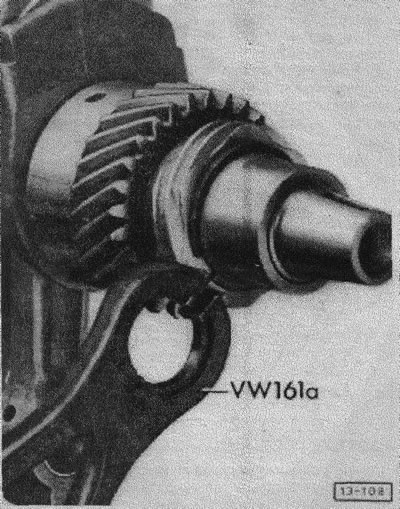
Remove the distributor drive gear retaining ring.
Installation
The lubrication holes of the shaft journals and bearings must not have sharp edges.
If there are foreign metal particles on the working surfaces of the bearing shells, they should be carefully removed with a scraper. In doing so, do not damage the bearing shell itself.
New liners should not be processed.
Check the reliability of the pin fit in the bearing installation locations in the crankcase.
Insert bearing shell halves 2.
Lubricate bearing 1 with engine oil and place it on the shaft so that its holes for the pin are facing the flywheel.
Installing bearing 1 of the crankshaft on engines produced since 11.85
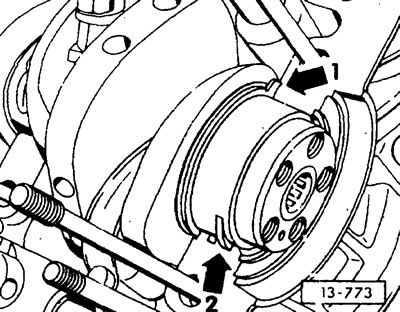
Since 11.85, modified bearing shells 1 of the crankshaft are installed. When installing, the locking protrusion of the spreader washer "1" must face the crankshaft bearing and the connecting surface of the engine crankcase, see figure.
The locking lugs of the crankshaft bearing 2 must fit into the recess in the engine crankcase. The lubrication holes must face the left half of the crankcase.
Please note: Crankcases for engines with a displacement of 1.9 l up to 11.85 are no longer manufactured. A new single crankcase must be installed instead (for engines with a working volume of 1.9 l and 2.1 l). In this case, the following parts are replaced with new types: new crankshaft bearing liners 1, 2 and 3, as well as bearing spacer washer 1.
Insert the crankshaft, making sure that all the pins fit well into the holes of the individual bearing shells.
When installing the crankshaft, take into account the timing marks on the camshaft.
Assemble the engine crankcase.
Crankshaft marking
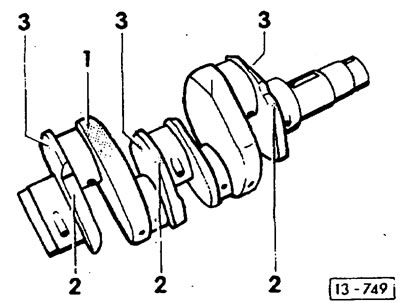
When replacing the crankshaft and/or bearing shells, only parts of the same size group must be installed. For this purpose, a blue or red dot is applied to the "2" sides of the crankshaft.
Note: If the colored dots are not present here, they are on side "3".
Marking of bearing shells 1 through 3 of the crankshaft. If the number 001 is stamped, the shell is suitable for installation with a crankshaft with a blue mark, if the number is 004, it is suitable for installation with a crankshaft with a red mark.
Crankshafts of engines with a working volume of 2.1 liters are additionally marked with a green dot in place "1".
Visitor comments