
English Русский
Български
Беларускі
Український
Српски
Hrvatski
Română
Polski
Slovenský
Magyar
  |  Articles  |  Sitemap  |  Contacts  |    |
Car maintenance Ford Car maintenance Hyundai Car maintenance Chevrolet Car maintenance BMW Car maintenance Audi Car maintenance Opel Car maintenance AvtoVAZ
VWmanual.ru


Main   Passat   Golf   Polo   Touareg   Tiguan   Sharan   Transporter   Others  
Transporter T3 (1979-1992) Transporter T4 (1990-2003)

Removal and installation the crankshaft oil seal (VW Transporter T3)

  • Main
  • Transporter
  • Transporter T3
  • Petrol engines
  • Engine repair
  • Removal and installation the crankshaft oil seal
            0


Contents: Removal ↓ Installation ↓ Assembly ↓
The crankshaft oil seal, located next to the flywheel, can be removed without removing the crankshaft.

Removal


Remove the belt pulley.
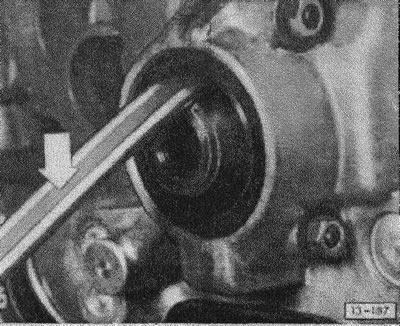
Remove the belt pulley.


Carefully remove the oil seal from the engine crankcase using the "arrow" pry bar.

Installation


Lubricate the new seal and install it using the VAG 3088 tool (on the car Syncro device VAG 3162) and slightly tighten the belt pulley bolt without the spacer washer. Then install and tighten the belt pulley bolt with the spacer washer. If there is no special device, carefully drive the seal with a pipe of the appropriate diameter and lightly hit it with a hammer until it stops.
Lubricate the new seal and install it using the VAG 3088 tool (on the car Syncro device VAG 3162)…


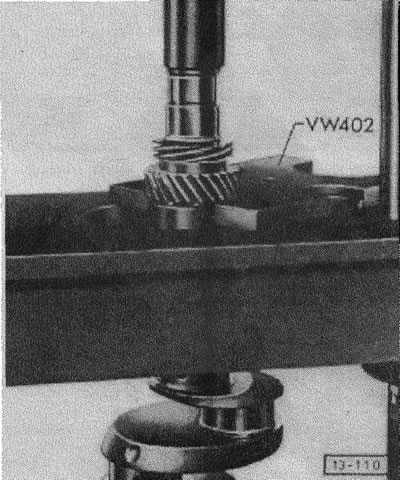
Press together the distributor drive gear, intermediate ring and crankshaft toothed pulley in a press and remove the keys.


Remove bearing 3.

Clean the crankshaft and blow out the lubrication channels with compressed air. Then immediately lubricate all bearing journals with engine oil to prevent corrosion.

Check for cracks in the crankshaft. To do this, check the shaft for sound by hanging the crankshaft vertically on a wire and lightly hitting it with a hammer. This should produce clear metallic sounds.

Check the crankshaft for signs of wear. Light marks on the journals can be carefully removed without damaging the interference fit. If necessary, grind or replace the crankshaft.

Inspect the holes of the ignition distributor drive gear and the camshaft toothed pulley for scoring and check the appearance of the working surface of the teeth.

Check the reliability of the pins.

Assembly


Wash the crankshaft with gasoline and blow out the lubrication channels with compressed air.

Lubricate with engine oil and install bearing 3.

Insert the keys of both drive gears.

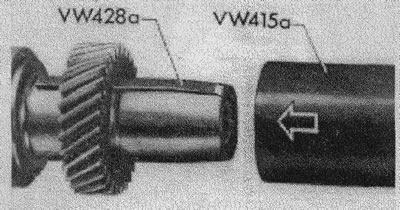
Heat both gears to approximately +80°C in an oil bath. Put the heated camshaft gear on with the chamfer facing bearing 3.
Heat both gears to approximately +80°C in an oil bath. Put the heated camshaft gear on with the…


To fit the crankshaft gear and the distributor drive gear, a bushing and a guide wedge are required. The guide wedge is needed to ensure that the groove in the drive gear is in the correct position for the cap.


Put on the intermediate ring.

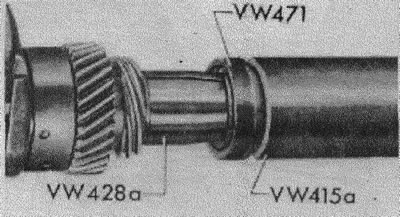
Install the heated distributor drive gear also using the bushing and guide wedge. After cooling, check the reliability of the fit.
Install the heated distributor drive gear also using the bushing and guide wedge. After cooling,…


Put on the retaining ring. To do this, a tapered sleeve is placed on the bearing neck so as not to damage the surface of the neck.

Lubricate with engine oil and install bearing 4. The ring and groove in the bearing should face the oil deflector ring.

Put on the oil deflector ring with the hollow side facing out. Insert the key of the belt pulley.

Install the connecting rods.

This article is available at russian, bulgarian, belarusian, ukrainian, serbian, croatian, romanian, polish, slovak, hungarian
The text has been checked: Tarasov Ivan

Share information:

Previous articles
Removal and installation connecting rods
Removal and installation the crankshaft
Removal and installation the camshaft
Disassembly and assembly of the engine crankcase
Checking and adjusting the axial play of the crankshaft
Removal and installation the flywheel, replacing the crankshaft seal
Next articles
Removal and installation the belt pulley
Engine fault diagnostics
Removal and installation the engine beam


Similar articles from other manuals for VW cars:
Replacing the crankshaft seal on the flywheel side Passat B6 (2005-2010)
Camshaft oil seal Golf 1 (1974-1984, petrol)
Checking the crankshaft speed sensor Polo 3 (1995-2003)
Replacing the crankshaft oil seal on the vibration damper side Touareg 1 (2002-2006)
Removal the crankshaft Sharan 1 (1995-2000)
Replacing the crankshaft oil seal Beetle (1960-1986)
Link to this page in different formats


Visitor comments


No comments yet


How much will 23 + 33 =


Transporter T4 
  • General information
  • User manual
  • Maintenance
  • Power unit
  • Engine repair
  • Ignition system
  • Lubrication system
  • Cooling system
  • Fuel system (petrol)
  • Fuel system (diesel)
  • Injection system (petrol)
  • Exhaust system
  • Transmission
  • Clutch
  • Car gearbox
  • Chassis
  • Car suspension
  • Steering
  • Brake system
  • Wheels and tires
  • Body
  • Exterior
  • Interior
  • Doors and windows
  • Heating system
  • Electrical equipment
  • Equipment and devices
  • Lighting and signaling
  • Power devices
  • Electrical circuits
Transporter T3 
  • General information
  • Maintenance
  • Petrol engines
  • Engine repair
  • Lubrication system
  • Cooling system
  • Power and exhaust system
  • Carburetor 34 PICT
  • Carburetors 2E3 and 2E4
  • Fuel injection system
  • Ignition system
  • Diesel engines
  • Engine repair
  • Lubrication system
  • Cooling system
  • Power and exhaust system
  • Transmission
  • Clutch
  • Car gearbox
  • Chassis
  • Front suspension
  • Rear suspension
  • Steering
  • Brake system
  • Body
  • Body and interior elements
  • Doors, locks and windows
  • Electrical equipment
  • Lighting system
  • Equipment and devices
  • Power devices (diesel)
  • Power devices (petrol)
  • Wiring diagrams (diesel)
  • Wiring diagrams (petrol)
VWmanual.ru © 2016-2026 | Mobile version | News and articles | Sitemap: EN BG BY UA RS HR RO PL SK HU | Write message | Site search
Passat B2 • Passat B3 • Passat B4 • Passat B5 • Passat B6 • Golf 1, diesel • Golf 1, petrol • Golf 2, petrol • Golf 2 • Golf 3 • Golf 4 • Golf 5 • Polo 3 • Polo 4 • Touareg 1 • Tiguan 1 • Sharan 1 • Transporter T3 • Transporter T4 • LT 28 • LT 2D • Beetle • Caddy 3 •
Our website uses cookies to ensure functionality and convenience.