
Removing
Set wheels to straight. Clean the steering gear in the area of the bellows. While holding the tie rod end -arrow 2- against turning, loosen the lock nut -arrow 3- Remove the front wheel. Loosen the tie rod end nut a few turns, but do not remove it. To protect the thread, leave the nut threaded onto the top few threads of the pin.
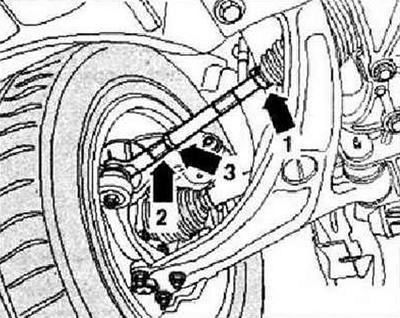
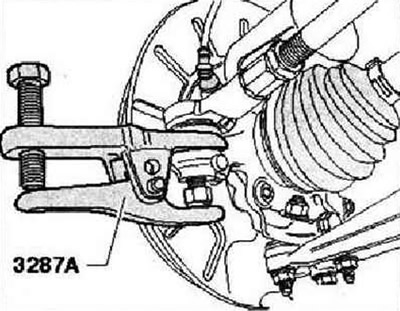
Using ball joint puller -3287 A-, press tie rod end out of steering knuckle. Now you can unscrew the nut. Remove spring clip -1- with clip pliers -VAG 1275- from bellows and move towards steering rod. Remove the clamp and pull the corrugated boot from the steering gear housing.
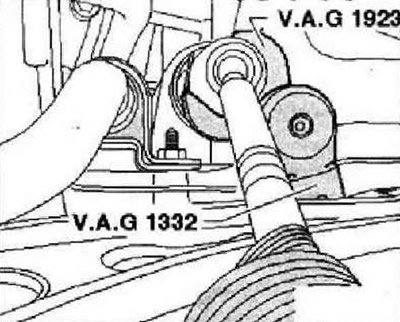
Using a 38 mm nozzle (open end wrench) -VAG 1923- Unscrew tie rod from rack.
Instruction: If there are visible signs of corrosion, damage, wear or contamination of the toothed rack, the steering gear is replaced as an assembly. In the absence of a visible film of lubrication on the rack, the steering gear is also replaced as an assembly.
Installation
Caution: The gear rack does not need to be lubricated.
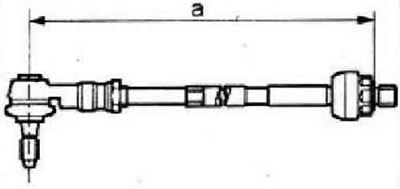
Set wheels to straight. Screw the tie rod into the tie rod end until dimension -a- is reached. Dimension -a- = 367±1 mm. Put on new clamps and a corrugated cover on the steering rod. Screw the steering rod into the rack rod and tighten.
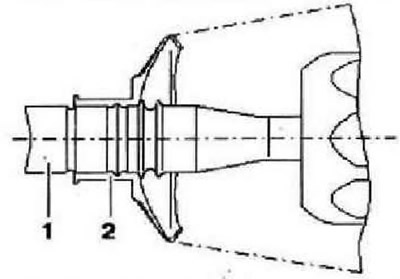
Fit the bellows -2- onto the tie rod -1- as shown in the illustration. Put the corrugated boot on the steering gear housing and slide it all the way.
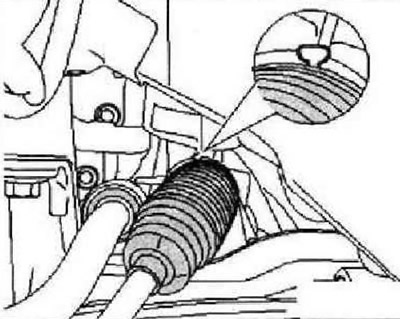
Use the Phaeton steering pliers -VAS 6199- to crimp the new clamp as shown in the illustration. Further installation is carried out in the reverse order.
After installation, check the wheel alignment. Adjust wheel alignment. After replacing both tie rods, carry out basic setting of steering angle sender -GB5- using tester VAS 5051B in mode "Guided Fault Finding". Then carry out the basic setting of the steering.
Tightening torques
| Tie rod to gear rack | 100 Nm |
| Tie rod end to steering rod | 70 Nm |
| Tie rod end to steering knuckle. Use only new nuts | 50 Nm |
Visitor comments