



Contents: Removal ↓ Installation ↓
Removal
1. Remove the engine cover.
2. Remove the poly V-belt.
3. Disconnect the upper hose from the expansion tank of the cooling system.
4. Remove the expansion tank and set it aside.
5. Remove the upper part of the timing belt cover.
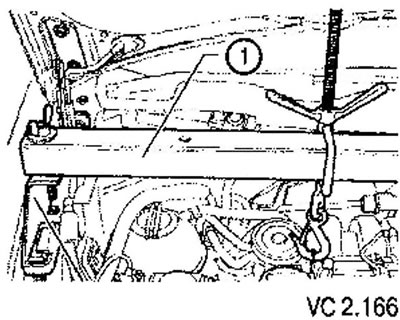
6. Install the crossbar (1) with the adapter and suspend the engine so that its supports are not loaded.
7. Remove the lower noise-insulating casing.
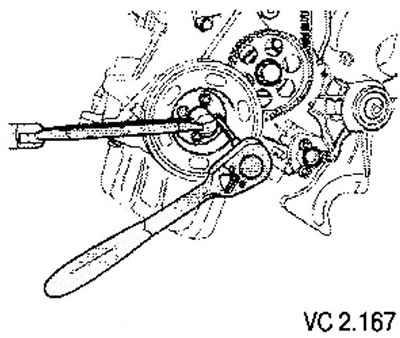
8. Remove the damper from the polyvinyl belt pulley.
9. Remove the middle and lower parts of the timing belt cover.
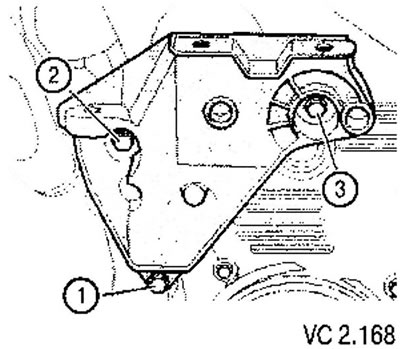
10. Unscrew the lower mounting bolt (1) of the engine support bracket.
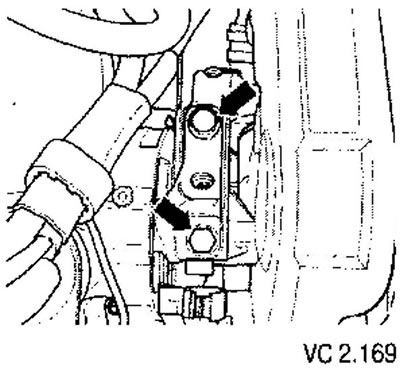
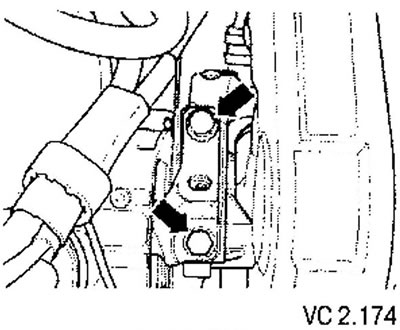
11. Unscrew the engine support mounting screws (arrows) and completely remove the support.
12. Raise the engine using a crossbar as far as possible so that both upper engine mount bracket mounting bolts (2) and (3) can be loosened and removed.
(The original article is posted on the website vwmanual)
13. Remove the engine support bracket by lifting it upwards.
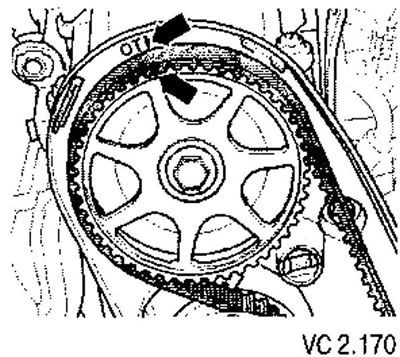
14. Rotating the crankshaft, set the camshaft toothed pulley to the TDC position of the first cylinder. The mark on the camshaft toothed pulley must match the arrow on the timing belt cover.
15. Mark the direction of movement of the toothed belt.
16. Loosen the tension roller and remove the timing belt.
17. After this, turn the crankshaft back slightly.
Installation
Caution! The crankshaft must not be at TDC when the camshaft is rotating. Damage to the valves and piston crowns may occur.
1. Install the timing belt on the crankshaft pulley and coolant pump (install, observing the correct direction of belt movement).
2. Position the camshaft so that the marks on the toothed pulley and the toothed belt cover match.
3. Install the middle and lower parts of the timing belt cover.
4. Install the damper on the poly V-belt pulley with new screws.
Tightening torque: 10 Nm and tighten further by 1/4 turn (90°).
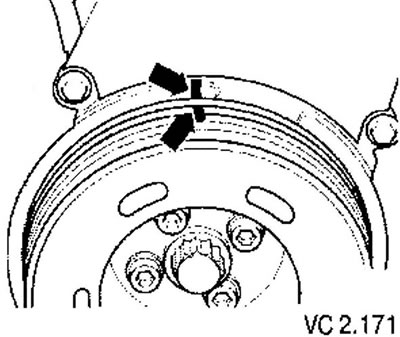
5. Using the marks on the torsional vibration damper, bring the crankshaft to the TDC position of the first cylinder (arrow).
6. Install the toothed belt on the tension roller and camshaft pulley.
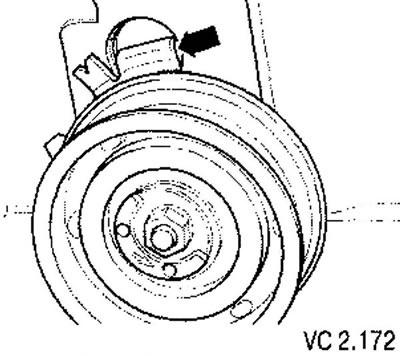
Attention! Pay attention to the correct tension of the roller in the cylinder head.
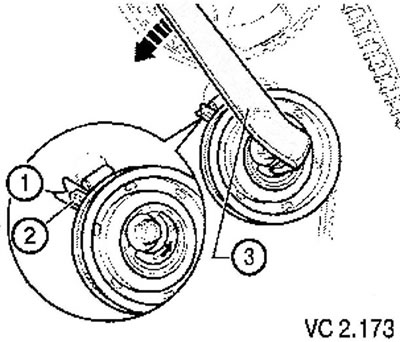
7. Tighten the timing belt. To do this, use a two-hole nut wrench to turn the eccentric to the left (in the direction of the arrow), until the arrow (2) is slightly higher than the mark (1) (the belt is too tight).
Attention!
- Repeat this action (belt tug) five times to get the belt to sit.
- After this, loosen the belt so that the mark (1) and arrow (2) are aligned.
- Tighten the fastening nut to a torque of 20 Nm.
8. Turn the crankshaft two revolutions in the direction of engine rotation and again set it to the position corresponding to TDC of the first cylinder. The last 45° (1/8 turn) the crankshaft should rotate without stopping (increase in effort).
9. Check the belt tension again. Correct position: the mark and the arrow are aligned.
10. Check the timing belt adjustment again.
If the marks do not match: repeat the timing adjustment.
11. Install the bracket (top) on the cylinder block and tighten both top screws to 45 Nm.
12. Lower the engine to its final mounting position.
13. Install the lower mounting bolt and tighten it to 45 Nm.
14. Install the engine mount assembly.
15. Using new bolts, screw the support to the engine bracket (arrows), while lowering the engine using a crossbar so that the bracket comes into contact with the support.
Tightening torque: 60 Nm and turn further by 90° (1/4 turn).
16. Remove the crossmember.
17. Install the upper part of the timing belt cover.
18. Install the poly V-belt.
19. Install the expansion tank of the cooling system.
20. Install the lower noise-insulating casing.
21. Install the engine cover.
Visitor comments