
English Русский
Български
Беларускі
Український
Српски
Hrvatski
Română
Polski
Slovenský
Magyar
  |  Articles  |  Sitemap  |  Contacts  |    |
Car maintenance Ford Car maintenance Hyundai Car maintenance Chevrolet Car maintenance BMW Car maintenance Audi Car maintenance Opel Car maintenance AvtoVAZ
VWmanual.ru


Main   Passat   Golf   Polo   Touareg   Tiguan   Sharan   Transporter   Others  
LT 28 (1975-1991) LT 2D (1996-2003) Beetle (1960-1986) Caddy 3 (2003-2010)

Removal, disassembly, assembly and installation of the crankshaft (VW Beetle)

  • Main
  • Volkswagen
  • Beetle
  • Power unit
  • Engine repair
  • Removal, disassembly, assembly and installation of the crankshaft
            0


Contents: Removal ↓ Disassembly ↓ Assembly ↓ Installation ↓

Removal


Disassemble the engine (see section above "Disassembling and assembling the engine").

Remove the camshaft.

Remove the crankshaft, bearings and remove the 1st bearing from the flywheel side. Be careful not to let the bearings fall out when removing the crankshaft. Mark them.

Disassembly


Secure the crankshaft to the supports.

Remove the V-belt pulley key and remove the 4th bearing together with the oil deflector disc.
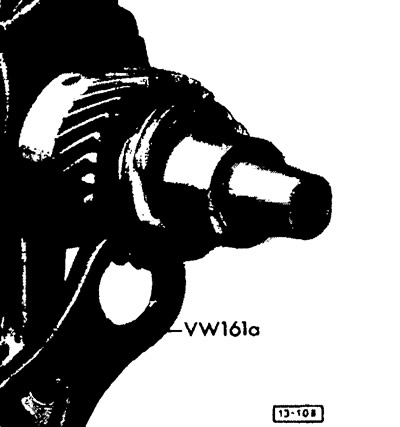
Using special pliers, remove the distributor drive gear retaining ring.

Using special pliers, remove the distributor drive gear retaining ring.

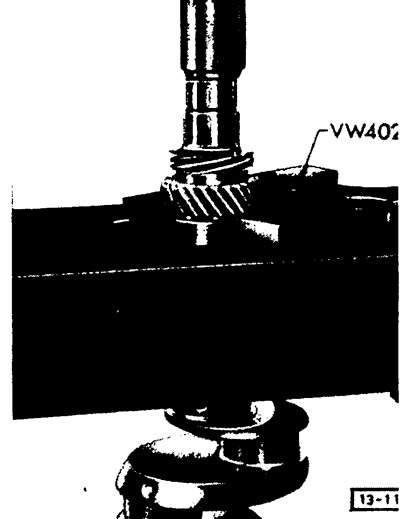
Press the ignition distributor drive gear, installation ring and timing gear from the crankshaft.…


Press the ignition distributor drive gear, installation ring and timing gear from the crankshaft. Remove the keys.

Remove the 3rd bearing.


Remove the connecting rods.

Clean the crankshaft and blow out the oil passages with compressed air. Lubricate all main and connecting rod journals with oil to prevent corrosion.

Check the crankshaft for cracks and regrind or replace it if necessary.

Check the holes of the ignition distributor drive gear and the timing gear drive gear for scoring, check the contact patch of the ring gear.

Check the tightness of the mounting pins.

Assembly


Wash the crankshaft with gasoline, blow out the oil channels with compressed air.

Lubricate the 3rd bearing with oil and place it on the shaft.

Install keys for both drive gears.

Heat both drive gears in an oil bath to approximately 80°C.

Press the heated timing gear onto the shaft with the chamfer facing the 3rd bearing.
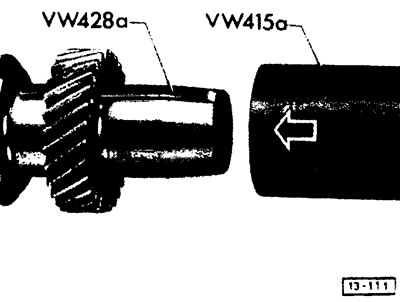
A bushing and guide wedge are used to install the timing gear and the distributor drive gear. The…


A bushing and guide wedge are used to install the timing gear and the distributor drive gear. The latter serves to ensure that the groove in the drive gear is correctly directed in relation to the key during installation.

Put on the mounting ring.

Press on (also using a bushing and a guide wedge) heated ignition distributor drive gear and after cooling, check the strength of its fit.
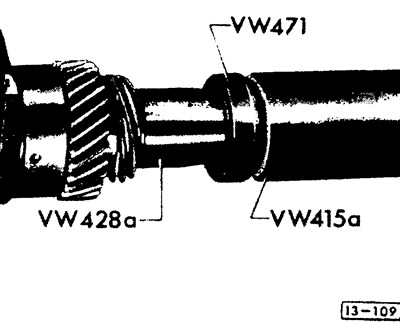

Install the retaining ring. To do this, close the 4th journal of the shaft with a tapered guide…


Install the retaining ring. To do this, close the 4th journal of the shaft with a tapered guide sleeve so as not to damage its supporting surface.

Lubricate and install the 4th bearing. The annular groove in it should be directed towards the oil deflector disc.

Install the V-belt pulley key.

Install the connecting rods.

Installation


Caution! Oil outlet holes in the shaft journals and bearings must not have sharp edges.


If there are foreign metal inclusions on the working surface of the bearings, they must be carefully removed with a file, without damaging the bearing.

Attention! New bearings do not need to be processed.


Check the tightness of the mounting pins in the bearing holes.

Install the 2nd bearing into the hole.

Lubricate the 1st bearing with oil and install it on the shaft so that its holes for the mounting pins are directed towards the flywheel.

Install the crankshaft, making sure that all dowel pins are correctly inserted into the bearing bores.

When installing the crankshaft, it is necessary to take into account the marks of its mounting position in relation to the camshaft.

Assemble the crankcase.

This article is available at russian, bulgarian, belarusian, ukrainian, serbian, croatian, romanian, polish, slovak, hungarian
The text has been checked: Kolesnikov Artem

Share information:

Previous articles
Removal, checking and installation the camshaft
Disassembly, inspection and assembly of the crank mechanism
Main engine components
Intake manifold and preheating ducts
Checking and adjusting the crankshaft axial play
Replacing the crankshaft oil seal
Next articles
Removal, checking and installation connecting rods
Engine malfunctions and how to fix them


Similar articles from other manuals for VW cars:
Checking and adjusting the crankshaft speed of a cold engine at… Passat B3 (1988-1993)
Crankshaft seals Golf 1 (1974-1984, petrol)
Checking the crankshaft speed sensor Polo 3 (1995-2003)
Replacing the crankshaft oil seal on the vibration damper side Touareg 1 (2002-2006)
Removal the crankshaft Sharan 1 (1995-2000)
Removal and installation the flywheel, replacing the crankshaft… Transporter T3 (1979-1992)
Link to this page in different formats


Visitor comments


No comments yet


How much will 14 + 13 =


Caddy 3 
  • General information
  • User manual
  • Daily care
  • Maintenance
  • Petrol engines 1.4 l
  • Engine repair
  • Cooling and lubrication system
  • Power and exhaust system
  • Petrol engines 1.6 l
  • Engine repair
  • Cooling and lubrication system
  • Power and exhaust system
  • Diesel engines
  • Engine repair
  • Cooling and lubrication system
  • Power and exhaust system
  • Transmission
  • Mechanical gearbox 0AH
  • Mechanical gearbox 0A4
  • Drive shafts
  • Chassis
  • Car suspension
  • Steering
  • Brake system
  • Body and wiring diagrams
  • Interior and exterior
  • Electrical circuits
Beetle 
  • General information
  • Maintenance
  • Power unit
  • Engine repair
  • Cooling and lubrication system
  • Supply system
  • Exhaust system
  • Transmission
  • Clutch
  • Car gearbox
  • Chassis
  • Front suspension
  • Rear suspension
  • Steering
  • Brake system
  • Wheels and tires
  • Body
  • Exterior
  • Electrical equipment
  • Equipment and devices
  • Power devices
  • Electrical circuits
LT 2D 
  • General information
  • User manual
  • Maintenance
  • Power unit
  • Petrol engines 2.3 l
  • Diesel engines 2.5 l
  • Diesel engines 2.8 l
  • Injection system (diesel 2.8 l)
  • Transmission
  • Clutch
  • Manual gearbox
  • Differential
  • Chassis
  • Car suspension
  • Steering system
  • Brake system
  • Body
  • Body elements
  • Heating system
  • Electrical equipment
  • Equipment and devices
  • Electrical circuits
LT 28 
  • General information
  • Maintenance
  • Power unit
  • Petrol engines 2.0L
  • Petrol engines 2.4L
  • Diesel engines
  • Cooling and heating
  • Fuel and exhaust system
  • Ignition system
  • Transmission
  • Clutch
  • Car gearbox
  • Cardan shaft
  • Rear axle
  • Chassis
  • Brake system
  • Car suspension
  • Steering system
  • Body
  • Body elements
  • Doors, locks and windows
  • Electrical equipment
  • Power devices
  • Equipment and devices
  • Electrical circuits
VWmanual.ru © 2016-2026 | Mobile version | News and articles | Sitemap: EN BG BY UA RS HR RO PL SK HU | Write message | Site search
Passat B2 • Passat B3 • Passat B4 • Passat B5 • Passat B6 • Golf 1, diesel • Golf 1, petrol • Golf 2, petrol • Golf 2 • Golf 3 • Golf 4 • Golf 5 • Polo 3 • Polo 4 • Touareg 1 • Tiguan 1 • Sharan 1 • Transporter T3 • Transporter T4 • LT 28 • LT 2D • Beetle • Caddy 3 •
Our website uses cookies to ensure functionality and convenience.