



Contents: Removal ↓ Installation ↓
Heater control unit
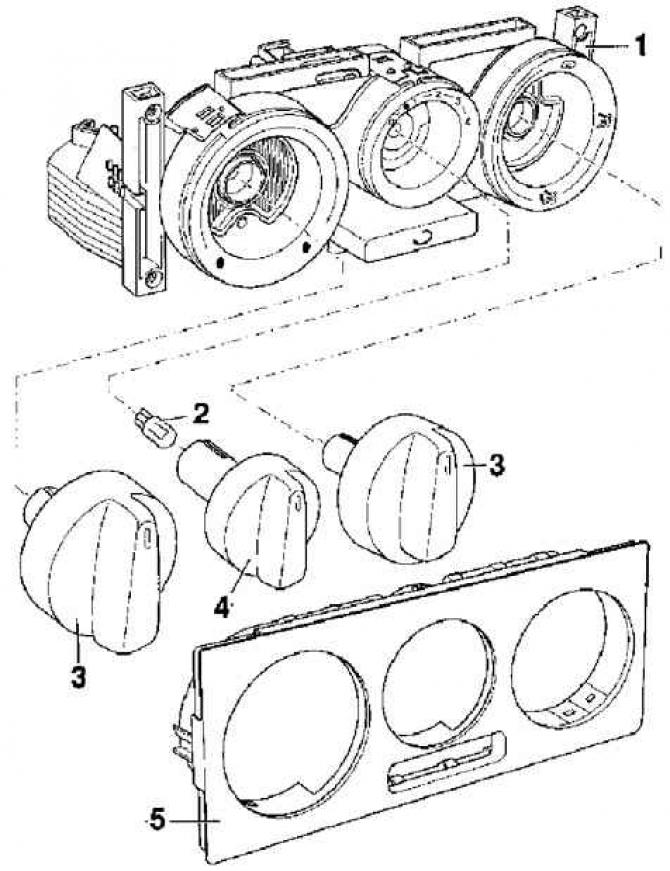
- 1 - heater control unit housing,
- 2 - backlight lamp,
- 3 - side rotary handles,
- 4 - central rotary handle,
- 5 - decorative trim for the heater control panel
Heating and ventilation system control cables
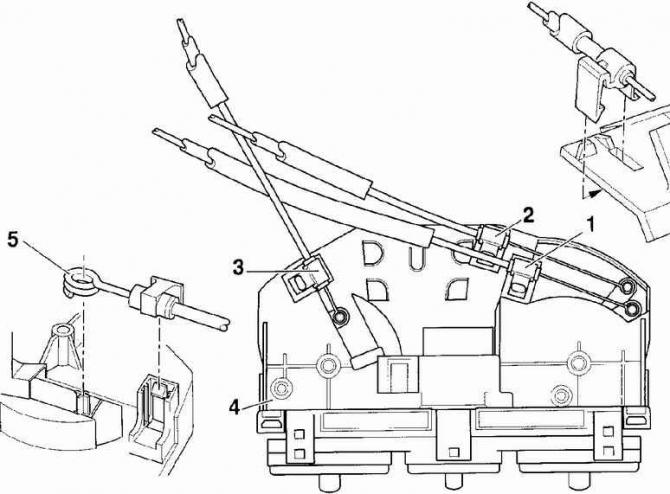
- 1 - a cable with a white sheath, controlling the "foot/defrost" valve,
- 2 - a cable with a black sheath that controls the central valve,
- 3 - a cable with a red sheath that controls the damper that regulates the temperature of the air supplied to the cabin,
- 4 - heating and ventilation system control unit,
- 5 - elements of fastening of the cable and cable sheath
Fastening control cables to the heater unit
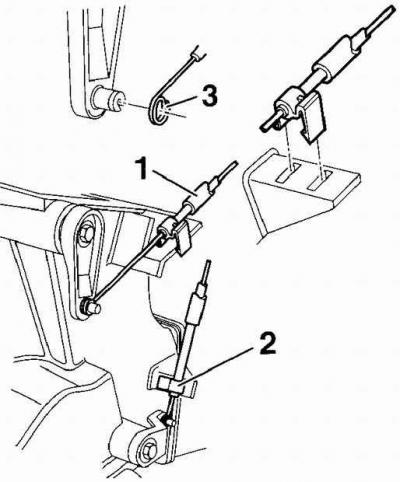
- 1 - a cable with a black sheath that controls the central valve,
- 2 - a cable with a white sheath that controls the air temperature flap,
- 3 - rounded end of the cable
Fastening the heater control cable sheath
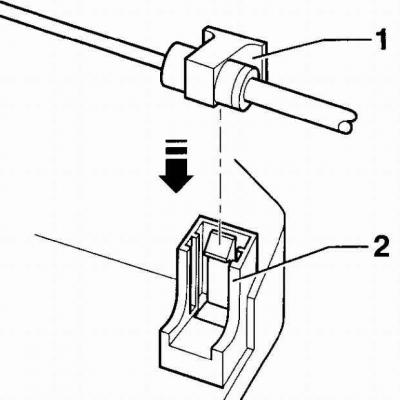
- 1 - holder,
- 2 - retainer body
Air temperature flap control cable fasteners
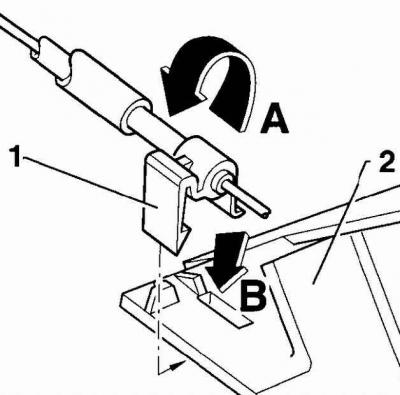
- 1 - holder,
- 2 - heater body
Removal
1. Remove the heater control unit from the instrument panel.
2. Remove the plastic or metal clips securing the control cable housings to the control unit housing.
3. Remove the rounded ends of the cables from the control unit levers.
[The original can be viewed on the portal: VWManual.ru]
Installation
1. Install the rounded ends of the cables onto the control unit levers, then secure the cable housings with clamps.
2. To secure the control cable housing, insert the cable holder (1) into the retainer housing (2) until the cable holder snaps into place, see Fig. Secure the heater control cable housing.
3. To secure the cable sheath that controls the temperature flap, insert the holder leg (1) into the groove (B) and, turning it counterclockwise (A), fix it on the heater unit housing, see Fig. Fastening the air temperature flap control cable.
Visitor comments