
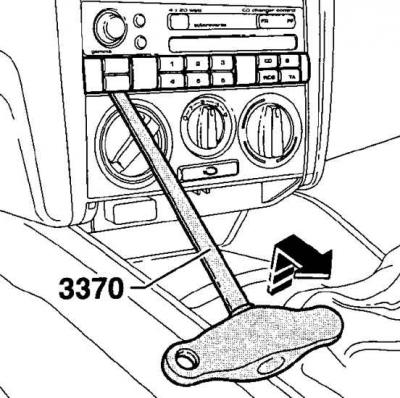
Using Special Tool 3370 to Remove the Heater Control Unit Trim Panel
Location of screws for fastening the heater control unit

The fastening screws are shown by arrows.
Checking the smooth running of the control cables
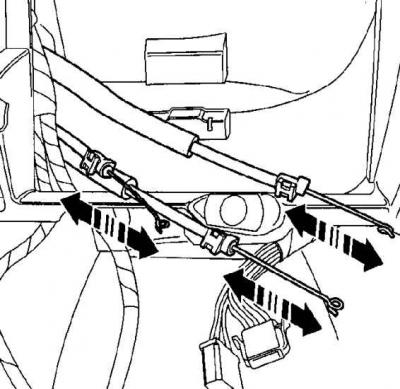
While holding the cable sheath, move the cable back and forth in the direction of the arrows.
Removing
1. Remove the glove box.
2. Remove the bottom facing of a steering column.
3. Remove the front section of the center console.
4. Remove the decorative panel of the heater control unit. To remove the decorative panel, you can use the special tool 3370 (see fig. Using Special Tool 3370 to Remove the Heater Control Unit Trim Panel) or a steel plate with a hook on the end, the same as for removing the center air nozzles.
5. Unscrew the four screws securing the heater control unit (see fig. Location of screws for fastening the heater control unit).
6. Pulling towards you, remove the heater control unit from the instrument panel together with the control cables connected to it.
7. Disconnect the control cable from the heater control unit.
8. Check the smoothness of the control cables, for which, while holding the cable sheath, move the cable back and forth (see fig. Checking the smooth running of the control cables).
Installation
Installing the control cable on the heater control unit lever

- 1 - control cable;
- 2 - heater control unit lever
To facilitate identification, the sheaths of the control cables are of different colors.
Order of execution
1. Put on the rounded ends of the cables (1) on control levers (2) and secure them by turning in the direction of the arrow.
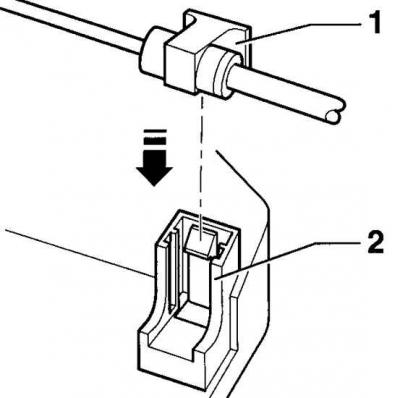
2. To attach the control cable sheath, insert the cable holder (1) into the lock housing (2) until the cable holder snaps into place.
3. Insert the control unit with connected cables into the instrument panel.
4. Screw in the four screws securing the heater control unit.
5. Insert the decorative panel of the control unit until it is clearly fixed.
6. Install the front section of the center console.
7. Establish the lower facing of a steering column.
8. Install the storage box.
Visitor comments