
Elements for connecting air ducts
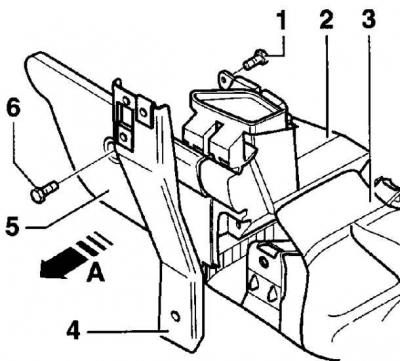
- 1 - screw;
- 2 - connecting piece;
- 3 - air supply channel for the front seat;
- 4 - bracket;
- 5 - lining;
- 6 - screw
Removing
1. Remove the connecting piece (2) and unscrew the bracket (4). Holding the veneer (5), remove the connector (2) towards the driver's footwell (arrow A).
2. Turn the temperature control knob fully counterclockwise.
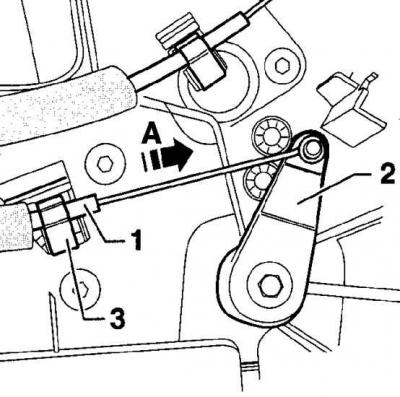
3. Put on the rope (1) on the temperature control knob (3). Move lever (3) clockwise as far as it will go and by moving the sheath of the control cable in the direction of the arrow (A), fix the cable sheath with a spring clip (2).
4. Turn the temperature control knob from stop to stop and check that it reaches the extreme positions. Otherwise, repeat the adjustment.
CABLE CONTROL FLAP TO FOOT/DEFROST
Fastening of the cable that controls the damper in the legs / defrosting
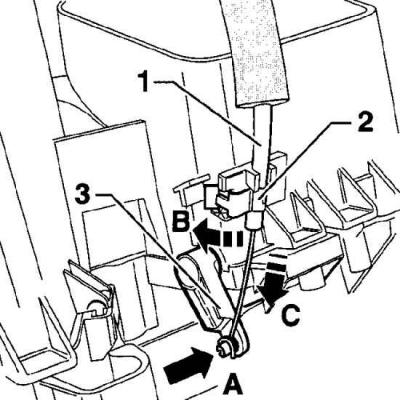
- 1 - control cable;
- 2 - spring clip;
- 3 - air distribution lever
1. Turn the rotary knob for air distribution counterclockwise as far as it will go.
2. Install the rounded end of the control cable (1) on the lever (3) and move the tip in the direction of the arrow (A).
3. Move the control cable sheath in the direction of the arrow (WITH) and secure the shell with a spring clip (2), by turning it in the direction of the arrow (IN).
4. Turn the air distribution knob from stop to stop and check that it reaches the end positions. Otherwise, repeat the adjustment.
CABLE CONTROL CENTRAL SHUTTER
1. Remove the connecting piece (2) (see fig. Elements for connecting air ducts).
2. Turn the rotary knob for air distribution counterclockwise as far as it will go.
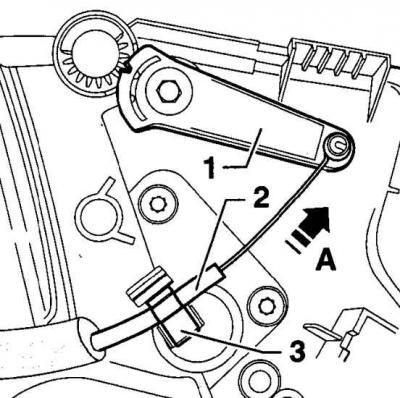
3. Install the rounded end of the control cable (2) on the central damper lever (1). Move the control cable sheath in the direction of the arrow (A) and secure it with a spring clip (3).
4. Turn the air distribution rotary knob from stop to stop and at the same time check that it has reached the extreme positions. Otherwise, repeat the adjustment.
Further installation
1. Install the connecting part on the air supply channel behind the front seat and screw on the bracket.
2. Install the front section of the center console.
3. Establish the lower facing of a steering column.
4. Install glove boxes.
Visitor comments