



Contents: Removal ↓ Installation ↓
Handbrake lever parts
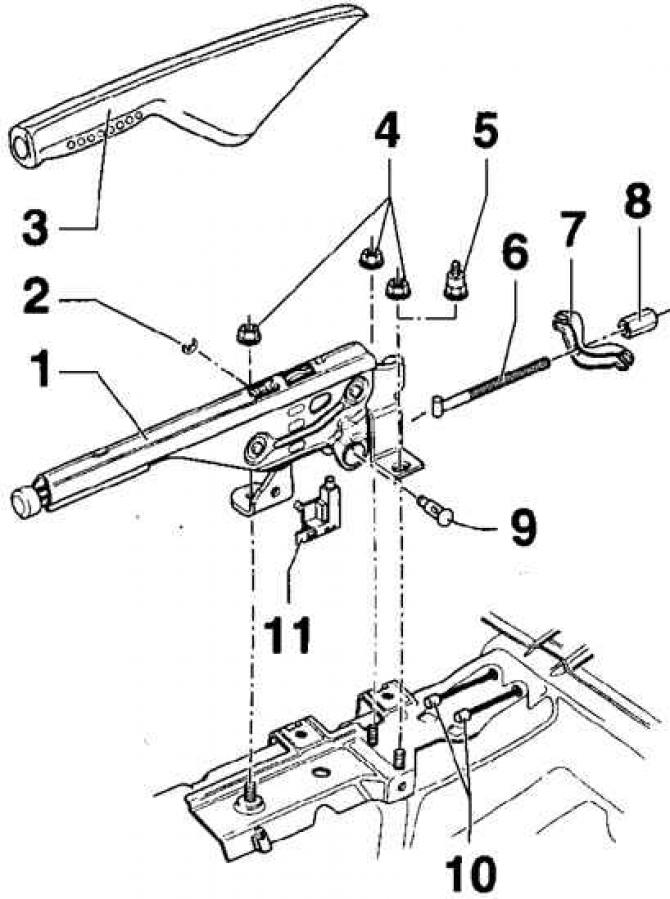
- 1 - handbrake lever handle;
- 2 - safety washer;
- 3 - Handbrake lever trim;
- 4 - hex nut, 25 Nm;
- 5 - adapter. For cars with armrest;
- 6 - traction;
- 7 - compensator;
- 8 - adjusting nut;
- 9 - bolt;
- 10 - handbrake cables;
- 11 - handbrake indicator light switch
Removal
1. Remove the rear section of the center console.
[The information is posted on this resource: www.VWMANUAL.ru]
2. Unscrew and remove the handbrake lever.
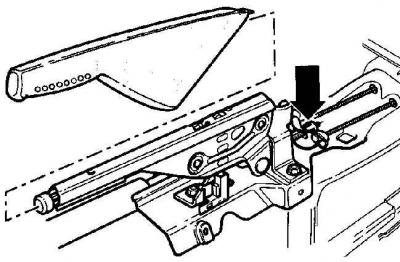
3. Loosen the adjusting nut behind the handbrake lever just enough to allow the handbrake cables to be removed from the compensator.
4. Disconnect the handbrake cables from the compensator.
Cars with rear disc brakes
5. Disconnect the handbrake cable from the rear brake lever.
Cars with rear drum brakes
6. Remove the brake drum and disconnect the handbrake cable from the brake shoe lever.
7. Raise the rear of the vehicle and support it on stands.
8. Remove the rear wheels.
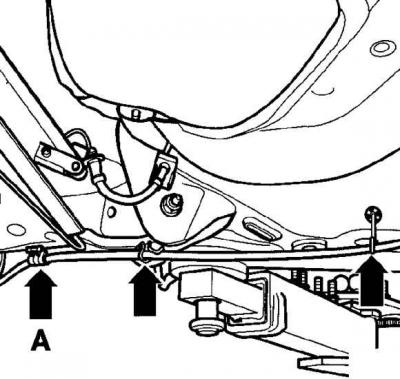
9. Remove the handbrake cable from the holder on the rear beam (arrow A) and from the mountings on the underbody.
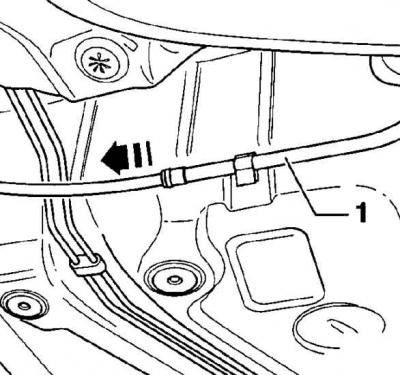
10. Remove the handbrake cable in the direction of the arrow from the guide pipe (1).
11. Remove the handbrake cable from under the vehicle.
Installation
1. Slide the handbrake cable into the guide tube.
Cars with rear disc brakes
2. Connect the handbrake cable to the rear brake lever.
Cars with rear drum brakes
3. Connect the handbrake cable to the brake shoe lever and install the brake drum.
4. Secure the handbrake cable to the rear beam holders and to the underbody of the vehicle.
5. Connect the handbrake cables to the handbrake lever compensator and screw on the adjusting nut.
6. Adjust the handbrake operation.
7. Install the rear part of the center console.
Visitor comments