



Doors - replacement
1. Disconnect the wire "masses" from the battery.
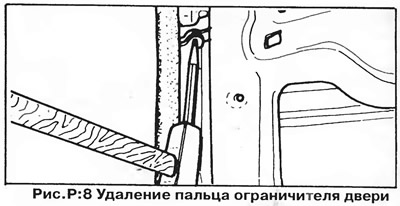
2. The door stop is attached with a pin and a retaining ring. Remove the retaining ring from the underside of the limiter and knock out the pin (pic. R:8).
3. The door is attached to the A-pillar with single hinge bolts through the top and bottom hinges (on Scirocco models and on the rear doors of all 4-door models, each hinge is attached with two bolts).
NOTE: Rear door hinge bolts have Allen heads; the head socket is very shallow, so it is important that the wrench be in good condition and fit correctly into the head socket of the bolt. In case of failure of the socket edges, you will have to grind off the bolt head and remove the remaining threaded part using an extractor.
4. Turn away bolts of fastening of a door, at the same time the assistant should support a door.
5. Installation of the door is carried out in reverse order (you will need an assistant to support the door when installing the fastening bolts).
6. The door stopper pin must be inserted from above and the lock ring from below, then if the lock ring falls out, the finger will remain in place and the door stop will continue to function.
Door upholstery panel - removal and installation
To gain access to the lock mechanism and power window, it is necessary to remove the upholstery of the respective door. Perform this operation as follows:
1. Turn away the button of blocking of the lock of a door.
2. Remove the inside door lock handle, then remove the countersunk screw and lock washer.
3. Remove the caps from the screws securing the upholstery panel to the door frame and remove the screws (pic. R:9).
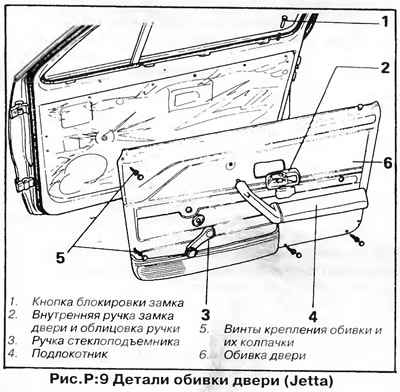
4. Remove an overlay from the window regulator handle and turn out the screw. Remove the handle and distance ring.
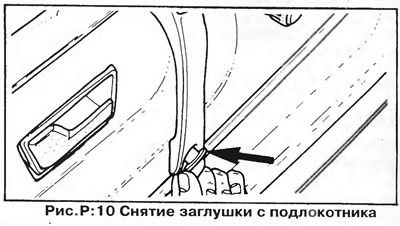
5. Remove the two screws from the armrest. On models with an armrest integrated with the inside door handle, the upper fixing screw is located under the plug (pic. R:10). Rotate the armrest upwards 90°around the top attachment point, this will release the top attachment and the armrest will separate from the door.
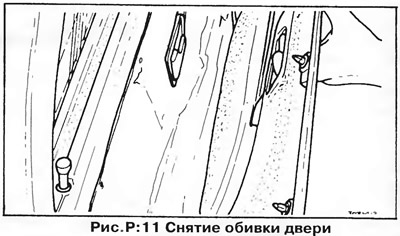
6. Press the upholstery panel from the door frame with a flat screwdriver, releasing the latches one by one (pic. R:11) - the fasteners must remain on the upholstery.
7. Installation of an upholstery is carried out upside-down. Before installing the window handle screw, degrease and apply Loctite to its threads to fix the threaded connections.
Visitor comments