
1. Use a charged battery for testing.
2. Switch off the ignition.
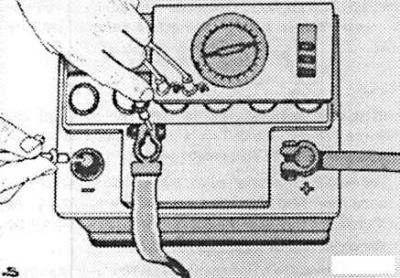
3. Install on ammeter (measurement range from 0–5 mA to 5 A) largest measurement area. Disconnect ground wire from battery. Connect the ammeter to the negative pole of the battery and ground cable.
Attention! You can also check with a test lamp. If the lamp connected to the negative pole of the battery and the negative cable still does not light up, then an ammeter must be connected.
4. Switch off all electrical consumers: available hours (regular consumer) disconnect, close the doors.
5. Switch the ammeter to the milliammeter range until the current value appears (1-3 mA allowed).
6. Remove the fuses in series and break the circuits. If, with any open circuit, the reading drops to zero, then look for the source of the malfunction here. Malfunctions can be: corroded and dirty contacts, frayed wires, internal circuit in the units.
7. If no fault is found in the protected circuits, then it is necessary to disconnect the wiring from the unprotected circuits. These are: generator, starter, ignition system.
8. If the arrow drops to 0 when disconnecting an unprotected unit, check this unit or replace it. In case of current leakage in the starter or ignition system, check the ignition switch according to the wiring diagram (see subsection 10.20.7).
9. Connect ground wire (-) to the battery.
Attention! Connect the battery only when the ignition is switched off, otherwise the injection control unit may be damaged.
10. Set clock time.
11. Enter anti-theft radio code.
Visitor comments