
Removing
Remove the air filter assembly with the air flow meter.
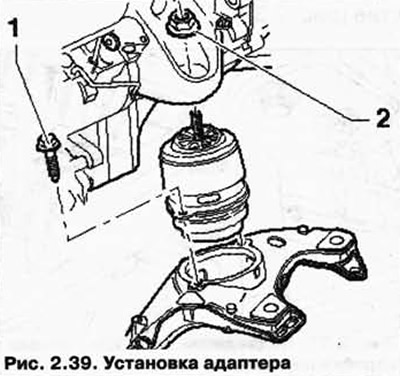
Turn off fixing nuts 2 on the right and left pillows of the engine.
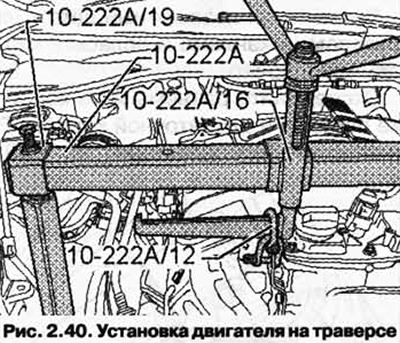
Insert the 10-222A/16 adapter into the traverse 10-222A with the high side of the lead screw guide up, as shown in Figure 2.39.
After that, insert adapters 10-222A/19 into traverse 10-222A on the right and left. Install the traverse 10-222A on the spars.
Hook the engine with two earrings 10-222A/12 to the adapters 10-222A/16 and slightly tighten it (pic. 2.40).
Then unscrew the fixing bolts 1 from the left and right engine mounts/subframe.
If necessary, use the free space between the MCC and the front wall.
Now carefully lift the engine with a crane 10-222A / 16.
To remove the engine mounts, you must additionally unscrew the fastening of the right or left engine mount from the cylinder block, since the engine cannot yet be raised high enough.
Installation
Installation is carried out in reverse order.
When installing, check the correct fit of the engine mount pin in the support.
First screw in all the fixing bolts by hand, then tighten them to the prescribed torque.
Tightening torque for fixing bolt 1: 60 Nm.
Tightening torque for fixing bolt 2: 75 Nm.
Tightening torque of the oil filter housing/engine mount mounting bolts on the left cylinder block: 23 Nm.
Tightening torque of the engine mount fixing bolts on the right cylinder block: 40 Nm.
Visitor comments