
Instructions: Below is a description of the removal and installation of the right carrier panel. The left carrier panel is removed and installed in the same way, the bolts are left-handed.
A power window, a lock and a speaker are fixed on the carrier panel. The door lock can only be removed together with the support panel. The support panel can only be removed after the window glass clamping screws have been loosened. To do this, lower the glass to the level of the mounting holes and loosen the clamping screws. If the glass does not go down when there is a power window, first find out the exact cause of the malfunction. To do this, use the tester -VAS 5051 A- or -VAS 5052- to interrogate the fault memory of the comfort systems. If the cause is an electrical fault, fix the fault first. If the power window motor is faulty, you can remove it from the carrier panel and slide the glass to the desired position by hand.
Removing
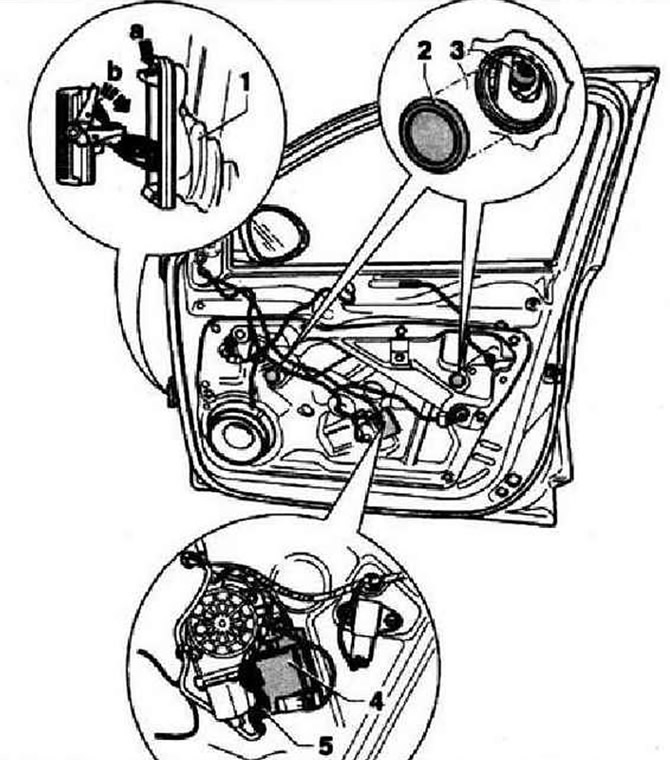
Remove the front door trim. Remove the outside door handle. Pry off and remove plugs -2-. Lower the window until you have access to its fastening screws -3-. Loosen bolts -3- (do not unscrew completely, take into account that they have a left-hand thread; tightening torque: 8 Nm) and release the clamps. Move the glass up and fix it (e.g. with adhesive tape). Unlock boot latches -arrow a- and remove boot. Detach connector -1- at strut by first lowering its locking lever -arrow b-. Unplug connector for exterior mirror -5- at power window motor -4-.

Detach exterior mirror wiring harness 4- from mountings. Insert the wires from the pillar A inside the door and disconnect their holder. Remove bolt -5- for door handle. Remove bolts -3- for door lock. Remove bolts -arrow-.
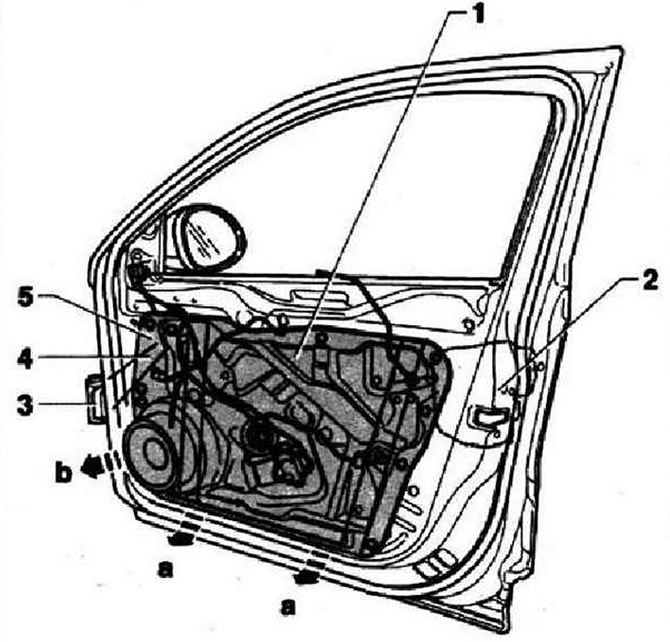
Detach lower part of support panel -1- from door -arrows a-. Pull support panel out of door towards pillar downwards and to the side -arrow b-. First remove the upper part of the power window -5- from the door and then the door lock -2-. Pull out connector -3- and wiring harness -4- together with support panel -1-.
Installation
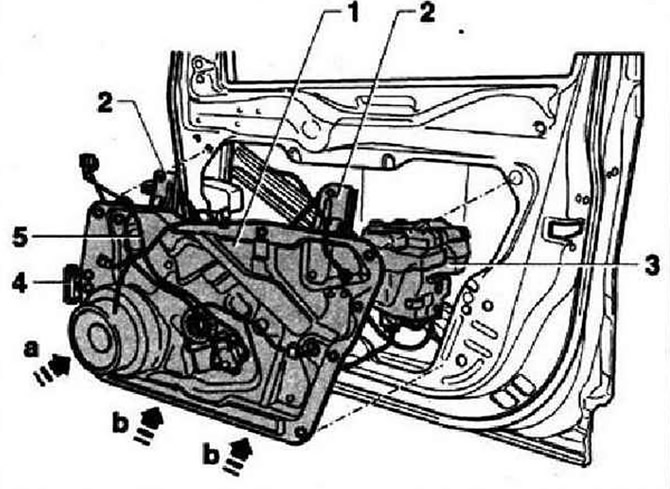
Insert support panel into door from bottom to top, -arrow a- obliquely towards door. Place lock -3-, power window lifter -2- and connector -4- in appropriate positions in door. Press the lower part of the support panel -1- and insert it into the door -arrows b-. Lay wiring harnesses -5-.
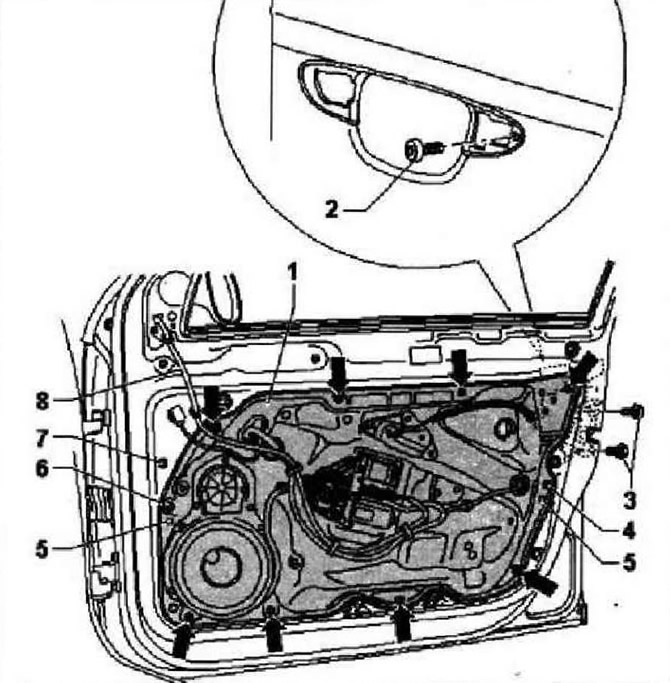
Center the position of the carrier plate -1- by placing it on the tabs -5-. Install all bolts arrow-. Tighten bolts -5- first. Then screw in the remaining bolts -arrow- in random order. Tightening torque for bolts -arrows 4- 8 Nm. Fix glass. Tighten lock bolts -3- to 20 Nm. Tighten the bolt -9- of the handle -8-. Check position of seal -10-. Connect connectors -6 and 7-. Then reverse the steps taken when removing the carrier panel. Before installing the door upholstery, check the operation of the door mechanisms.
Visitor comments