
Removing
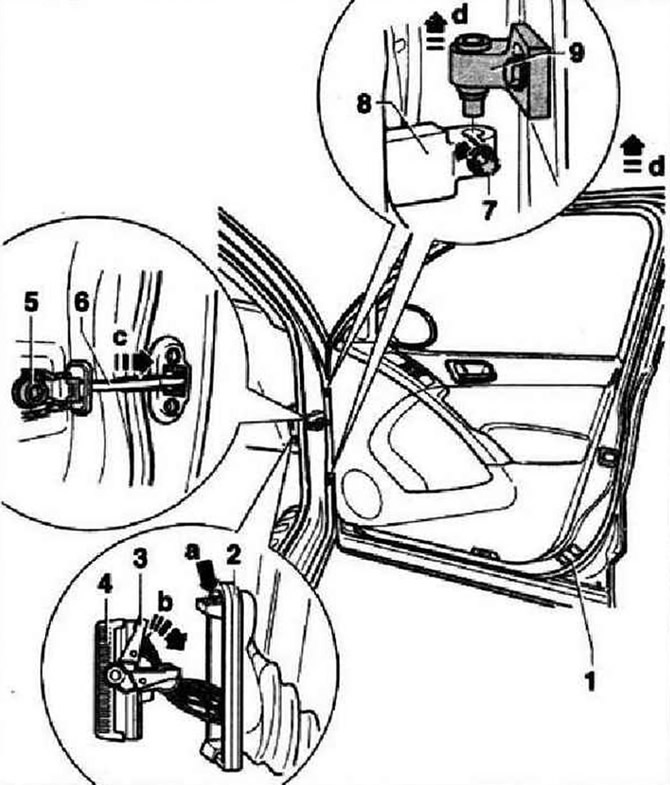
By pressing the latch, remove the bellows -2- -arrow a- and disconnect from the A-pillar. Turn the locking lever -3- downwards -arrow b- and disconnect the electrical connector -4- from the block. Remove bolt -5- and push door stop -6-inward -arrow c-. Loosen bolts -7- on lower parts of both hinges -8-. Lift door together with upper hinge halves -9- upwards -arrow d-. When installing the door, use different torques to tighten the bolts. If the A-pillar has been replaced, then when installing the door, proceed as prescribed in the case of replacing the pillar. If the A-pillar has not been replaced, then when installing the door, proceed 8 in accordance with the instructions in the following section (Installation).
Installation is carried out in the reverse order.
Tightening torque for bolt -5-: 32 Nm. Tightening torque for bolt -7-: 30 Nm. Check the gaps around the perimeter of the front door.
Installation after replacing the A-pillar
ATTENTION: If the A-pillar has been replaced, the bolts on the A-pillar must be tightened as described below.
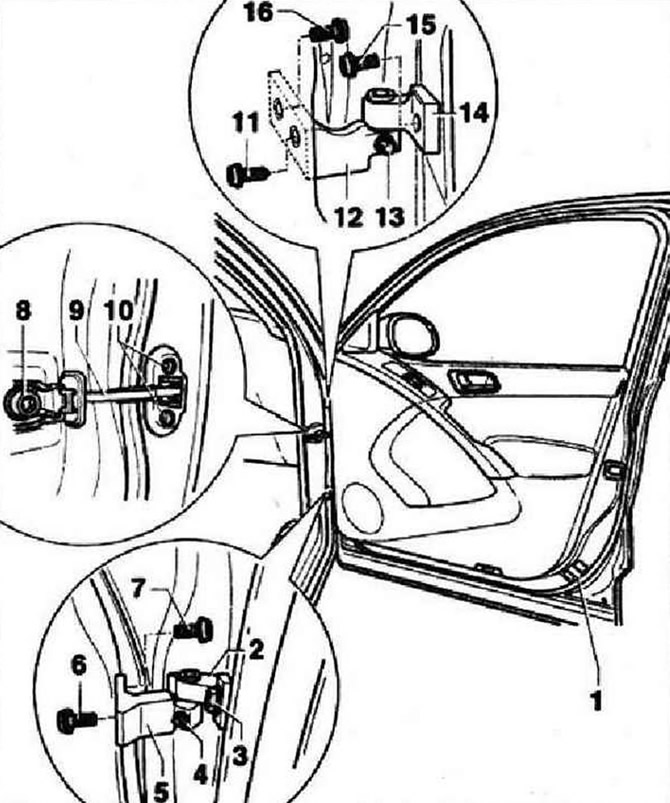
The A-pillar has been replaced. Installation is carried out in the reverse order. Install door and tighten bolts -6, 7, 11 and 16- to 32 Nm. Reinstall all door components. After completing all work, tighten bolts -6, 7, 11 and 16- to 20 Nm. It is always necessary to use new bolts. Check the gaps around the perimeter of the front door.
Visitor comments