
English Русский
Български
Беларускі
Український
Српски
Hrvatski
Română
Polski
Slovenský
Magyar
  |  Articles  |  Sitemap  |  Contacts  |    |
Car maintenance Ford Car maintenance Hyundai Car maintenance Chevrolet Car maintenance BMW Car maintenance Audi Car maintenance Opel Car maintenance AvtoVAZ
VWmanual.ru


Main   Passat   Golf   Polo   Touareg   Tiguan   Sharan   Transporter   Others  
LT 28 (1975-1991) LT 2D (1996-2003) Beetle (1960-1986) Caddy 3 (2003-2010)

Removal and installation of axle shafts, joints and their protective covers (VW Beetle)

  • Main
  • Volkswagen
  • Beetle
  • Chassis
  • Rear suspension
  • Removal and installation of axle shafts, joints and their protective covers
            0


Contents: Removal ↓ Installation ↓
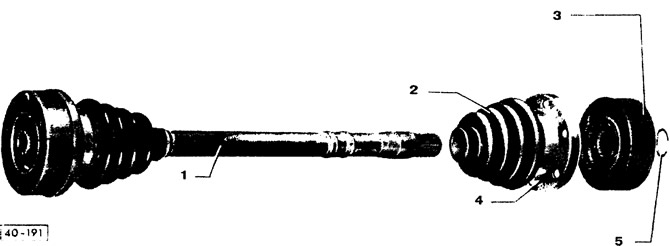
Axle shaft elements: 1 - axle shaft; 2 - hinge protective cover; 3 - hinge; 4 - protective cap; 5 -…

Axle shaft elements: 1 - axle shaft; 2 - hinge protective cover; 3 - hinge; 4 - protective cap; 5 - retaining ring


Please note: Since 1981, vehicles have used solid axle shafts with disc springs that have an internal toothed ring gear. These springs cannot be used on other axle shafts. The disc spring must be installed twice on each axle shaft (between the hinge and the shaft). Solid axle shafts are identified by 5 circumferential grooves.


Removal


Defective hinge caps must be replaced immediately, otherwise the bearings may be damaged. The hinges are replaced as a set.

Raise the rear of the vehicle and place it on supports.
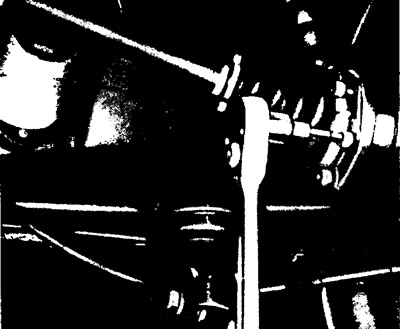
Loosen the Allen bolts on both joints and remove the axle shaft.

Loosen the Allen bolts on both joints and remove the axle shaft.


Caution! Do not allow dirt to get on the hinges!


Caution! Do not allow dirt to get on the hinges!


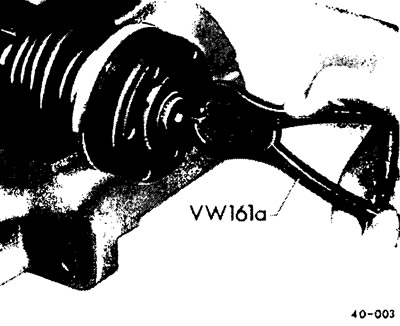
Remove the retaining ring using special pliers.
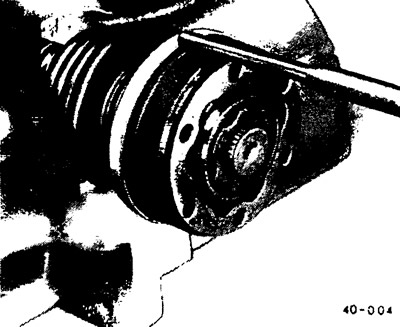
Bend the protective cap away from the hinge using a punch.

Bend the protective cap away from the hinge using a punch.

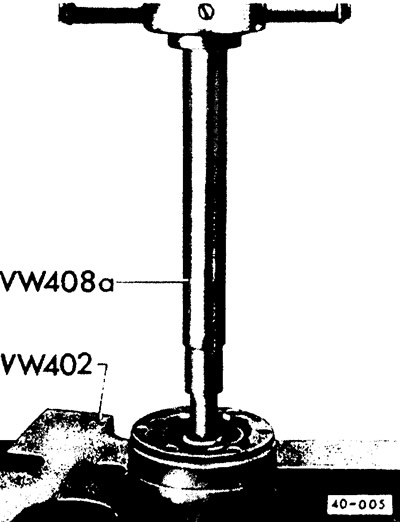
Press out the joint using a press and remove the protective cap.


Press out the joint using a press and remove the protective cap.

Installation


Important! Apply 45 g of M0S2-based paste to each side of the clean hinge. When replacing the hinge protective boot, lubricate it.


Before installation, check the hinge protective cover for scratches and worn areas; replace if necessary.

Pull the cover over the hinge and press the hinge onto the axle shaft. At the same time, install the retaining ring into the groove. If necessary, press it in using special pliers.

Place the protective cap on the hinge and secure it from behind with a band clamp.

Install the axle shafts, place washers under the Allen bolts and tighten them to 45 Nm (4.5 kgfm).

This article is available at russian, bulgarian, belarusian, ukrainian, serbian, croatian, romanian, polish, slovak, hungarian
The text has been checked: Kolesnikov Artem

Share information:

Previous articles
Rear brake components (suspension with diagonal balance beam)
Replacing wheel hub bearing seals
Removal and installation shock absorbers
Rear suspension parts
Removal and installation balancers
Adjusting the elastic levers
Next articles


Similar articles from other manuals for VW cars:
Replacing the protective covers of the outer joints of the front… Passat B4 (1988-1996)
Checking the axle shaft covers Golf 1 (1974-1984, diesel)
Constant velocity joint axle shafts Polo 3 (1995-2003)
Removal and installation cylinder head covers and gaskets Touareg 1 (2002-2006)
Removal and installation covers and flywheel Tiguan 1 (2007-2015)
Wheel Drive Shafts — Design Description Sharan 1 (1995-2000)
Bottom protection and preservation of axle shafts Transporter T4 (1990-2003)
Link to this page in different formats


Visitor comments


No comments yet


How much will 18 + 39 =


Caddy 3 
  • General information
  • User manual
  • Daily care
  • Maintenance
  • Petrol engines 1.4 l
  • Engine repair
  • Cooling and lubrication system
  • Power and exhaust system
  • Petrol engines 1.6 l
  • Engine repair
  • Cooling and lubrication system
  • Power and exhaust system
  • Diesel engines
  • Engine repair
  • Cooling and lubrication system
  • Power and exhaust system
  • Transmission
  • Mechanical gearbox 0AH
  • Mechanical gearbox 0A4
  • Drive shafts
  • Chassis
  • Car suspension
  • Steering
  • Brake system
  • Body and wiring diagrams
  • Interior and exterior
  • Electrical circuits
Beetle 
  • General information
  • Maintenance
  • Power unit
  • Engine repair
  • Cooling and lubrication system
  • Supply system
  • Exhaust system
  • Transmission
  • Clutch
  • Car gearbox
  • Chassis
  • Front suspension
  • Rear suspension
  • Steering
  • Brake system
  • Wheels and tires
  • Body
  • Exterior
  • Electrical equipment
  • Equipment and devices
  • Power devices
  • Electrical circuits
LT 2D 
  • General information
  • User manual
  • Maintenance
  • Power unit
  • Petrol engines 2.3 l
  • Diesel engines 2.5 l
  • Diesel engines 2.8 l
  • Injection system (diesel 2.8 l)
  • Transmission
  • Clutch
  • Manual gearbox
  • Differential
  • Chassis
  • Car suspension
  • Steering system
  • Brake system
  • Body
  • Body elements
  • Heating system
  • Electrical equipment
  • Equipment and devices
  • Electrical circuits
LT 28 
  • General information
  • Maintenance
  • Power unit
  • Petrol engines 2.0L
  • Petrol engines 2.4L
  • Diesel engines
  • Cooling and heating
  • Fuel and exhaust system
  • Ignition system
  • Transmission
  • Clutch
  • Car gearbox
  • Cardan shaft
  • Rear axle
  • Chassis
  • Brake system
  • Car suspension
  • Steering system
  • Body
  • Body elements
  • Doors, locks and windows
  • Electrical equipment
  • Power devices
  • Equipment and devices
  • Electrical circuits
VWmanual.ru © 2016-2026 | Mobile version | News and articles | Sitemap: EN BG BY UA RS HR RO PL SK HU | Write message | Site search
Passat B2 • Passat B3 • Passat B4 • Passat B5 • Passat B6 • Golf 1, diesel • Golf 1, petrol • Golf 2, petrol • Golf 2 • Golf 3 • Golf 4 • Golf 5 • Polo 3 • Polo 4 • Touareg 1 • Tiguan 1 • Sharan 1 • Transporter T3 • Transporter T4 • LT 28 • LT 2D • Beetle • Caddy 3 •
Our website uses cookies to ensure functionality and convenience.