



Although different units may be installed and different pulleys may be used to drive them, in any case only one tension roller is used.
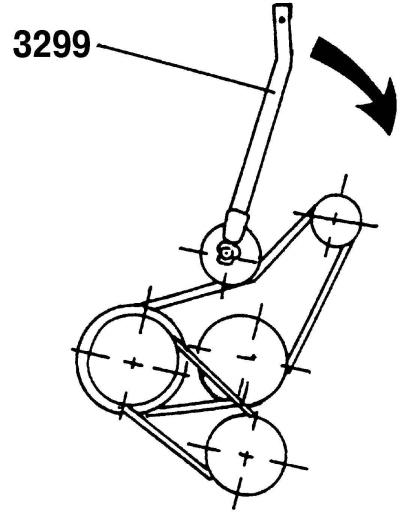
Fig. 156. Diagram of the poly V-belt layout on a vehicle without air conditioning. To loosen the belt tension, turn the lever mounted on the tension roller in the direction shown by the arrow
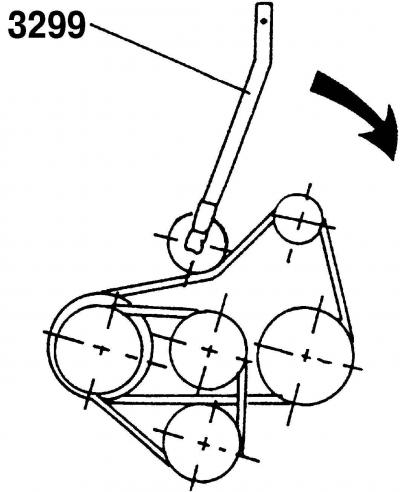
Fig. 157. Poly V-belt routing diagram on a vehicle with air conditioning. To loosen the belt tension, turn the lever mounted on the tension roller in the direction shown by the arrow
The diagrams of the poly V-belt installation on a vehicle without air conditioning and with air conditioning are shown in (Fig. 156) and (Fig. 157), respectively.
Removal the poly V-belt is installed as follows:
- mark the direction of movement of the poly V-belt. To do this, draw an arrow in the direction of movement with a marker. The engine crankshaft rotates clockwise when viewed from the belt side;
- lever 3299 (fig. 156 and 157) loosen the tension of the poly V-belt;
- remove the poly V-belt from the power steering pump drive mechanism;
- remove the poly V-belt;
- check the condition of the poly V-belt. It should not have any cracks or breaks, peeling coating or fibers, frayed fibers, frayed or glassy side surfaces, oil or grease stains;
- a damaged poly V-belt must be replaced.
Installation the poly V-belt is installed as follows:
- turn the tension roller with lever 3299 and put the poly V-belt on the tension roller and the generator (if you are installing an old poly V-belt, follow the direction of movement indicated on it);
- release the tension roller with lever 3299 so that the poly V-belt is tensioned.
Visitor comments