



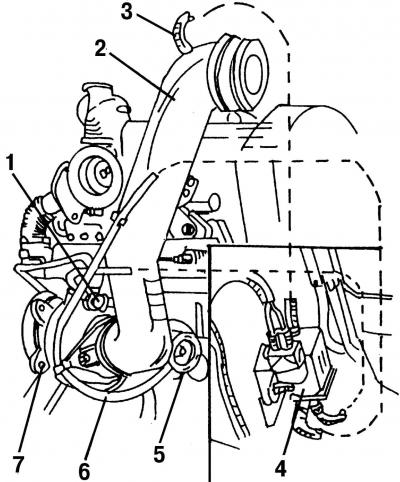
Fig. 481. Connections on the turbocharger (general installation): 1 - red hose; 2 - inlet manifold; 3 - black hose; 4 - electromagnetic valve; 5 - boost pressure regulation mechanism; 6 - blue hose; 7 - turbocharger
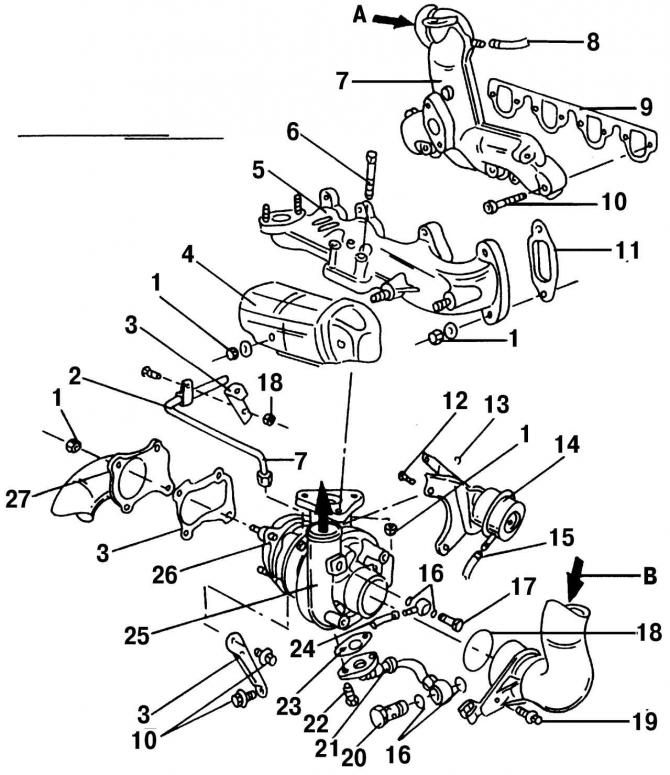
Fig. 482. Removing and installing the turbocharger: 1 - nut, 25 Nm; 2 - oil supply pipeline; 3 - bracket; 4 - heat shield; 5 - exhaust manifold; 6 - bolt, 35 Nm; 7 - inlet manifold; 8 - hose; 9 - gasket (always replace); 10 - bolt, 25 Nm; 11 - gasket, pay attention to the correct installation; 12 - bolt, installed with sealant; 13 - retaining ring; 14 - membrane box; 15 - hose to the boost pressure enrichment regulator; 16 - sealing ring (always replace); 17 - hollow bolt; 18 - sealing ring; 19 - bolt, 10 Nm; 20 - hollow bolt, 30 Nm; 21 - return oil line; 22 - bolt, 30 Nm; 23 - gasket (always replace); 24 - hose; 25 - turbocharger; 26 - to the radiator of the supercharged air; 27 - Front exhaust pipe; A - from the radiator of the supercharged air; B - from the air filter
Removal and installation of the turbocharger is carried out in accordance with Fig. 482. Fig. 481 shows the connection points of the turbocharger pipes, so special attention should be paid to this figure when installing the turbocharger:
- disconnect the wires from the battery;
- place the front of the car on supports and remove the engine guard;
- disconnect the exhaust pipe from the turbocharger (4 nuts), disconnect it from the other side. Remove the front exhaust pipe. Remove the gaskets;
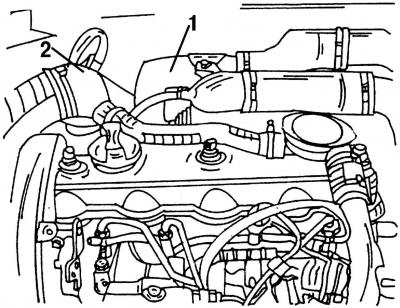
Fig. 483. Disconnect hoses 1 and 2 to remove the turbocharger
- remove the air hose between the intake manifold and the turbocharger connection to the charge air cooler, as well as the hose between the air filter and the turbocharger. These are hoses 1 and 2 (Fig. 483);
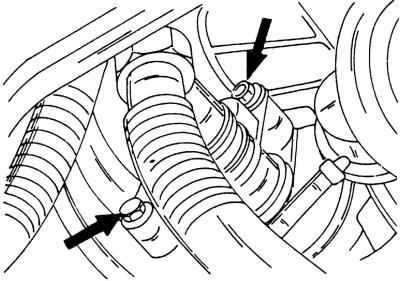
Fig. 484. The bolts indicated by the arrows secure the intake pipe
- unscrew the bolts shown in Fig. 484 and remove the exhaust pipe;
- unscrew the bolt and remove the boost pressure enrichment hose;
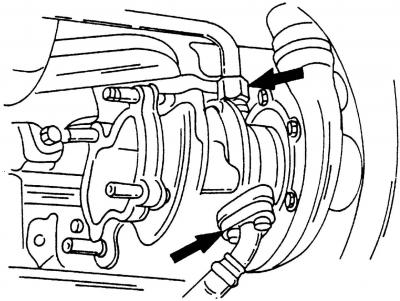
Fig. 485. Connection points of both oil supply lines on the turbocharger
- disconnect the oil recirculation line and the supply line at the locations shown in Fig. 485;
- loosen the mounting bolts and remove the turbocharger.
The turbocharger is installed in the reverse order of the removal process. In this case:
- replace gaskets, sealing rings, bolts, nuts, etc. as directed. (list to fig. 482).
- install and secure the boost pressure enrichment hose before installing the turbocharger;
- install the turbocharger and tighten the bolts inserted from above so that the turbocharger can still be moved a little;
- tighten the nut from below to a torque of 25 N·m, and then tighten the bolts inserted from above to a torque of 35 N·m.
- before installing the oil supply pipe, fill it with oil;
- install the oil recirculation pipe with a new gasket and tighten to 25 N·m;
- install the front exhaust pipe with new gaskets (tightening torque of the connection 25 Nm);
- pay attention to the correct placement of individual hoses and the reliability of their installation;
- after installing the turbocharger, start the engine and let it idle for a while. The engine should not be operated at high speeds immediately, as this will not distribute the oil evenly.
(The original can be viewed on the portal: VWManual)
Visitor comments