
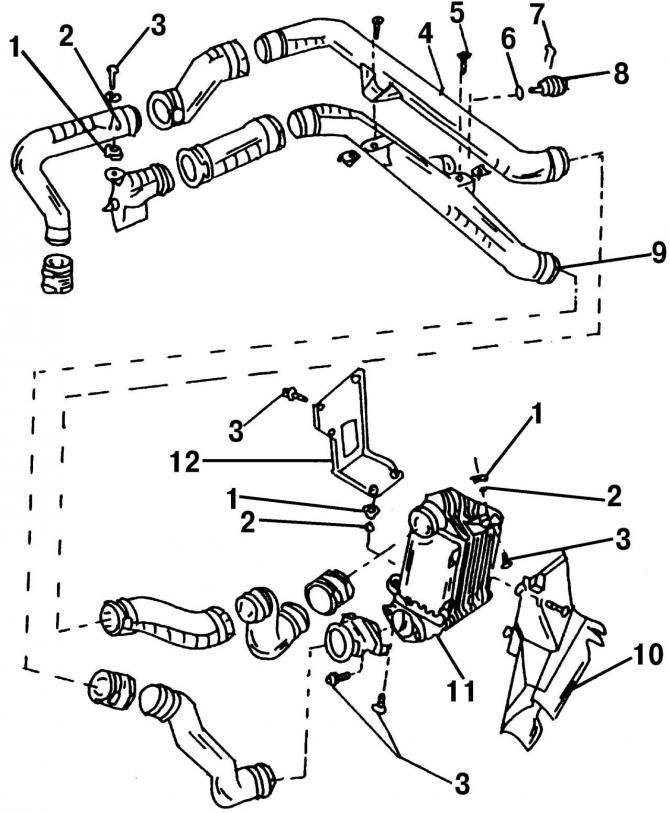
Pic. 486. The radiator of forced air: 1 - rubber support; 2 - bushing; 3 - bolt, 10 Nm; 4 - hose; 5 - bolt, 10 Nm; 6 - sealing ring; 7 - locking spring clip; 8 - temperature sensor; 9 - hose; 10 - air hose; 11 - radiator of forced air; 12 - mounting clamp
The charge air radiator is shown in Figure 486. All hoses attached to it are fastened with clamps.
Removing the charge air cooler is a rather laborious work, since only with great difficulty can one get to the attachment points of its individual parts. The removal process is described below in general terms for all models:
- place the front of the car on supports and remove the engine protection;
- loosen the hose clamps and disconnect both hoses from the charge air cooler;
- remove the intake air deflector;
- remove the towing eye cover, remove the cover, loosen the lower grille fastening clamps and remove it;
- remove the charge air cooler.
Installation takes place in the reverse order of the removal process.
Visitor comments