

2. Click «08» to select a function «Reading a block of measured values» and confirm by pressing the button «Q». The display should show the following information:

3. Click «002» to select a function «Group 2 display» and press «Q». The display should show the following information:

Continuation of the test only when the coolant temperature is above 80°C (display zone 2) and after running the engine for about 2 minutes at idle.
4. Record the voltage of the lambda probe in zone 3. The voltage should change at least 10 times per minute in the range of 0-1.0 V. If the voltage changes more slowly, determine the malfunction.
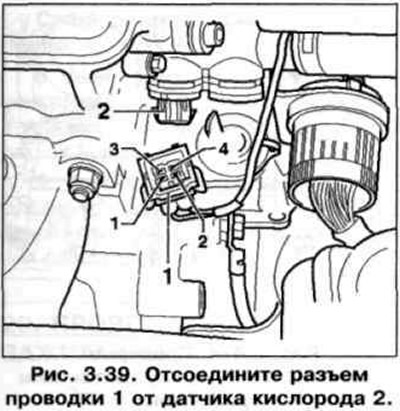
5. Disconnect wiring connector 1 from oxygen sensor 2 (pic. 3.39). The voltage should rise and then fall back to the previous level.
6. Connect the wiring connector again. The voltage should drop and then rise again to its previous level.
7. Click «→».
8. Click «06» to select a function «Output Completion» and confirm by pressing the button «Q».
9. Turn off the ignition.
10. Connect the VAG 1598/18 tester to the engine control unit wiring harness (rice. 3.34).
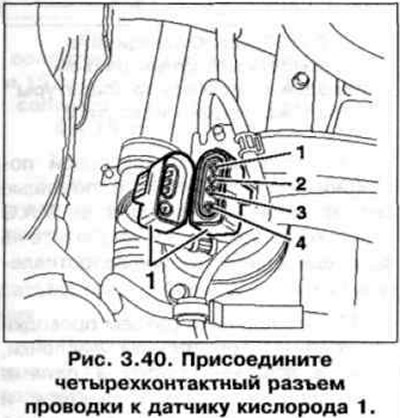
11. Connect the four-pin harness connector to the oxygen sensor 1 (pic. 3.40).
12. Check the wires between the tester and the connector for continuity: pin 3 + socket 15, pin 4 + socket 38. Set value: max. 1.5 ohm.
13. Check the wires of pins 3 and 4 for a short to the wires of pins 1 and 2 in the wiring diagram.
Specification resistance: ∞ Ohm.
14. If no fault is found in the wires, then replace the oxygen sensor.
Visitor comments