
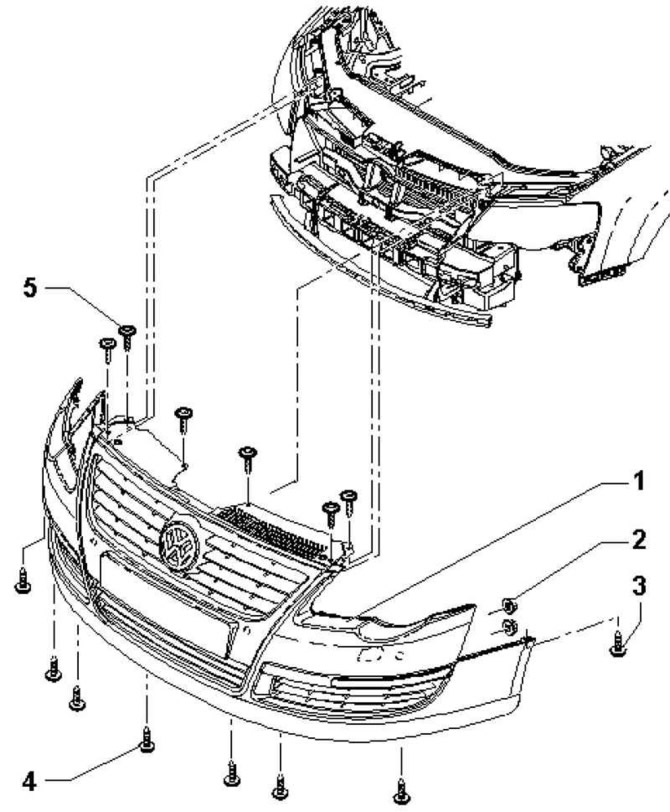
Pic. 8.1. Front bumper components: 1 – facing of a forward bumper; 2 - hex nut; 3-5 - screws
Note: Depending on the model variant, slight deviations must be taken into account during removal and installation.
Removing
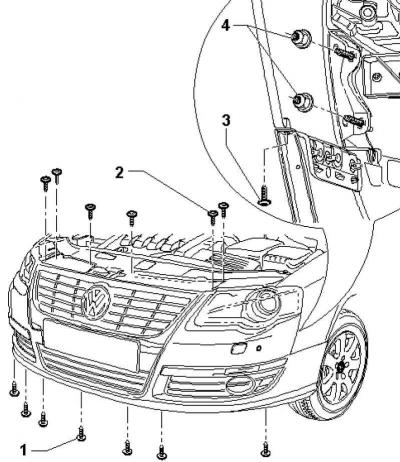
Pic. 8.2. Removing the front bumper
Remove the front fenders left and right
Remove screws 2 from the top of the radiator frame.
Unscrew screws 1 from below.
Remove screws 3 (upward) left and right.
Unscrew the hexagon nuts 4 on the wings on the left and right.
Further removal is possible only with the help of a second mechanic.
Together with a second mechanic, remove the bumper lining in parallel from the wing receptacles.
Disconnect the existing electrical connections and hoses.
Installation
Installation is carried out in the reverse order.
Note: When installing the front bumper trim, make sure that the installation is parallel on the fenders.
Note: Pay attention to parallelism and gaps.
Visitor comments