
Removal and installation
1. Disconnect the wire "masses" from the battery and remove the instrument panel (see chapter "electrical equipment").
2. Remove the steering wheel (see chapter "Steering").
3. Remove the heater and ventilation control knobs.
4. Remove facing of the block of management of a heater.
5. Remove the decorative plug from the radio socket. If a radio is installed, remove its front panel, control knobs and the receiver itself.
6. Remove the switches and signal lamps from the dashboard by releasing the latches and pulling them forward (see chapter "electrical equipment").
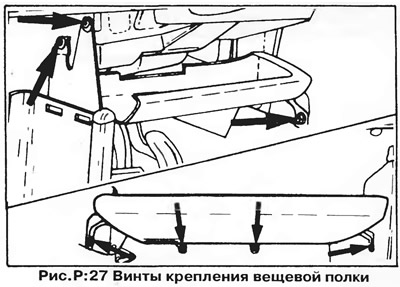
7. Remove the storage shelves from under the dashboard on the driver and passenger side - to do this, unscrew the self-tapping screws (pic. R:27), tilt the shelf down and pull it out.
8. Turn out the lower screws of fastening of the instrument panel (Ah, fig. R:28).
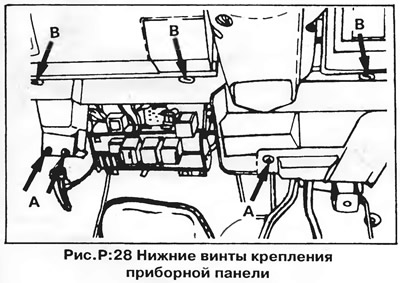
9. Press the latches on the bottom cover of the dashboard (B, fig. R:28) and pull out the guides.
10. Turn out three screws of fastening of the bottom part of the central console and remove the console from the gear lever.
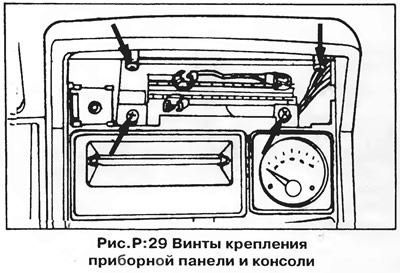
11 Remove the four screws securing the heater control unit (pic. R:29), that simultaneously hold the top of the center console Remove the center console.
12. Open a ware box and turn out two screws in a lateral window.
13. From inside the panel, remove the screw that secures the dashboard bracket to the front bulkhead.
14. Remove the four screws (two on each side), that secure the dashboard to the side brackets.
15. Pull out the dashboard inside the cabin, releasing it from the spring clips, and remove it from the car.
16. Installation of the dashboard is carried out in the reverse order. Pay attention to the correct installation of the instrument panel and speedometer cable. Check the operation of the heater control unit.
Visitor comments