



Contents: Installation ↓ Tightening torques ↓
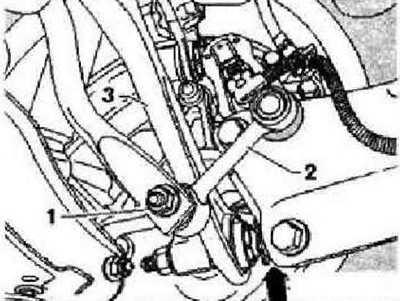
Remove the wheel. Remove the coil spring. Unscrew the nut "1" and disconnect the strut "2" from the stabilizer. Unscrew the bolt "arrow" securing the transverse tie rod "3".
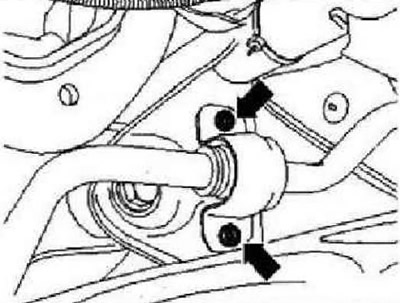
Loosen the bolts securing the stabilizer clamp "arrows".
Unscrew the nut "arrow" and remove the bolt by moving it backwards. Remove the cross rod "1".
Installation
Install the cross-rod on the vehicle and tighten the bolts by hand. Tightening the cross-rod mounting bolts can only be done after installing the suspension in the position corresponding to dimension "a"!
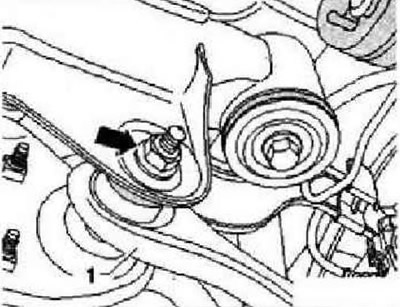
Screw the transverse rod "1" to the subframe and tighten the new nut "arrow". Tighten the stabilizer clamp mounting bolts "arrow". Tighten the bolt "arrow" for mounting the transverse rod "3".
[The original text can be found on the portal: VWMANUAL]
Instructions: Make sure there is a washer between the nut and the wheel bearing housing.
Insert the pin of the strut "2" into the hole of the stabilizer and tighten the nut "1". Install the coil spring. Install the wheel and tighten the bolts of its fastening. Check the wheel alignment angles.
Tightening torques
| Lateral tie rod to hub bearing housing. Use only new bolts and nuts, tighten only to position corresponding to curb weight | 130 Nm and turn 90° |
| Cross rod to subframe. Use only new bolts and nuts, tighten only to position corresponding to unladen weight | 90 Nm and turn 90° further |
| Stabilizer to subframe. Use only new bolts, tighten only in position corresponding to unladen weight | 25 Nm and turn further by 45° |
| Stabilizer to rack. Use only new nuts | 40 Nm |
Visitor comments