



Contents: Removal the front oil seal ↓ Removal the rear oil seal ↓ Installing the front oil seal ↓ Installing the rear oil seal ↓
The front and rear crankshaft seals should be replaced each time the crankshaft or seal flange is removed. If you follow these instructions, you will not need any special tools to remove or install the crankshaft seals.
Both seals can be replaced on an installed engine if you notice traces of leaking oil near them. In addition, a slipping clutch may also indicate a leaky crankshaft seal. In the worst case, oil stains at the front of the engine can cause the accessory drive belt to slip, which can cause, for example, a loss of charging power in the alternator.
Removal the front oil seal
In order to have access to the front crankshaft oil seal, the poly V-belt must be removed as described in section 17.4.1.
To unscrew the crankshaft pulley bolt, engage fifth gear and tighten the parking brake lever. Then unscrew the bolt.
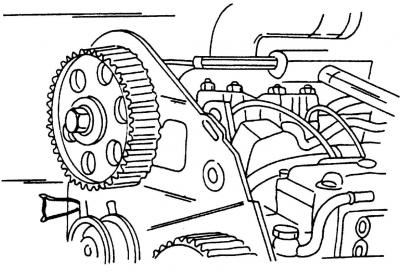
Fig. 438. Knock off the camshaft gear by inserting a mandrel from behind and hitting it briefly from behind with a plastic or rubber hammer
When removing the front oil seal, you can follow the description for removing the camshaft oil seal. You can use a lever designed for removing the camshaft oil seal (Fig. 438).
Removal the rear oil seal
In order to access the rear crankshaft oil seal, the gearbox, clutch and flywheel must be removed. To remove the rear oil seal, we suggest unscrewing the oil seal flange and then replacing the oil seal. For this reason, the engine intermediate plate and oil pan must also be unscrewed.
Unscrew the six bolts of the oil seal flange from the crankcase and remove the flange together with the oil seal.
Knock the seal out of the flange.
Installing the front oil seal
With the engine removed
Apply grease to the seal lip and carefully press the seal from the inside out into the flange until the outer surface of the seal is flush.
Carefully place the flange with the gasket over the crankshaft onto the cylinder block and center it well. Tighten the bolts evenly around the circle to a torque of 10 Nm.
On the installed engine
For the front crankshaft oil seal, you can purchase a special tool to press it in. This tool is a piece of pipe that fits onto the outside of the oil seal. The oil seal can then be pressed into the crankcase using the crankshaft pulley bolt. Lubricate the inside and outside of the oil seal thoroughly and place the oil seal against the crankcase. Now carefully tighten the bolt, pressing the oil seal in.
Installing the rear oil seal
Apply grease to the seal surface and carefully press it into the flange until the outer surface of the seal is flush.
Carefully place the flange with the gasket over the crankshaft onto the cylinder block and center it well. Tighten the bolts evenly around the circle to a torque of 10 Nm.
Visitor comments