




Figure 11.6. Front suspension components (independent type) (Section 3): 1 - Crosspiece; 2 - Stabilizer; 3 - Final link; 4 - Arch support; 5 - Isolator; 6 - Spiral spring; 7 - Bushing; 8 - Upper arch; 9 - Upper ball joint; 10 - Hub carrier; 11 - Lower ball joint; 12 - Lower arch; 13 - Shock absorber; 14 - Radial lever; 15 - Mounting pin.
2. Lower the piston down and remove the upper mounts, gasket and washers.
3. Loosen and remove the two lower mounting bolts and lower the shock absorber down, removing it from the spring and arches.
4. On LT 40 and 45 models, loosen and remove the upper and lower support mounting bolts and remove the entire shock absorber, including the flexible bushings and sleeves.
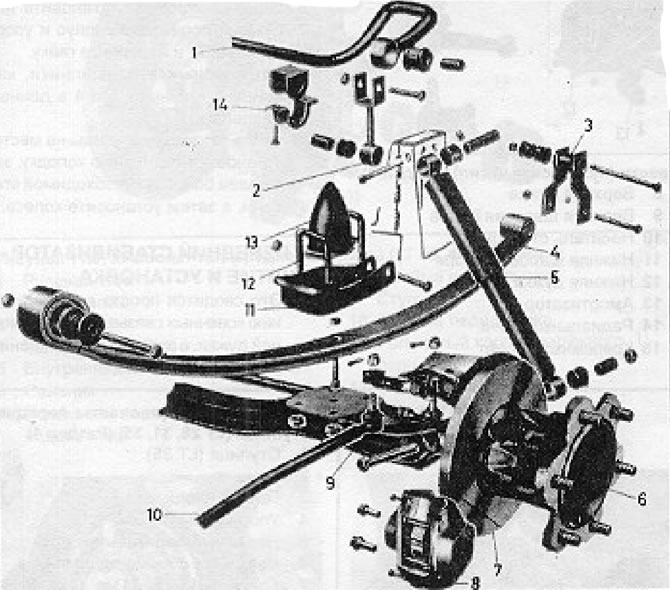
Figure 11.5. Front Suspension Components (Axle Type) (Section 3): 1 - Stabilizer; 2 - Final linking; 3 - Spring saddle; 4 - Spring; 5 - Shock absorber; 6 - Hub; 7 - Brake line; 8 - Block (caliper); 9 - Place beam; 10 - Drive rod; 11 - Spring plate; 12 - U-bolt; 13 - Buffer; 14 - Stabilizer clamp.
5. To check the shock absorber, clamp its lower mount in a vice so that it is positioned vertically. Now insert and pull the piston all the way in and out several times. Any tendency for the clutch to jerk, lack resistance, or stick indicates the need for replacement.
6. Installation is carried out by performing the above steps in reverse order. Make sure the flexible bushings are in good condition, otherwise replace them.
7. Tighten all bolts and nuts to the required torque.
[View the original article on the resource vwmanual.ru]
Visitor comments