



Removal
Attention!
- The mating surfaces of the camshaft housing (bottom) and cylinder head (top) are not subject to mechanical processing.
- The camshaft bearings are integrated into the cylinder head and into the camshaft housing. Before removing the camshaft housing, it is necessary to loosen the timing belt.
- If the camshaft frame is removed, then when it is subsequently installed, it is necessary to replace the camshaft oil seal and the cover on the back of the cylinder head.
1. Remove the engine cover.
2. Remove the intake manifold.
Caution! The intake channels at the bottom of the intake manifold must be covered with a clean cloth.
3. Remove the upper part of the timing belt cover.
4. Set the camshaft toothed pulley to the TDC position of the first cylinder. The mark on the camshaft toothed pulley must match the arrow on the timing belt cover.
5. Loosen the tension roller and remove the toothed belt from the camshaft pulley.
6. After this, turn the crankshaft back slightly.
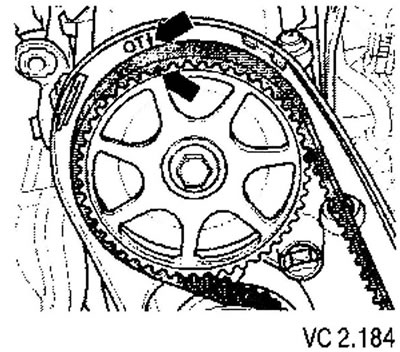
7. Remove the camshaft timing pulley.
8. Remove the prismatic key from the camshaft.
9. Unscrew the valve cover mounting screws, loosening them from the edges to the middle.
10. Remove the valve cover.
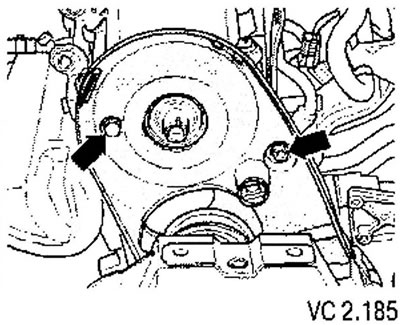
11. Loosen the rear timing belt cover mounting bolts (arrows).
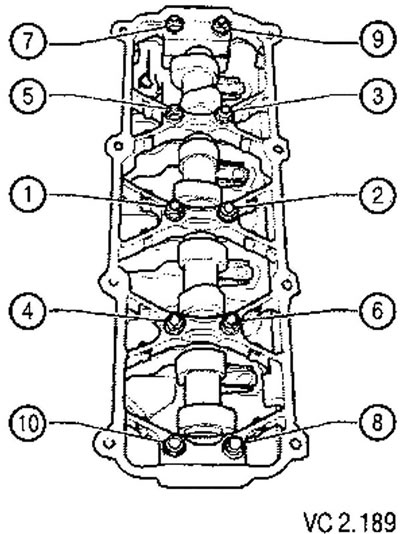
12. Unscrew the nuts of supports No. 5, 1 and 3. One by one, crosswise, loosen the covers of supports No. 2 and 4.
13. Remove the camshaft housing.
14. Carefully remove the camshaft vertically upwards and place it on a clean surface.
15. Remove the roller levers together with the supports. Place the roller arms and supports on a clean surface. At the same time, ensure that during subsequent installation the supports and levers are in their original places.
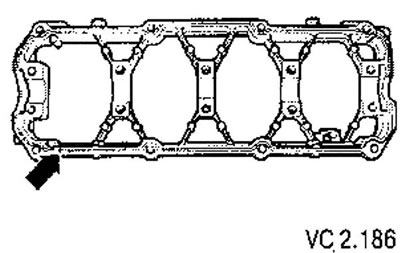
16. Remove any remaining sealant from the groove (arrow) of the camshaft housing, as well as from the mating surface.
Do not allow any contaminants or sealant residue to enter the cylinder head.
Installation
Installation conditions:
- There should be no traces of oil on the mating surfaces.
- When installing the camshaft housing or camshaft, the cams for the first cylinder should face up.
- The pistons should not be at TDC.
1. Install the roller lever supports in the cylinder head and install the corresponding roller levers on them and on the ends of the valve stems.
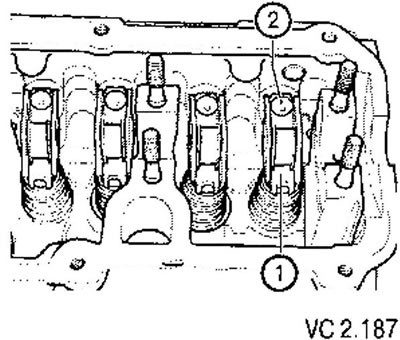
2. The roller lever must lie correctly on the end of the valve stem (1) and be secured with a clamp on the corresponding support (2).
3. Lubricate the working surfaces of the camshaft.
4. Carefully install the camshaft onto the cylinder head supports.
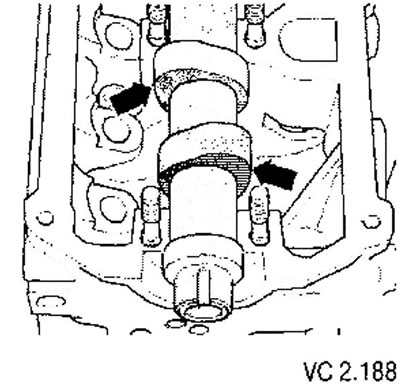
5. 8 Apply an even bead of sealant to the clean groove of the camshaft housing (arrow) so that it protrudes slightly from the groove.
Spread the sealant evenly over the entire mating surface.
Attention!
- The sealant should not be applied too thickly. If necessary, remove excess sealant with a lint-free cloth.
- The installation of the housing and tightening of its mounting bolts must be carried out without interruption, since the sealant begins to harden immediately after application.
6. Install the cover on the back of the cylinder head.
7. Install the camshaft frame and lightly tighten, one by one and crosswise, the bearing caps No. 2 and
4. After this, also slightly tighten the nuts of supports No. 3, 1 and 5.
8. Tighten the nuts to a torque of 23 Nm in the sequence shown.
9. Install the valve cover. Tighten the bolts crosswise from the middle to the edges.
10. Install the rear timing belt cover.
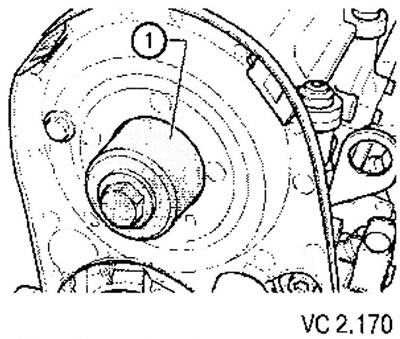
11. Install the oil seal on the guide sleeve and press it in using a mandrel with a screw until it stops.
Caution! To prevent wear on the mandrel, place a standard M12 washer under the screw head.
12. Install the parallel key on the camshaft.
13. Install the camshaft timing pulley. When tightening the timing pulley mounting screw, it is necessary to hold the camshaft pulley with a lever.
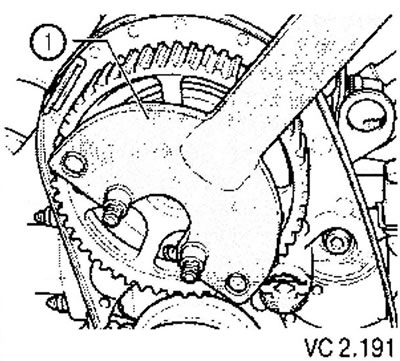
Tightening torque: 100 Nm.
Caution! The crankshaft must not be at TDC when the camshaft is rotating. Damage to the valves and piston crowns may occur.
Further installation is carried out in the reverse order of removal.
Important! After installing the housing and valve cover, wait approximately 30 minutes for the sealant to dry.
Camshaft, checking axial runout
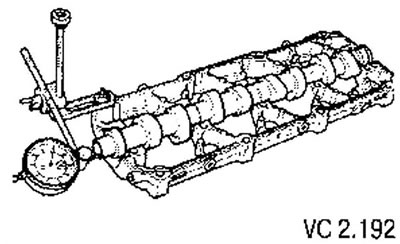
Maximum permissible value: no more than 0.17 mm.
Visitor comments