



Contents: Removal ↓ Installation ↓
Attention: When disconnecting and connecting the battery, be sure to follow the sequence of actions described in the repair manual.
Removal
Disconnect the battery.
Remove the front panel.
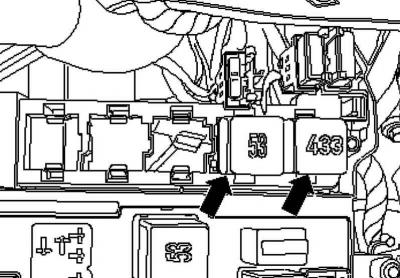
Fig. 7.118. Relay location
Remove the relay from the relay box (fig. 7.118).
Note: The number of relays and fuses depends on the vehicle configuration.
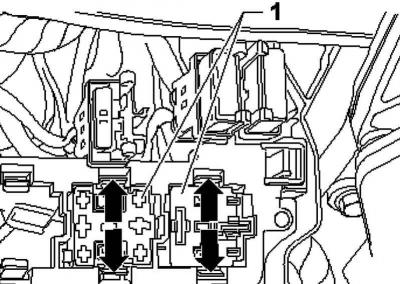
Fig. 7.119. Unlocking the locks
Release the locks in the direction of the arrow outwards and push plug 1 out of the relay block (fig. 7.119).
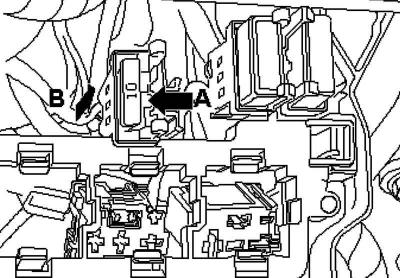
Fig. 7.120. Removing the holder with the fuse
Unlock holder A and remove the holder with the fuse in the direction of arrow B from the relay box (fig. 7.120).
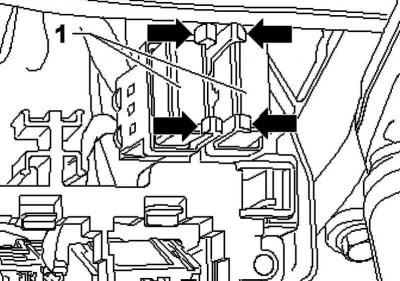
Fig. 7.121. Removing thermal fuses
Release the locks in the direction of the arrow and remove the thermal fuses 1 from the clamping device (fig. 7.121).
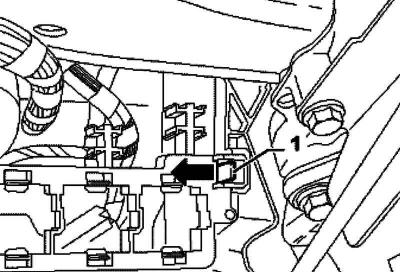
Fig. 7.122. Relay block retainer
Release the lock 1 of the relay block in the direction of the arrow and remove the relay block (fig. 7.122).
Installation
Installation is carried out in the reverse order, taking into account the following.
View the original article on the resource (VWManual.ru)
First lock the plug (for the relay), then the holder (for fuse) and clamping device (for thermal fuses) into the relay block.
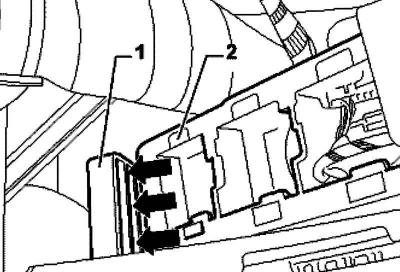
Fig. 7.123. Installing the relay block
Install relay block 2 into guide 1 and secure relay block (fig. 7.123).
Visitor comments