



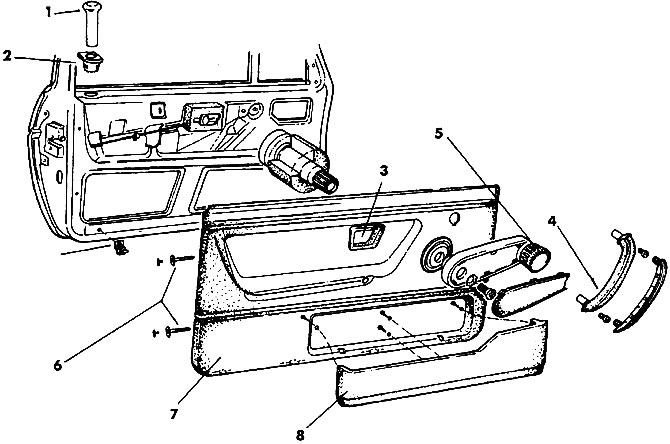
Figure 464. Interior door trim: 1 - door lock button; 2 - socket; 3 - overlay; 4 - door handle; 5 - window lift handle; 6 - screws; 7 - inner door trim; 8 - pocket
When removing the 3rd door trim, it must be pressed, moved back and removed.
Remove the trim from the 4th door handle using a wide screwdriver, unscrew the two screws and remove the handle.
Remove the window lifter handle cover, unscrew the screw and remove the window lifter handle.
If necessary, lift the corner of the inner trim of the 7th door with a wide screwdriver, during installation, completely move the middle plastic pin back and after installing the corner, press the pin flush.
Caution: When removing the corner, place paper under the screwdriver to avoid damaging the paintwork.
Unscrew the screws 6 securing the door trim - two screws on each side.
Remove the inner door trim from the door opening, releasing it from the corners.
Attention! When replacing the door trim on cars from August 1987, it is necessary to first cut a 110x10 mm cutout in the trim from the front upper edge due to the modified rearview mirror mount. To do this, carefully remove the fabric upholstery, then stretch it over the sawn area and secure it with adhesive tape.
Remove pocket 8 from the door trim by unscrewing the screws that secure it.
Installation is carried out in reverse order.
Visitor comments