



Contents: Removal ↓ Installation ↓
Removal
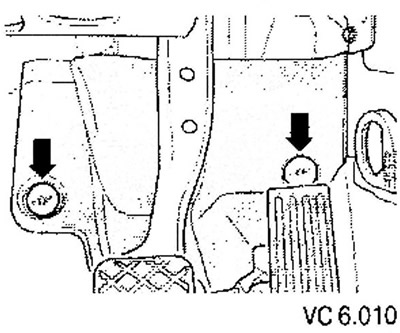
1. After opening the locks (arrows), remove the floor trim in the driver's footwell.
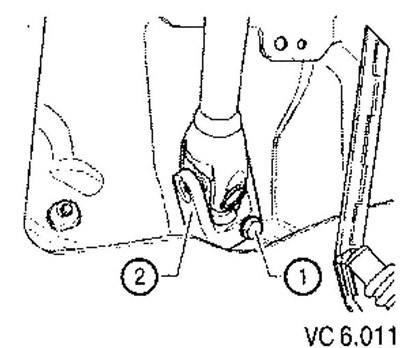
2. Loosen the screw (1) and remove the cardan joint (2) from the steering gear.
3. Clamp the tank and rotary pump hoses.
4. Remove the front wheels.
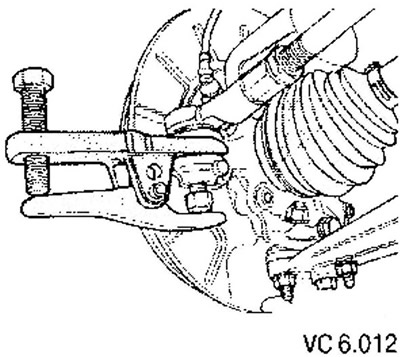
5. Unscrew the tie rod end nut.
Caution: To protect the tie rod end pin threads, leave the nut threaded on for a few turns.
6. Press the tie rod end out of the steering knuckle and disconnect it.
7. Remove the lower soundproofing casing.
8. Disconnect the rods from the stabilizer.
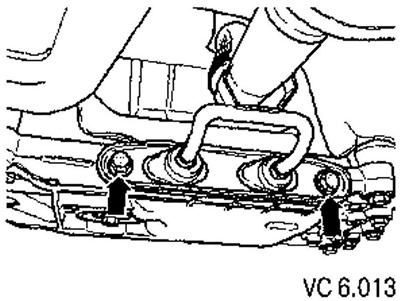
9. To make it easier to remove the stabilizer, unscrew the two screws (arrows) of the exhaust system suspension.
10. On vehicles with an additional heating system, it is necessary to partially dismantle its exhaust system.
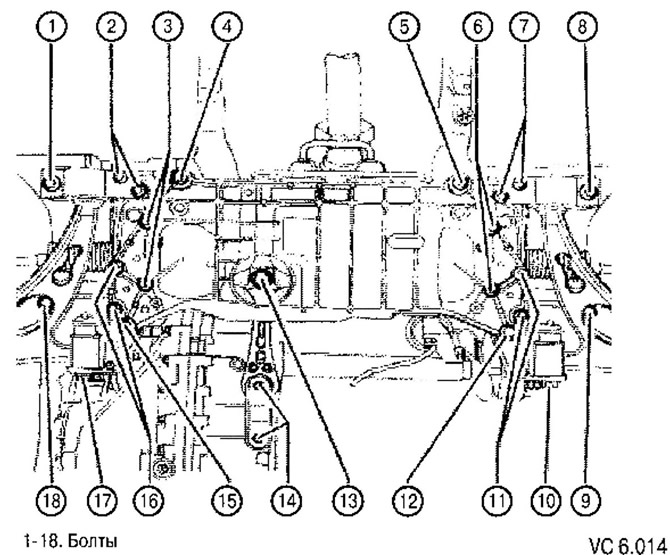
11. After unscrewing the bolts (14), disconnect the pendulum support from the gearbox.
12. Unscrew the bolts (3, 6, 11, 16) steering gear and stabilizer mounts.
13. Support the subframe with a jack and a wooden block underneath.
14. Unscrew the bolts (4-5) and lower the subframe slightly, monitoring the position of the electrical cables.
15. Unscrew the wiring harness (arrow) from the subframe.
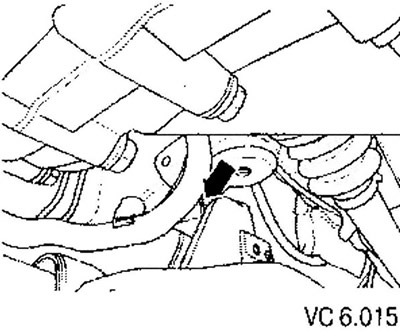
15. Remove all fasteners securing the wiring harness to the steering gear.
16. Unscrew the hydraulic line hoses from the steering gear and cover them with a plastic bag. When installing, tighten the hoses to a torque of 32 Nm.
17. Carefully lower the subframe and remove the steering gear.
Installation
Installation is carried out in reverse order.
After installation, it is necessary to bleed the air from the steering system.
After installation, perform a basic installation of the steering angle sensor using the "Vehicle Diagnostic, Measurement and Information System".
If the steering gear is replaced, it is necessary to perform a basic adjustment of the power steering control unit using the "Vehicle Diagnostic, Measurement and Information System".
Visitor comments