
Removing
1. After opening the locks, remove the floor lining in the driver's footwell.
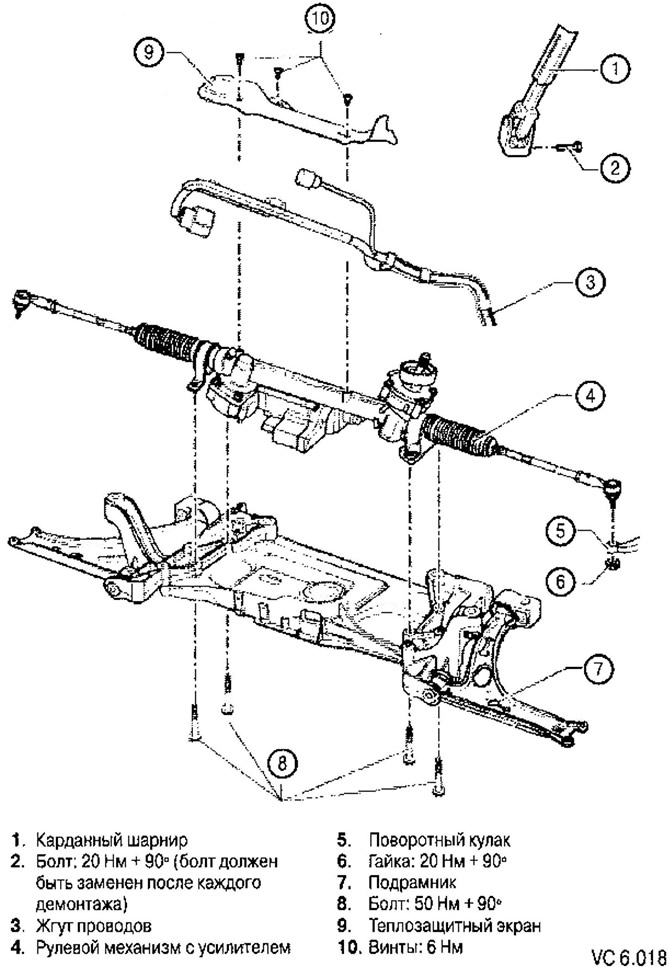
2. Remove the universal joint from the steering shaft.
3. Remove the front wheels.
4. Turn off a nut of a tip of steering draft and press out a tip from a rotary fist.
5. Remove the lower noise isolation.
6. Disconnect drafts from the stabilizer.
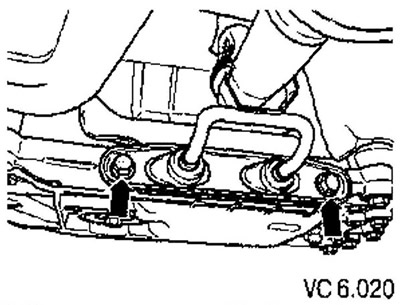
7. For the convenience of removing the stabilizer, unscrew the two screws (arrows) exhaust system hangers.
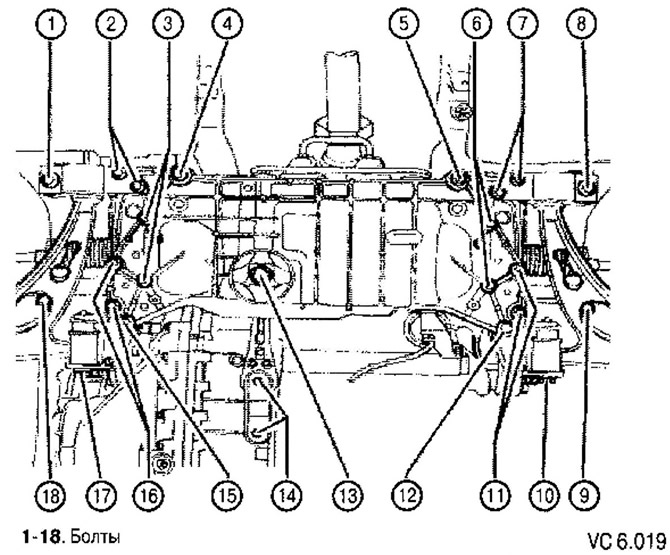
8. Unscrewing the bolts (14), disconnect the pendulum support from the gearbox (see fig. VC6.019).
9. Disconnect the exhaust system bracket from the subframe.
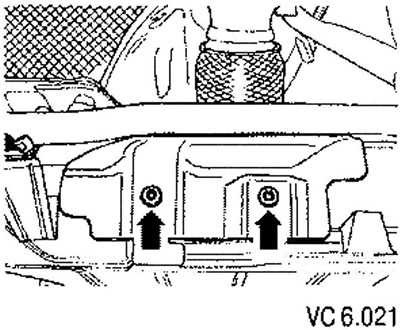
10. Unscrew the heat shield from the subframe and remove it (arrows).
11. Remove the bolts (3, 6, 11, 16) steering gear and stabilizer mounts (see fig. VC6.019).
12. Support the subframe with a jack with a wooden beam underneath.
13. Remove the bolts (4-5) and lower the subframe a little, observing the position of the electrical cables (see fig. VC6.019).
14. Remove a heat-shielding screen of the steering mechanism.
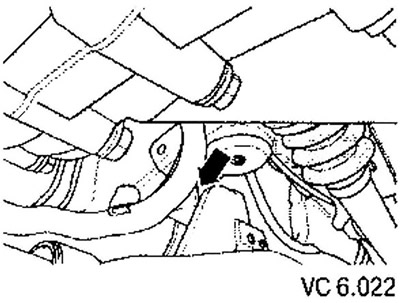
15. Unscrew the wiring harness (arrow) from the subframe (see fig. VC6.022).
16. Remove all wiring harness fasteners.
17. Disconnect all electrical connectors.
18. Carefully lower the subframe and remove the steering gear from it.
Installation
Installation is in the reverse order. After installation, it is necessary to carry out the operation of bleeding the steering system.
After installation, carry out the basic setting of the steering angle sensor using «Vehicle diagnostics, measurement and information systems».
In case of replacement of the steering mechanism, it is necessary to carry out the basic adjustment of the power steering control unit using «Vehicle diagnostics, measurement and information systems».
Visitor comments