



Contents: Removal ↓ Installation ↓
Driver side front pillar lower trim fasteners
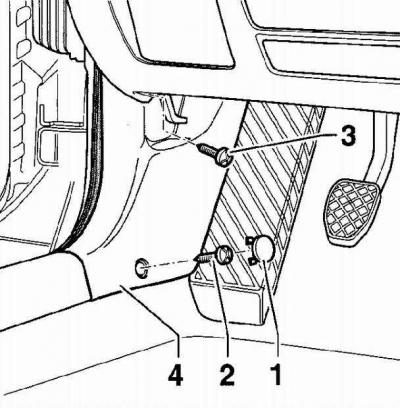
- 1 - plug,
- 2 - screw,
- 3 - screw,
- 4 - trim panel
Removal the lower trim of the instrument panel on the driver's side
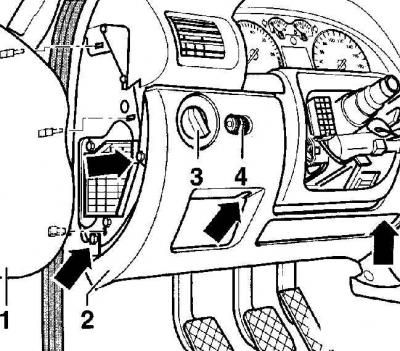
- 1 - side decorative trim,
- 2 - lower trim of the instrument panel on the driver's side,
- 3 - headlight switch,
- 4 - headlight corrector
Removal
1. Remove the plugs covering the screws, see Fig. Driver's side front pillar lower trim fasteners.
2. Remove the screws securing the lower trim panel.
3. Move the lower trim panel forward and out from under the door sill trim panel and remove it from the vehicle.
4. Remove the driver's side instrument panel trim panel, see Fig. Removing the driver's side instrument panel lower trim panel.
5. Remove the screws securing the driver's side instrument panel lower trim panel (arrows), see Fig. Removing the driver's side instrument panel lower trim panel.
6. Remove the lower trim panel and disconnect the electrical connectors from the headlight switch and headlight range control.
Installation
Installation is carried out in the reverse order of removal.
Visitor comments