
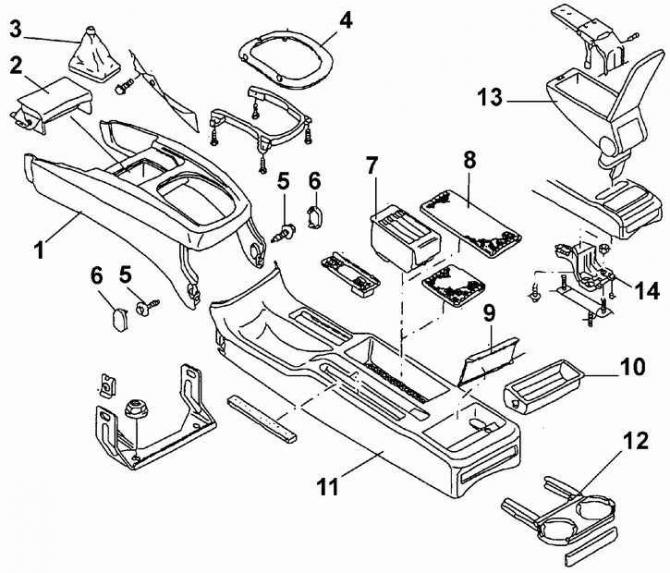
- 1 - front part of the center console,
- 2 - ashtray,
- 3 - protective cover,
- 4 - decorative overlay,
- 5 - self-tapping screw,
- 6 - plug,
- 7 - block for cassettes,
- 8 - decorative cover,
- 9 - ashtray cover,
- 10 - ashtray,
- 11 - rear of the center console,
- 12 - stand for glasses,
- 13 - armrest,
- 14 - bracket
Removing the rear of the center console
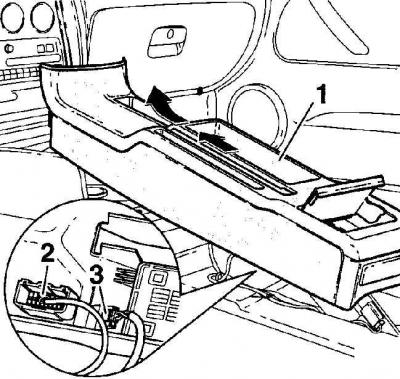
- 1 - rear of the center console,
- 2 - diagnostic connector,
- 3 - socket of the switch of remote opening of a cover of a fuel filler neck
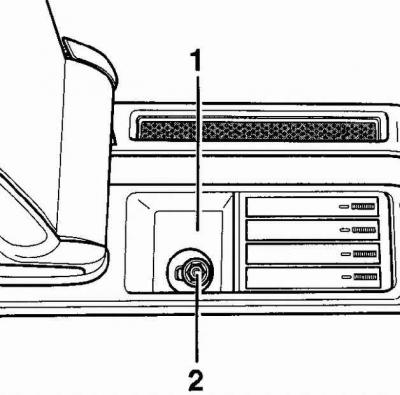
Removing the front section of the center console
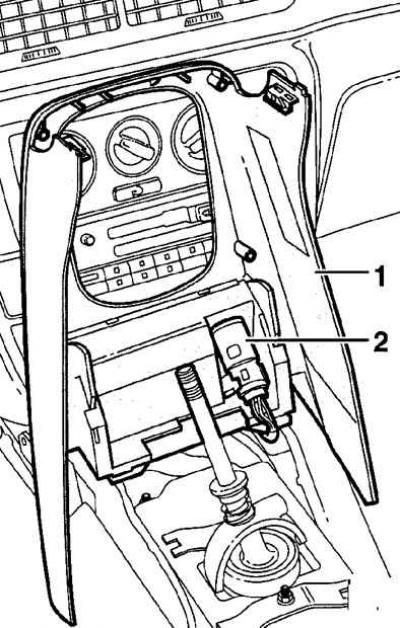
- 1 - front section of the center console,
- 2 - cigarette lighter
1. Switch off ignition and remove a wire of weight from the accumulator.
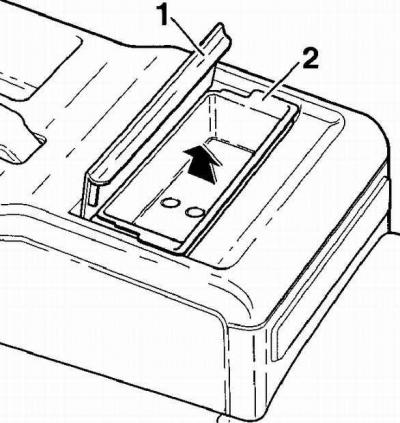
2. Open the lid (1) and take out the ashtray (2) from the rear of the center console.
3. Set the center armrest to the vertical position.
4. Remove the exposed rubber plug (1) from the center console, unscrew the nut (2).
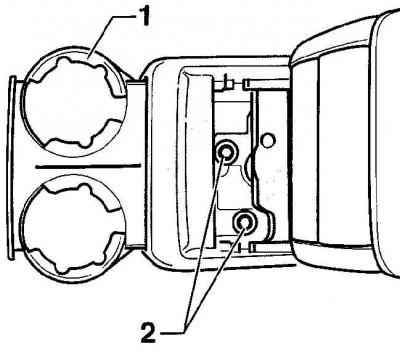
5. Pull out the stand from the center console (1) for glasses. Loosen two nuts (2), that secure the rear of the center console. On vehicles without a center armrest, there is only one nut located under the ashtray.
6. Tighten the handbrake lever all the way up.
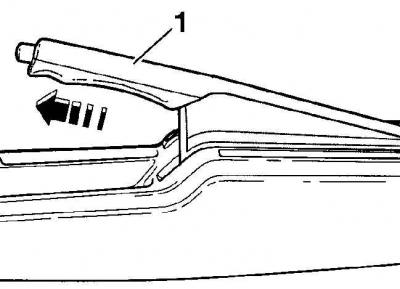
7. Pulling along the handbrake lever, remove the decorative trim (1) hand brake lever.
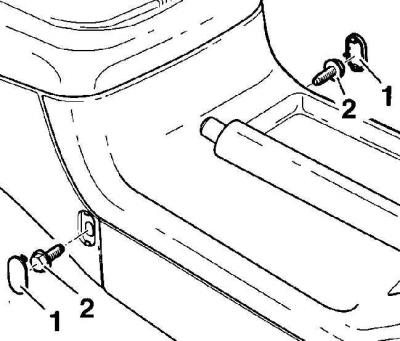
8. Remove the covers from both sides of the center console (1), closing bolts and unscrew the bolts (2) center console mountings.
9. On the handbrake lever, remove the rear of the center console, see fig. Removing the rear of the center console.
10. Release the diagnostic connector (2), see fig. Removing the rear of the center console.
11. Disconnect the electrical connector from the remote fuel filler cap release switch (3), see fig. Removing the rear of the center console.
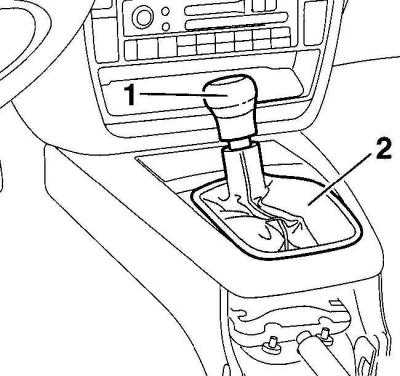
12. Peel off the bottom of the protective case (2) away from the center console and by pulling the handle (1) up, remove the handle with the protective cover from the gear lever.
13. Lifting the rear of the front section of the center console, separate it from the instrument panel and remove it from the gear lever, see fig. Removing the front section of the center console.
14. Disconnect the electrical connector from the cigarette lighter (2), see fig. Removing the front section of the center console.
Installation
1. Installation of the central console is made in sequence, return to removal.
2. Connect ground wire to battery.
Visitor comments