



Trunk door trim elements
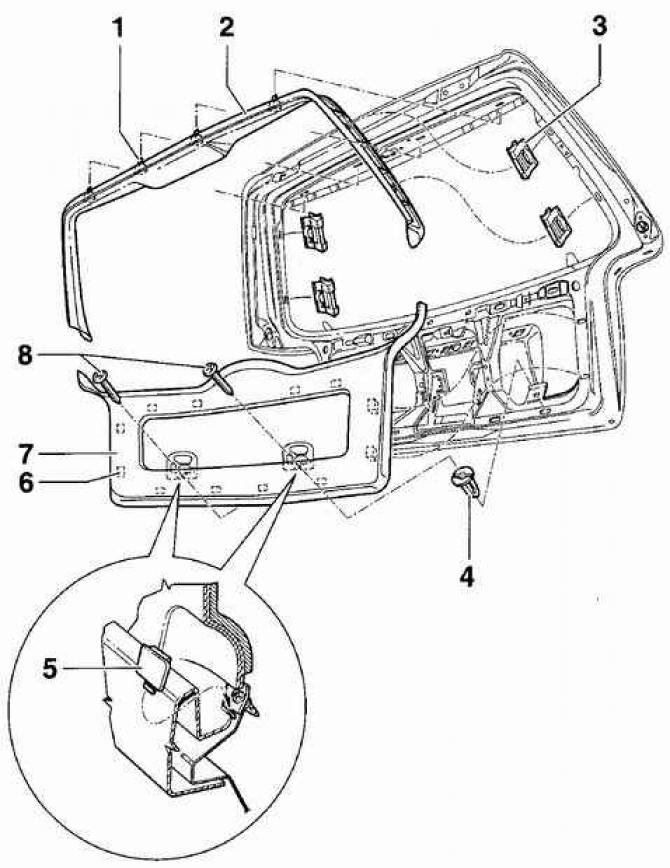
- 1 - pistons 4 pcs.,
- 2 - upper part of the upholstery,
- 3 - clamps 4 pcs.,
- 4 - plastic nuts 2 pcs.,
- 5 - plugs 2 pcs.,
- 6 - pistons 12 pcs.,
- 7 - lower part of the upholstery,
- 8 - screws 2 pcs.
Upper part of the upholstery
Removal
1. Remove the lower part of the trunk lid trim (7), see fig. Trunk door trim elements.
2. Release both sides of the upper tailgate trim from the clips. Pull downwards to remove the upper portion of the trim from the clips and remove it from the vehicle.
Installation
1. Before installation, check the condition of the upper trim mounting pins and replace them if necessary.
2. Installation is carried out in the reverse order of removal.
Lower part of the upholstery
Removal
1. Remove the two plugs (5), see Fig. Trunk door trim elements.
2. Remove the two screws located at the base of the trim handles (8), see Fig. Trunk lid trim elements.
3. Starting from the bottom, separate the door trim from the trunk lid.
Installation
1. Before installation, check the condition of the door trim mounting pins and replace them if necessary.
2. Installation is carried out in the reverse order of removal.
Visitor comments