



Front ceiling light and front reading lights
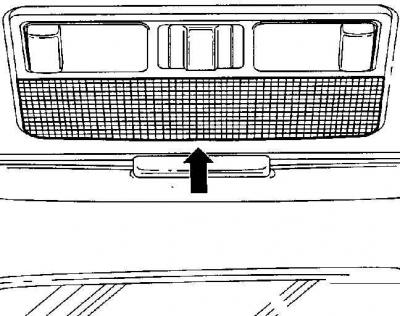
1. Remove the diffuser by inserting the flat end of a screwdriver between the lamp and the diffuser (arrow) and carefully prying the diffuser off.
2. Remove the faulty bulb from the socket and insert a new bulb.
3. Reinsert the diffuser, first with both small tabs into the frame, then press up and forward until both long tabs lock into place in the holder.
Side reading light
1. Using a thin screwdriver blade inserted into the recess in the side reading lamp lens, carefully remove the side reading lamp from its socket.
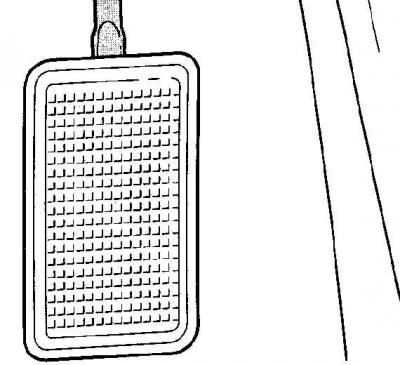
2. Disconnect the electrical connector and remove the side reading lamp.
3. Remove the plastic cover from the back side.
4. Remove the faulty bulb and insert a new bulb.
5. Install the plastic cover on the back side.
6. Connect the electrical connector.
7. Install the side reading lamp until it locks firmly into place.
Rear lamp
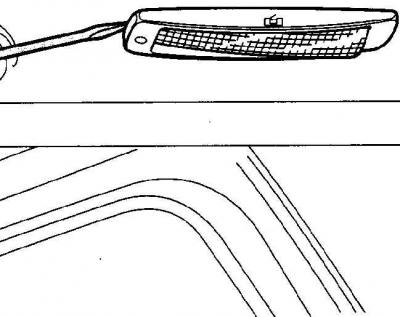
1. Remove the lampshade assembly by inserting the flat end of a screwdriver between the frame and the headlining and carefully prying the lampshade out.
2. On the back of the lampshade, slide the plastic cover to the side.
3. Remove the faulty bulb and insert a new bulb.
4. From the back side, slide the plastic cover on until it locks into place.
5. First install the lampshade from the connector side, then press it into the cutout in the headlining.
Trunk light
1. Open the back door.
2. The luggage compartment light is located on the right side of the luggage compartment.
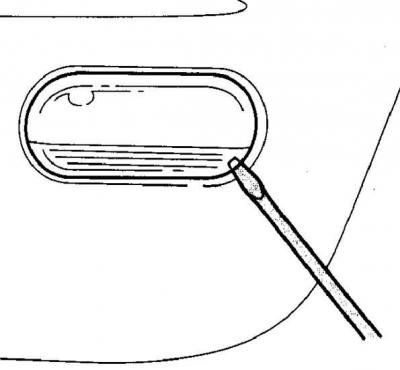
3. Unlock the lampshade from the bottom and remove it.
4. Replace the faulty lamp.
5. Insert the lampshade first from the top and then from the bottom.
Visitor comments