



Contents: Removal ↓ Installation ↓
Fastening elements of threshold trims
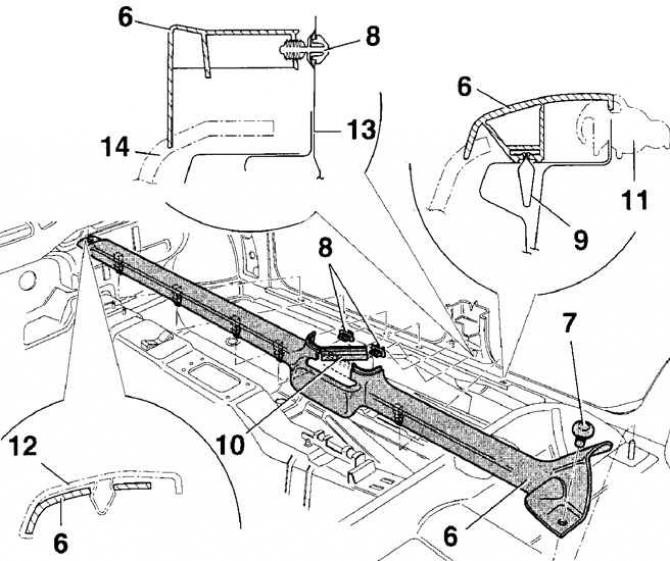
- 6 - threshold overlay;
- 7 - push button;
- 8 - spring clamp fastening;
- 9 - clamps 5 pcs.;
- 10 - overlay;
- 11 - inner door seal;
- 12 - Front pillar trim;
- 13 - central pillar;
- 14 - carpet
Rear pillar trim fastening elements
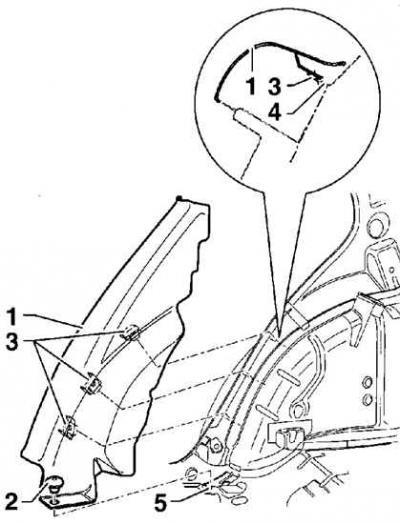
- 1 - upholstery;
- 2 - push button;
- 3 - clamp;
- 4 - body flange;
- 5 - Set screw
Removal
1. Remove the rear seat cushion and tilt the rear seatback forward.
2. Remove the lower trim of the front pillar.
3. Remove the lower B-pillar trim.
4. Remove the push button that covers the access to the set screw (5) (see figure Rear pillar trim fastening elements).
5. Separate the rear door trim (1) from the body flange (4), while releasing the clips (3).
6. Release the clips and separate the door sill trim from the center pillar.
7. Pull up to release the remaining clips securing the door sill trim to the vehicle body and remove the door sill trim from the vehicle.
Warning: The attachment fasteners (10) are located behind the seat belt.
Installation
1. Before installation, check the condition of the threshold trim clips and replace them if necessary.
2. Installation is carried out in the reverse order of removal.
3. Check that the door seal is positioned correctly.
Visitor comments