
Caution: On non-illuminated sockets, too much force may damage the fastening of the clamping sleeve. Using the T40148 puller, only illuminated sockets can be removed (cigarette lighters). On sockets without clamping sleeve illumination, the puller is not able to release the latches. As a rule, sockets without illumination cannot be removed without damage.
With some vehicle equipment, the backlight is not an incandescent lamp, but an LED. This LED is permanently connected to the clamping sleeve and is not separately replaceable. Clamping sleeves with incandescent lamps are available in several versions. A version that allows you to change the incandescent lamp separately, and a version where a separate replacement of the lamp is not possible. Here the lamp is replaced with a cartridge. The different internal construction of cars causes differences in sockets and cigarette lighters. They differ in length and electrical connections. Sockets and cigarette lighters with cable ends may require additional work to get to the connectors.
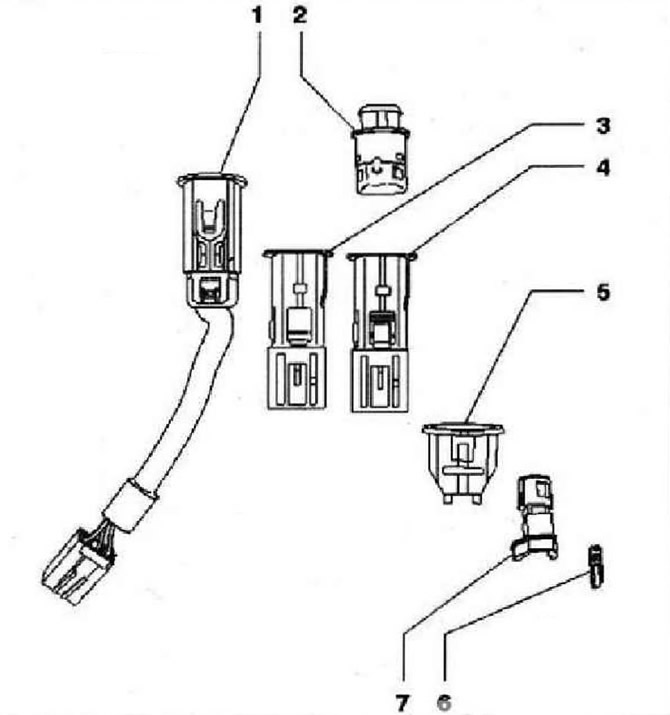
- 1 - Cigarette lighter socket with cable end
- 2 - Cigarette lighter
- 3 - Socket
- 4 - Cigarette lighter socket
- 5 - Clamping sleeve
- 6 - Incandescent lamp type W5 12 V, 1.2 W
- 7 - Block for lamps
Removal and installation of the cigarette lighter socket
Instructions: Removal and installation of all sockets is carried out in the same way and is described using only the cigarette lighter socket as an example.
Remove the cigarette lighter, cigarette lighter dummy, etc. from the outlet.
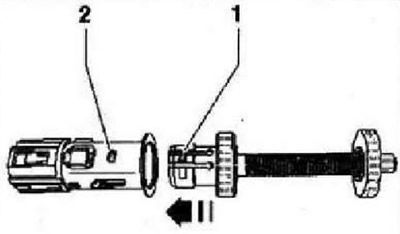
Instructions: For a better understanding, the socket is presented in a dismantled state. Possible damage to the socket or clamping sleeve. Make sure the position of the puller is correct, otherwise the latches of the clamping sleeve will not open.
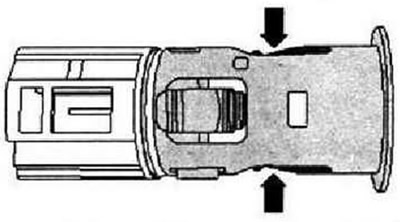
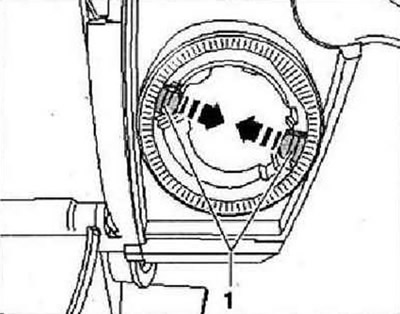
Insert puller into socket -arrow- until latches -1- snap into grooves -2-.
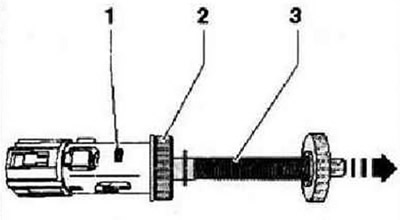
Release the latches on the clamping sleeve by pulling the handle -3- in the -direction of the arrow-. Remove the socket with a puller from the clamping sleeve.
Caution: Possible damage to outlet wiring. When removing the socket, pay attention to the length of the wire.
Depending on the mounting location, it may be necessary to use mandrel 40148/1 -2- and knurled nut -1-. Unplug the socket.
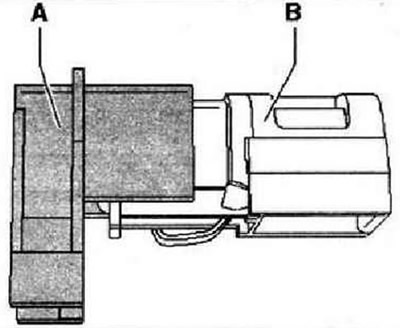
Unlock puller latches by pressing pin -1- in -direction of arrow B-. After this, the ejector -2- must be unlocked by briefly turning it to the left -arrow A-. Pull the puller out of the socket.
Instructions: Make sure that the latches of the puller are not separated to the sides. After heating, the cigarette lighter may pop out of the socket. When the puller is inserted, the springs of the sockets are bred to the sides, and the holding moment is reduced. After disassembling the socket, gently compress the springs again and check that the cigarette lighter remains in the extraction position after heating.

Carefully compress rosette springs -arrows-.
Make sure that after heating the cigarette lighter remains in the extraction position and is not thrown into the vehicle interior.
Installation is carried out in the reverse order.
Removing and installing cigarette lighter lamp -L28-
Instructions: With some vehicle equipment, the illumination is provided not by an incandescent lamp, but by an LED. This LED is permanently connected to the clamping sleeve and is not separately replaceable. Clamping sleeves with incandescent lamps are available in several designs. A version that allows you to change the incandescent lamp separately, and a version where a separate replacement of the lamp is not possible. Here the lamp with the cartridge is replaced.
Remove socket. Press the latches -arrows- and pull out the clamping sleeve with the chuck. Detach the chuck from the clamping sleeve.
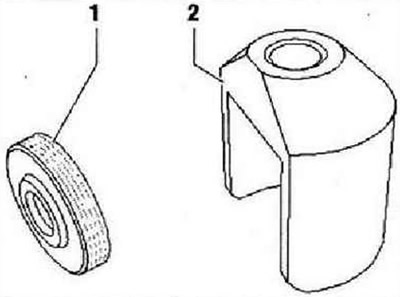
Disconnect cartridge at -A- and -B-. Open element -B- of the chuck.
Remove bulb in -direction of arrow-.

Installation is carried out in the reverse order.
Visitor comments