



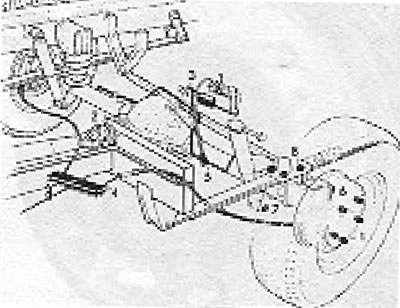
Figure 8.12. Rear axle fastenings (LT 28, 31): 1 - Wheel nuts; 2 - Cardan shaft flange bolts; 3 - Brake pressure regulator spring; 4 - Handbrake cables; 5 - Hydraulic three-way adapter; 6 - Panhard lever; 7 - Lower shock absorber mount; 8 - Spring U-bolt nuts.
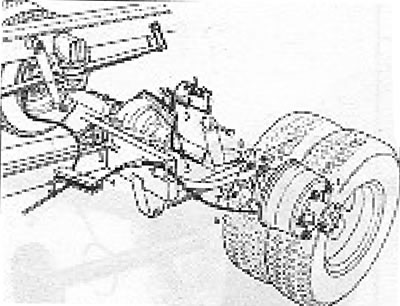
Figure 8.13. Rear axle fastenings (LT 35, 40, 45): 1 - Wheel nuts; 2 - Cardan shaft flange bolts; 3 - Brake pressure regulator spring; 4 - Handbrake cables; 5 - Hydraulic three-way adapter; 6 - Connecting elements of the stabilizer ends; 7 - Lower shock absorber mounts; 8 - Spring U-bolt nuts.
1. Raise the rear of the vehicle. securely fasten it and remove both wheels.
2. Remove the driveshaft (see Chapter 7).
3. Disconnect the spring from the brake pressure regulator, but do not disturb the installation of the adjusting screw (see Chapter 9).
4. Disconnect the handbrake cables from the rear brake drums and remove the cable boots from the rear brake plates.
5. Disconnect the hydraulic brake lines from the wheel cylinders.
6. Unscrew the hydraulic brake three-way adapter from the rear axle housing and release the brake pipes from the clamps. Close open brake lines.
7. On LT 26 and 31 models, disconnect the Panhard lever from both the rear axle housing and the body.
8. On LT 35, 40 and 45 models, disconnect the stabilizer from the rear axle.
9. Lower the vehicle slightly and then raise the rear axle on a jack stand.
10. Disconnect the lower shock absorber mounts.
11. Remove the nuts from the U-bolts of the leaf springs.
12. Remove the rear axle completely from the vehicle.
13. Installation is carried out by performing the above steps in reverse order, but observe the following provisions:
- Tighten all nuts and bolts to the required torque;
- Don't forget to connect the brake pressure regulator spring;
- Bleed the brake hydraulic system (see Chapter 9);
- Check the rear axle oil level and top it up if necessary.
[The article is posted on this website VWmanual.ru]
Visitor comments