



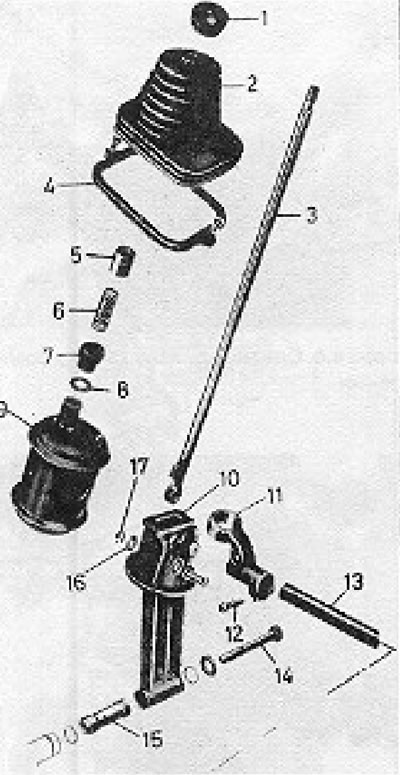
Figure 6.2. Gear shift lever components: 1 - Handle; 2 - Backstage; 3 - Lever; 4 - Fastening; 5 - Sleeve; 6 - Spring; 7 - Bearing; 5 - Washer; 9 - Coupling (only on early models); 10 - Front bracket; 11 - Tie rod; 12 - Through bolt; 13 - Gear shift rod; 14 - Bolt; 15 - Gasket; 16 - Washer; 17 - Spring clamp.
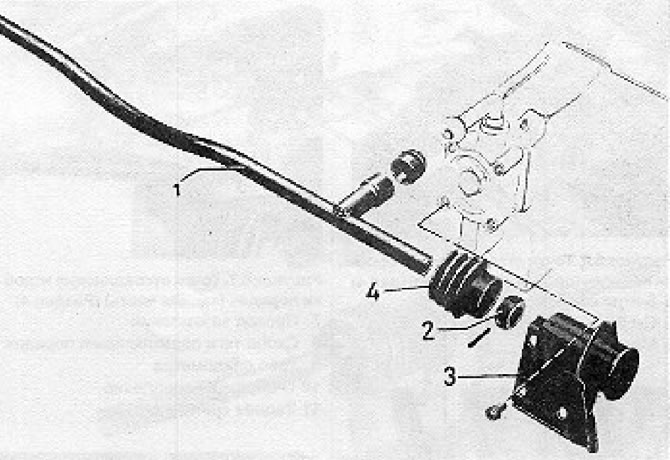
Figure 6.3. Gear shift rod: 1 - Thrust; 2 - Bushing; 3 - Rear bracket; 4 - Backstage.
1. Working from inside the cab, loosen and remove the handle from the gear shift lever.
2. Working under the vehicle, loosen and remove the through bolt from the clamp on the gear shift lever linkage.
3. Push the gear shift lever rod towards the rear of the vehicle.
[The original text is available on the portal: VWmanual.ru]
4. Unscrew the front bracket from the body and remove the lever bracket structure downwards.
5. To remove the tie rod, unscrew the rear bracket and remove the tie rod socket from the ball mount on the gearbox.
6. Now you can disassemble the rod and lever assemblies by removing the mounting clips and pins. Replace worn bushings, bearings and rubber bushings.
7. Assembly and installation are carried out by performing the above-described disassembly and removal steps in reverse order. Apply multi-purpose lubricant to rubbing surfaces during assembly.
8. Adjust the mechanism as described in Section 2.
Visitor comments