



Contents: Removal ↓ Installation ↓
Removal
Note: Light alloy rims are protected against corrosion by a clear varnish. When changing wheels, make sure not to damage the protective layer, otherwise the protective coating must be restored.
Before removing the wheel, mark the direction of rotation of the tire by drawing an arrow on its sidewall with chalk.
Take measures to prevent the car from rolling. To do this, apply the handbrake and engage 1st gear or reverse gear. For a car with an automatic transmission, move the mode selector lever to position P. In addition, place a wedge under the diagonally located wheel. Always place the wedge on the side toward which the car may roll when it is lifted.
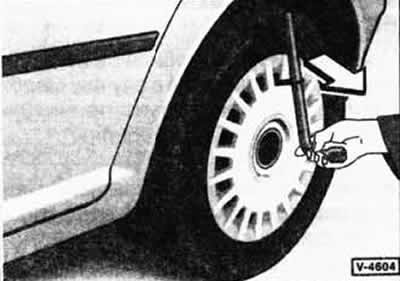
Wheel with a cap covering the entire rim: hook the cap through the recess with a hook from the on-board tool kit and press the cap away from the wheel rim.
The original article is available on the website: VWmanual.ru
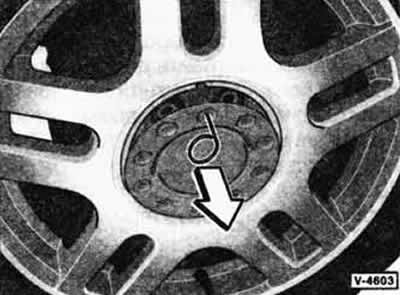
Wheel with a cap in the center of the rim: remove the cap using a wire hook.
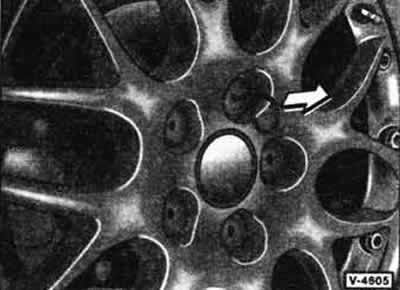
Wheel with protective caps of mounting bolts, remove protective caps with a wire hook.
Loosen the wheel bolts by ½ a turn, do not unscrew them.
Note: The vehicle must be parked on the platform with all wheels, the gear must be engaged and the handbrake must be applied. Do not use a torque wrench to loosen the bolts.
Safety instructions
There is a risk of accident when lifting the vehicle! Please read the section "Lifting the vehicle" beforehand.
Automobile jack up so that the wheel does not touch the platform.
Unscrew the wheel bolts and remove the wheel.
Note: To loosen the wheel bolts with anti-theft protection, you need an adapter, which is usually included in the on-board tool kit. Before loosening the bolts, remove the protective caps from them. Take the adapter from the tool kit and insert it into the wheel bolt until it stops. Loosen the bolt with a wheel bolt wrench. The code number of the adapter is stamped on its end. This number should be written down and carefully stored in case the adapter needs to be restored if it is lost.
Installation
To protect against deep corrosion, the seat of the disc wheel on the hub, both at the front and at the rear, must be lightly lubricated with plastic grease for rolling bearings after each removal of the corresponding wheel.
Clean dirty bolts and threads. Do not lubricate the threads of wheel bolts.
Warning: Rusty or difficult to tighten wheel bolts must be replaced immediately. Until this is done, moderate driving speeds should be maintained during travel.
Place the wheel on the hub in accordance with the mark indicating the direction of rotation made before removal.
Tighten the wheel bolts and lightly tighten them in a criss-cross pattern to a torque of 50 Nm.
Lower the car and remove the jack.
Tighten the wheel bolts in a crisscross pattern in several steps. Always use a torque wrench to tighten the wheel bolts. This ensures that the wheel bolts are tightened evenly and securely. The tightening torque for wheel bolts on both steel and light alloy rims is 120 Nm.
Caution: If the wheel bolts have been tightened without using a torque wrench, the tightening torque should be checked immediately at a service station. If the wheel bolts are tightened one-sidedly or unevenly, increased stress may occur in the wheel and/or wheel hub.
Wheel with a cap on the entire rim: press the cap to the rim first in the area of the rubberized tire valve, and then fix it around the entire perimeter. If necessary, press the cap to the rim with palm strikes.
Wheel with a cap in the center of the rim: attach the cap and secure it. Make sure that the protrusion on the cap fits into the recess on the rim, see Figure V-4603.
Wheel with protective caps for mounting bolts: Place protective caps on bolt heads.
Note: Rims and wheel bolts are matched. When replacing light alloy rims with steel ones, for example when switching to winter tires with steel rims, it is necessary to use wheel bolts of the appropriate length and shape. The reliability of the wheel fastening and the operation of the braking system depend on this.
After replacing tires, be sure to check and, if necessary, adjust their inflation pressure.
Visitor comments