



Contents: Removal ↓ Installation ↓
Removal
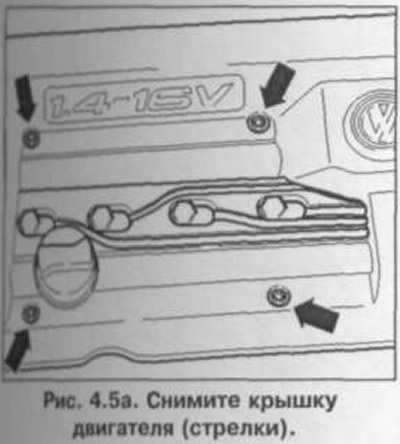
1. Remove the engine cover (arrows) (fig. 4.5 a).
2. Remove the air filter pole with the air intake duct.
3. Remove the upper part of the timing belt cover.
4. Set the piston of the first cylinder to TDC. To do this, align the mark on the crankshaft pulley with the edge of the mark 0 (fig. 4.4 a).
5. The locking holes in the camshaft pulleys must be aligned with the holes in the camshaft housing (arrows) (fig. 4.4 b).
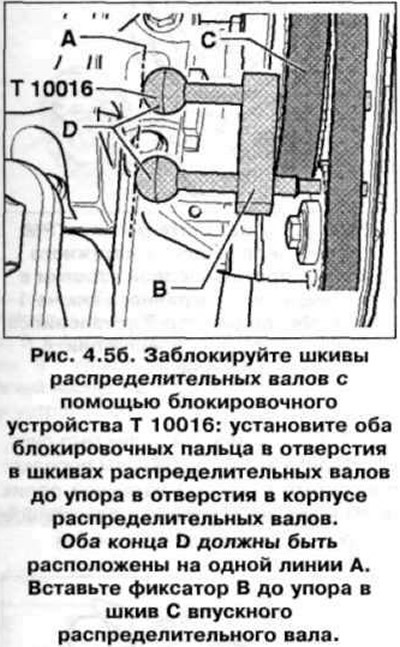
6. Lock the camshaft pulleys using the T 10016 locking device: insert both locking pins into the holes in the camshaft pulleys until they stop in the holes in the camshaft housing (fig. 4.5 b). Both locking pins are installed correctly when both ends D are aligned with the same line A. Insert locking pin B until it stops in intake camshaft pulley C.
7. Remove the right sound insulation casing.
8. Mark the direction of belt movement.
9. Using the key, move the tension roller in the direction of the arrow (fig. 4.3 a).
10. Remove the ribbed belt.
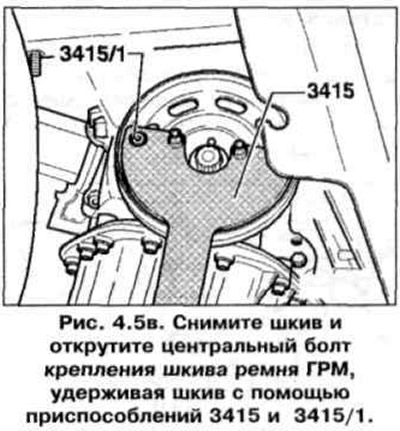
11. Remove the pulley and unscrew the timing belt pulley mounting bolt, holding the pulley using tools 3415 and 3415/1 (fig. 4.5 in).
12. Remove the pulley. Reinstall the mounting bolt with two washers and tighten to secure the toothed pulley.
13. Remove the intermediate roller (on cars with air conditioning) and tension roller.
14. Remove the lower part of the timing belt cover.
15. Mark the direction of rotation of the timing belts.
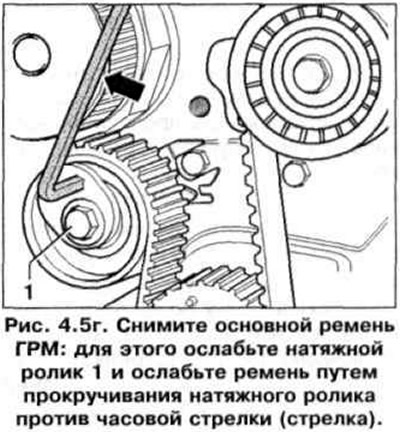
16. Remove the main timing belt: to do this, loosen the tension roller 1 and loosen the belt by turning the tension roller counterclockwise (arrow) (fig. 4.5 g).
17. Loosen the tension roller mounting bolt.
18. Remove the main timing belt.
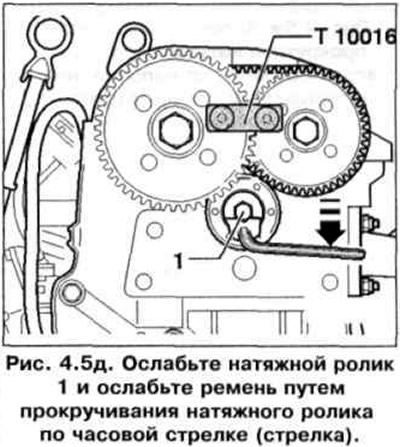
19. Loosen tension roller 1 and loosen the belt by turning the tension roller clockwise (arrow) (fig. 4.5 d).
20. Remove the additional timing belt.
Installation
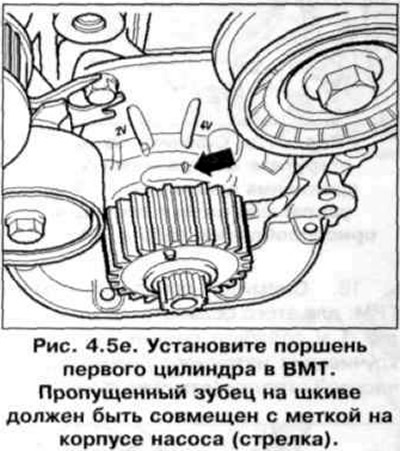
21. Set the piston of the first cylinder to TDC. The missing tooth on the pulley should be aligned with the mark on the pump body (arrow) (fig. 4.5 e).
22. Install the auxiliary timing belt clockwise: intake camshaft pulley, exhaust camshaft pulley. The slack part of the belt should be directed downwards.
23. Install the auxiliary timing belt tension roller:
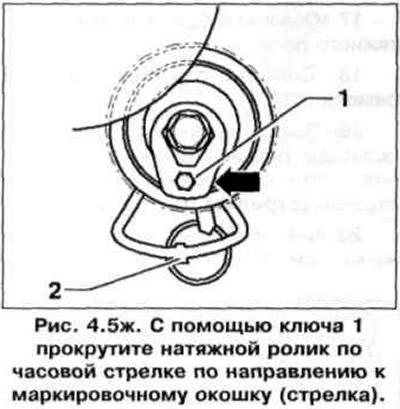
- using key 1, turn the tension roller clockwise towards the marking window (arrow) (fig. 4.5 f). The tension roller must be in an unloaded state.
24. Press the bottom of the timing belt and install the tensioner roller mounting bolt.
25. Tighten the bolt by hand. The eye on the base plate should align with hole 2 on the cylinder head.
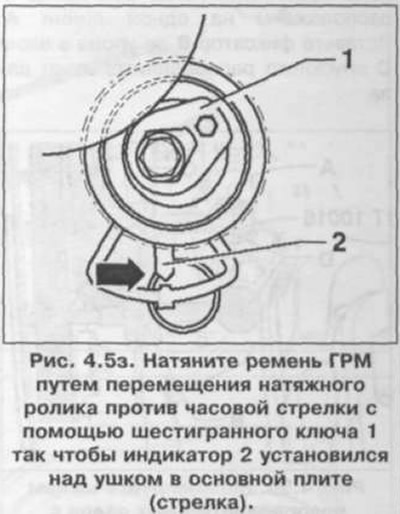
26. Then tension the timing belt by moving the tension roller counterclockwise using the Allen key 1 so that the indicator 2 is positioned above the eye in the main plate (arrow) (fig. 4.5 z).
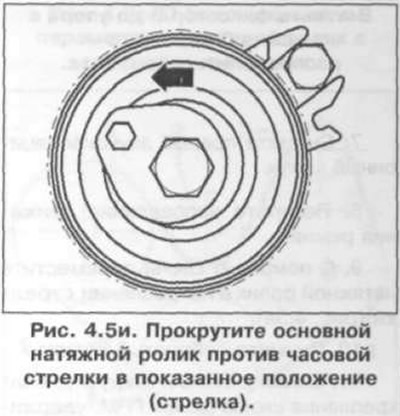
27. If the tension roller has been removed, install it in the following order: rotate the main tension roller counterclockwise to the position shown (arrow) (fig. 4.5 and).
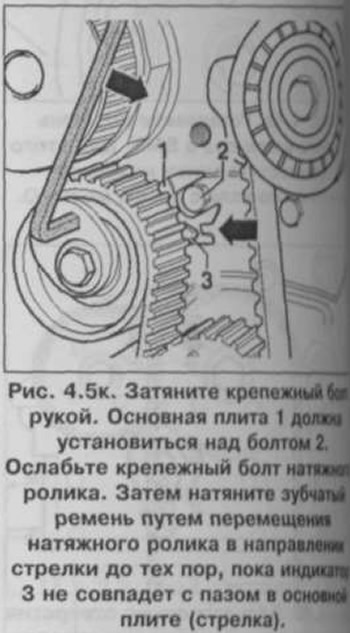
28. Tighten the mounting bolt with the nut. The main plate 1 should be positioned above the bolt 2 (Fig. 45 k). Loosen the tension roller mounting bolt. Then tension the toothed belt by moving the tension roller in the direction of the arrow until the indicator 3 coincides with the groove in the main plate (arrow).
29. Remove the locking tool from the camshafts.
30. Tighten the tension roller mounting nut.
31. Now turn the crankshaft two revolutions and set the piston of the first cylinder to TDC.
32. Further installation is carried out in the reverse order of removal.
Visitor comments