



Contents: Removal ↓ Installation ↓
Removal
1. Disconnect the negative cable from the battery.
2. Disconnect the protective cover 2 of the gear shift lever 1 and unscrew the bolts 3 with the washer 4 (figure 5.11).
3. Disconnect gear shift lever 1 from the gear shift lever on the gearbox or from the additional lever (figure 5.12).
4. Remove the center console.
5. Remove the engine/gearbox mounting bolts (figure 5.14).
6. Raise the car.
7. Unscrew the bolts securing the driveshaft to the power take-off box (Flange-mounted manual transmission) or disconnect it from the additional unit (Manual transmission without flange) (figure 5.77).
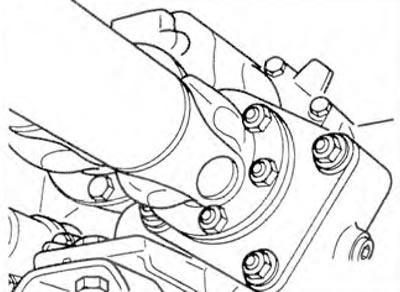
Figure 5.77. Unscrew the bolts securing the propeller shaft to the power take-off box (Flange-mounted manual transmission) or disconnect it from the additional unit (Manual transmission without flange).
8. Mark the position of the cardan shaft 1 and flange 2 (figure 5.16). Unscrew the bolts securing the cardan shaft 1 to the flange 2.
9. Hang the cardan shaft 1 on the stepladder 2 (figure 5.17).
10. Raise the engine. To do this, place a wooden block on the subframe under the pallet.
11. Disconnect connector 1 from PTO switch 2, hydraulic tube 3 from the working cylinder (figure 5.78).
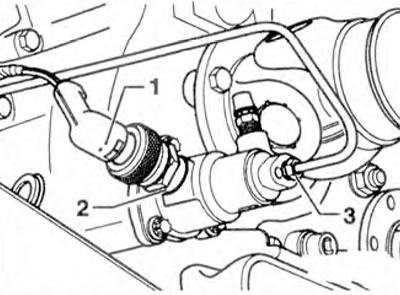
Figure 5.78. Disconnect connector 1 from PTO switch 2, hydraulic tube 3 from the working cylinder.
12. Unscrew the bolts (arrows) securing the rear part of the engine and gearbox (figure 5.19).
13. Disconnect and remove clutch slave cylinder 1 and bracket 3 from the gearbox, remove sealing gasket 2 (figure 5.79).
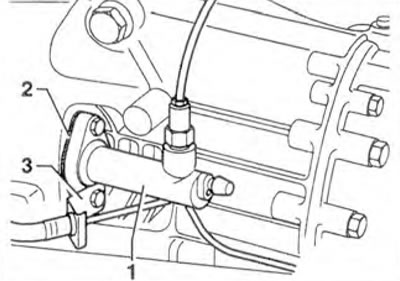
Figure 5.79. Disconnect and remove clutch slave cylinder 1 and bracket 3 from the gearbox, remove sealing gasket 2.
14. Disconnect the ground wire from the gearbox. Remove the starter.
15. Loosen the nut securing wire 1 to the reversing light switch 2 and remove the wire (figure 5.20).
16. On vehicles with a tachograph, remove the speed sensor 1 (figure 5.21).
17. Place the VAG 1383 A jack under the gearbox (figure 5.80).
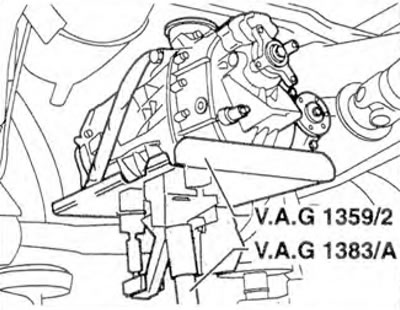
Figure 5.80. Place the VAG 1383 A jack under the gearbox.
18. Disconnect the gearbox from the engine and lower it.
Installation
19. Installation is carried out in the reverse order of removal.
Visitor comments