
English Русский
Български
Беларускі
Український
Српски
Hrvatski
Română
Polski
Slovenský
Magyar
  |  Articles  |  Sitemap  |  Contacts  |    |
Car maintenance Ford Car maintenance Hyundai Car maintenance Chevrolet Car maintenance BMW Car maintenance Audi Car maintenance Opel Car maintenance AvtoVAZ
VWmanual.ru


Main   Passat   Golf   Polo   Touareg   Tiguan   Sharan   Transporter   Others  
LT 28 (1975-1991) LT 2D (1996-2003) Beetle (1960-1986) Caddy 3 (2003-2010)

Fuel tank — removal, cleaning and installation (VW Lt 28)

  • Main
  • Volkswagen
  • LT 28
  • Power unit
  • Fuel and exhaust system
  • Fuel tank — removal, cleaning and installation
            0


1. Disconnect the negative cable from the battery.

2. On models with a cargo platform, remove the spare tire, unscrew the bolts securing the wheel carrier, and move the latter to the side.

3. Remove fuel from the tank either by pumping it into a container or by disconnecting the outlet hose from the fuel pump and turning on the ignition. The fuel supplied by the pump should also be collected in some container.

4. Disconnect the fuel tank filter tube (see photo).
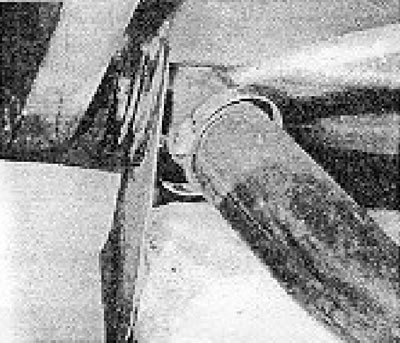
Photo 7.4. Fuel tank filler pipe.

Photo 7.4. Fuel tank filler pipe.


5 Disconnect the tank breather hoses.

6. Disconnect the fuel supply hose and return hose (if any).

7. Disconnect the wiring from the fuel level sensor.

8. Loosen the fuel tank mounting bolts and remove it from the vehicle (see photo).
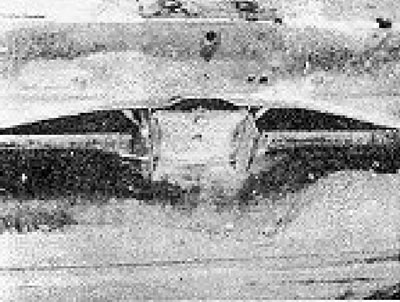
Photo 7.8. Rear fuel tank mount.

Photo 7.8. Rear fuel tank mount.


9. If the tank leaks, it must be repaired by a specialist. Do not attempt to solder or weld the tank unless it has been thoroughly steamed first. Small holes can be temporarily repaired using a special repair compound.

10. To clean the tank from sediment or water accumulated at the bottom, pour a little kerosene into it and shake it well. Before doing this, you should remove the fuel level sensor so as not to damage it. Repeat flushing the tank, replacing the kerosene from time to time, until you remove all the dirt and water from it.

11. The tank is installed in reverse order.

The original information is posted on the resource [vwmanual]

This article is available at russian, bulgarian, belarusian, ukrainian, serbian, croatian, romanian, polish, slovak, hungarian
The text has been checked: Kolesnikov Artem

Share information:

Previous articles
Fuel level sensor — removal and installation
Fuel pump (electric) — removal and installation
Fuel pump (mechanical) — removal and installation
Fuel filter — replacement
Air Cleaner — maintenance, removal and installation
Fuel system, exhaust system and emission control specifications
Next articles
Carburetor — regulation of idle speed and mixture composition
Carburetor — removal and installation
Carburetor — disassembly and assembly
Carburetor — adjustment
Throttle Pedal Cable — adjustment
Exhaust Gas Afterburning System — description and maintenance


Similar articles from other manuals for VW cars:
Fuel tank filler flap Passat B6 (2005-2010)
Fuel tank check valve Golf 2 (1984-1993, petrol)
Fuel tank cap Polo 3 (1995-2003)
Fuel tank filler flap Touareg 1 (2002-2006)
Fuel tank device Tiguan 1 (2007-2015)
Fuel level sensor in the tank Sharan 1 (1995-2000)
Fuel tank — design description Transporter T3 (1979-1992)
Link to this page in different formats


Visitor comments


No comments yet


How much will 26 + 44 =


Caddy 3 
  • General information
  • User manual
  • Daily care
  • Maintenance
  • Petrol engines 1.4 l
  • Engine repair
  • Cooling and lubrication system
  • Power and exhaust system
  • Petrol engines 1.6 l
  • Engine repair
  • Cooling and lubrication system
  • Power and exhaust system
  • Diesel engines
  • Engine repair
  • Cooling and lubrication system
  • Power and exhaust system
  • Transmission
  • Mechanical gearbox 0AH
  • Mechanical gearbox 0A4
  • Drive shafts
  • Chassis
  • Car suspension
  • Steering
  • Brake system
  • Body and wiring diagrams
  • Interior and exterior
  • Electrical circuits
Beetle 
  • General information
  • Maintenance
  • Power unit
  • Engine repair
  • Cooling and lubrication system
  • Supply system
  • Exhaust system
  • Transmission
  • Clutch
  • Car gearbox
  • Chassis
  • Front suspension
  • Rear suspension
  • Steering
  • Brake system
  • Wheels and tires
  • Body
  • Exterior
  • Electrical equipment
  • Equipment and devices
  • Power devices
  • Electrical circuits
LT 2D 
  • General information
  • User manual
  • Maintenance
  • Power unit
  • Petrol engines 2.3 l
  • Diesel engines 2.5 l
  • Diesel engines 2.8 l
  • Injection system (diesel 2.8 l)
  • Transmission
  • Clutch
  • Manual gearbox
  • Differential
  • Chassis
  • Car suspension
  • Steering system
  • Brake system
  • Body
  • Body elements
  • Heating system
  • Electrical equipment
  • Equipment and devices
  • Electrical circuits
LT 28 
  • General information
  • Maintenance
  • Power unit
  • Petrol engines 2.0L
  • Petrol engines 2.4L
  • Diesel engines
  • Cooling and heating
  • Fuel and exhaust system
  • Ignition system
  • Transmission
  • Clutch
  • Car gearbox
  • Cardan shaft
  • Rear axle
  • Chassis
  • Brake system
  • Car suspension
  • Steering system
  • Body
  • Body elements
  • Doors, locks and windows
  • Electrical equipment
  • Power devices
  • Equipment and devices
  • Electrical circuits
VWmanual.ru © 2016-2026 | Mobile version | News and articles | Sitemap: EN BG BY UA RS HR RO PL SK HU | Write message | Site search
Passat B2 • Passat B3 • Passat B4 • Passat B5 • Passat B6 • Golf 1, diesel • Golf 1, petrol • Golf 2, petrol • Golf 2 • Golf 3 • Golf 4 • Golf 5 • Polo 3 • Polo 4 • Touareg 1 • Tiguan 1 • Sharan 1 • Transporter T3 • Transporter T4 • LT 28 • LT 2D • Beetle • Caddy 3 •
Our website uses cookies to ensure functionality and convenience.