



Petrol engine with a working volume of 1.2 liters
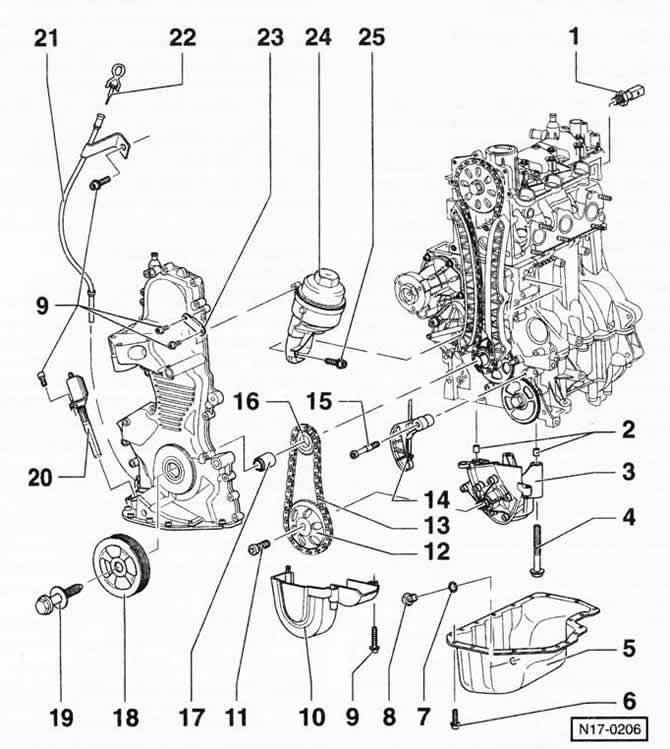
1 - hydraulic switch, 0.3-0.7 bar, 25 Nm
2 - guide bushings
3 - oil pump
Replace only as a complete unit.
4 - bolt, 25 Nm
5 - oil pan
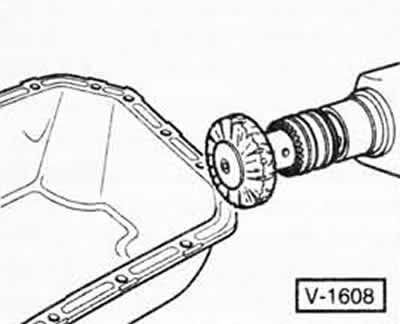
Before installation, thoroughly clean the sealing surfaces from oil and grease. Remove sealant residues with a rotating plastic brush, install the oil pan on silicone sealant WV-D 17B 404 A2.
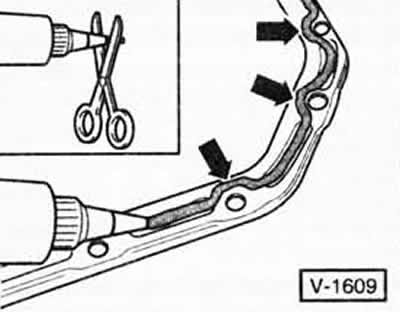
Apply sealant in a strip width of 2...3 mm.
Note: The width of the strip should not exceed the specified size, otherwise excess sealant may get into the oil pan and contaminate the suction pipe mesh. The sealant strip in the area of the holes for the mounting bolts should be placed on the inside of the "arrow".
After applying the sealant, install the pan no later than 5 minutes later. After installation, before pouring in engine oil, allow the sealant to harden for about 30 minutes. Installing the oil pan will be easier if you screw M6 studs into the engine block crankcase in two places as guides.
6 - bolt, 15 Nm
7 - sealing ring
Always replace.
8 - oil drain plug, 30 Nm
Always replace. With non-removable sealing ring.
9 — bolt, 8 Nm
10 — lid
11 — bolt, 20 Nm + 90° (¼ turn) in tightening direction
12 - asterisk
For roller chain. After installation, adjust the valve timing (at the service station).
13 - roller chain
Before removing, mark the direction of movement.
14 - chain tensioner with bar
15 — bolt, 15 Nm
16 - asterisk
For roller chain.
17 — bearing sleeve
18 — crankshaft belt pulley
19 — bolt, 90 Nm + 90° (¼ turn) in tightening direction
Always replace. Lubricate before installation. When loosening and tightening, hold the belt pulley with a standard holder.
20 — Engine oil level/temperature sensor
21 - guide tube
22 — oil level indicator (dipstick)
The engine oil level should not be above the MAX mark.
23 — holder
24 - oil filter
25 — bolt, 25 Nm
Note: The illustration shows an AWY engine with two valves per cylinder.
Visitor comments