
Examination
Safety note
There is a risk of accident when lifting the vehicle! You must first read the section «Vehicle lifting».
Raise the car in front on the goats.
Watching the ball joint, push the transverse arm hard up and pull down.
Watching the ball joint, the wheel at the bottom is strongly pressed outward and inward.
During both checks, no play should be felt or observed in the ball joint. Pay attention to possible play in the wheel bearing and in the thrust bearing of the suspension strut.
Check the protective rubber boot for damage, replace the ball joint if damaged.
Removing
Attention: When the nut securing the cardan joint shank is loosened, the car cannot be put on the wheels with a full mass, since in the absence of axial preload, the hub bearing is damaged.
Loosen the nut securing the universal joint shaft, see chapter «Removal and installation of an amortization rack».
Mark the installation position of the ball joint bolts in relation to the control arm and remove the bolts, see chapter «Removal and installation of an amortization rack».
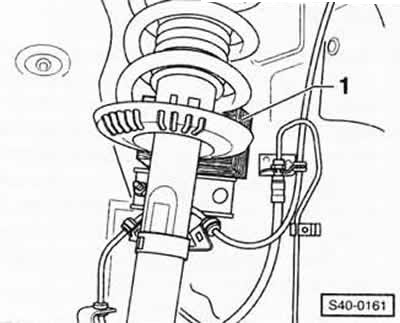
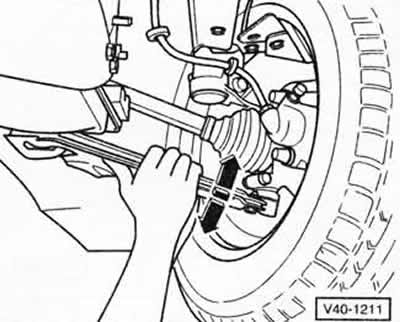
Swing the spring strut outward and support it with, for example, a block of wood -1-. At the same time, pull the propeller shaft out of the wheel hub.
Note: If the propeller shaft cannot be removed from the wheel hub, press it out with a puller, see chapter «Removal and installation of cardan shaft».
Tie the cardan shaft to the body with a tie wire. The cardan shaft must not sag down.
Place a suitable jack under the steering knuckle.
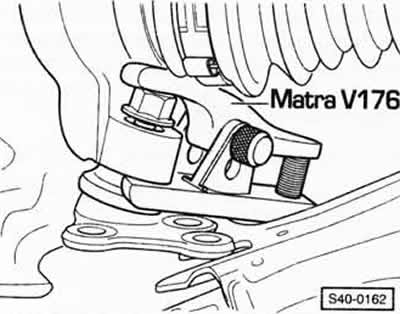
Press out the ball joint using a puller.
Note: Loosen the ball joint nut only a few turns to protect the thread during pressing.
Installation
Attention: Pay attention to the installation position of the ball joint. In case of incorrect installation, the angle of inclination of the axis of rotation of the wheel changes.
Mounting position: L - left hinge; R - right hinge; 3 - hinge for the chassis with a wheel rim diameter of 13 inches; 4 - hinge for the chassis with a wheel rim diameter of 14 inches.
Insert the ball joint into the steering knuckle and screw on a new self-locking nut. Tighten the nut to a torque of 20 Nm, then tighten it by 90°in the direction of tightening.
Insert the driveshaft stub into the wheel hub.
Bolt ball joint to transverse link. Use new mounting bolts, see chapter «Removal and installation of an amortization rack».
Keeping the tire in the same direction of rotation, bolt the wheel and lower the vehicle. Tighten wheel bolts crosswise to 120 Nm.
Screw a new nut onto the propshaft stub and tighten to the specified torque, see chapter «Removal and installation of cardan shaft».
Visitor comments