
Dismantling
Remove door trim, see above.

Lower the window. Unscrew the window from the power window, see fig. 57-129.
With manual control:
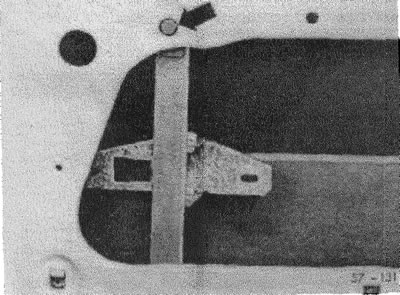
(57-131) unscrew the hex bolt (arrow) window regulator. Before that, outline the contour of the washer with a scriber.
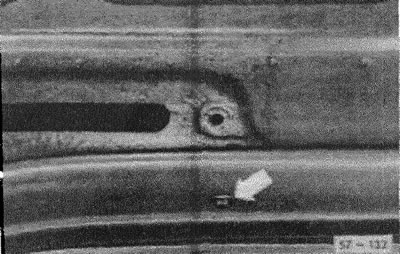
(57-132) unscrew the hexagon bolt on the bottom edge of the door. Before that, outline the washer.
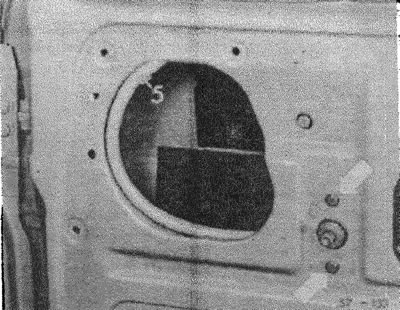
(57-133) Remove the power window handle seal.
Remove two hex bolts (arrow). Before doing this, outline both washers.
Bend back plate 5 and pull out the window regulator.
With electrical control:
Remove connecting cable.
Raise the glass to the very top and secure in this position, for example, with wooden wedges.
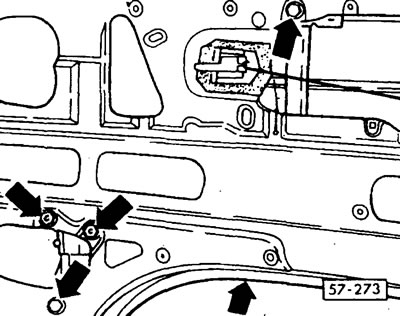
(57-273) unscrew the power window motor, 3 bolts and 2 nuts
Carefully pull the motor together with the drive rail through the cutout in the door. Be wearing protective gloves!
Attention! Do not bend the plastic guides of the engine rods!
Installation
With manual control:
Insert window regulator.
Screw the window regulator with two bolts to the handle and two bolts to the door.
Straighten window lifter. Be guided by the contours of washers outlined during dismantling. Screw on the window regulator.
Bend the bar along the door cutout.
Slide the glass down and lightly attach to the power window.
Raise the glass with the handle to align it with the frame and window seal.
Lower the glass a little and screw it through the mounting holes to the power window, see above.
Try raising and lowering the glass. If it moves hard, unscrew the glass from the power window, straighten it and screw it back on.
Install the power window handle seal.
Install door trim, see above.
With electrical control:
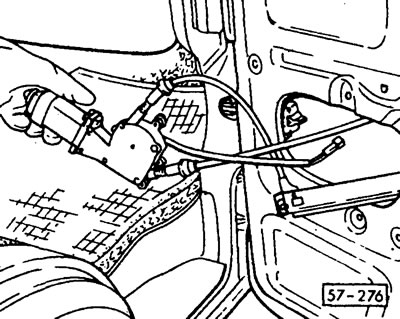
(57-276) insert the electric motor together with the drive bar and rods through the mounting hole.
Set the rods and the motor to the working position, fasten the bar and the motor.
Connect cable.
Screw the glass to the holder.
Check the operation of the power window.
Install door trim, see above.
Visitor comments