
Removing
Disconnect the battery.
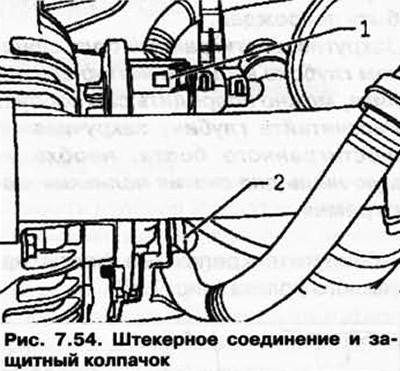
Disconnect the plug connection of the cable DF 1 and remove the protective cap 2 (pic. 7.54).
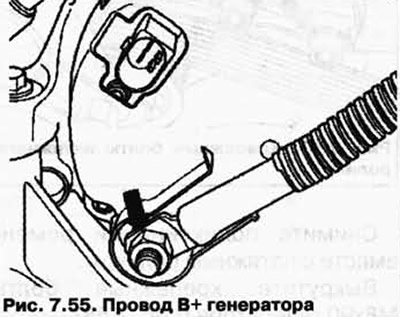
Unscrew the B+ wire from the alternator (pic. 7.55).
ATTENTION: Before removal, mark the direction of travel and the upper side of the polypin belt with chalk or a marker. When installing, observe the correct direction of movement and the position of the sides of the belt. Changing the direction of travel or the sides of a previously used V-ribbed belt will damage it.
Remove the air ducts above the radiator.
Screw the support bolt M8x50 into the threaded hole of the tension roller so that you can remove the V-ribbed belt (pic. 7.56).
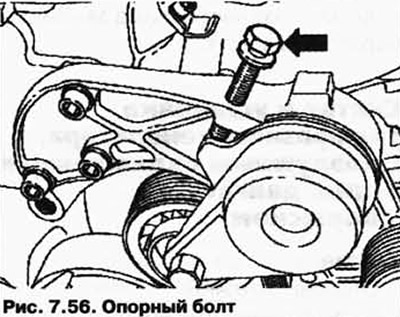
CAUTION: The idler housing may be damaged. Driving the hex bolt too deep into the idler housing can damage the housing itself. Calculate the depth of tightening of the hex bolt required only to remove the V-ribbed belt.
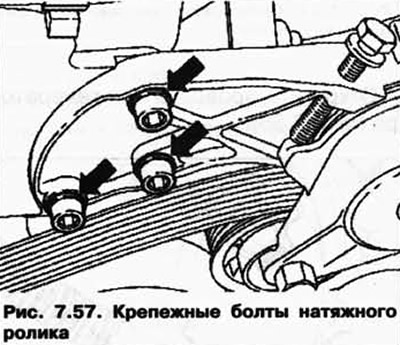
Unscrew the fixing bolts of the tension roller (pic. 7.57).
Remove the V-ribbed belt together with the tension roller.
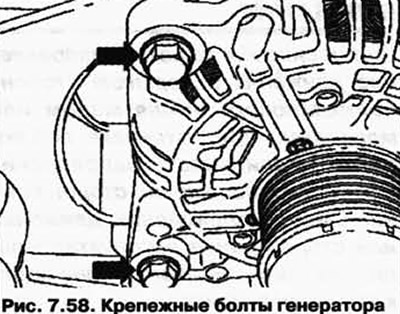
Unscrew the mounting bolts M8x90 generator (pic. 7.58).
Installation
ATTENTION: When installing a previously operated V-ribbed belt, observe the direction of movement marked during removal.
ATTENTION: Check the reliability of fastening of all units (alternator, air conditioner compressor, vane pump).
ATTENTION: When laying the belt, make sure that the V-ribbed belt is correctly positioned on the pulleys.
ATTENTION: Check if the support bolt M8x50 is unscrewed from the tension roller.
Installation is carried out in the reverse order, paying attention to the following.
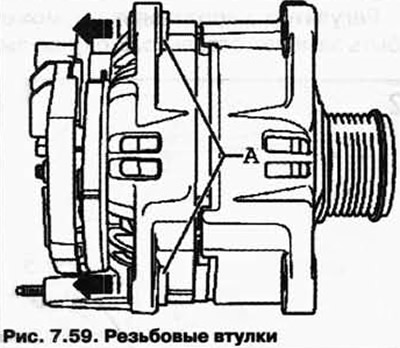
Carefully knock out the threaded bushings A about 4 mm in the direction of the arrow from the alternator housing (pic. 7.59).
Tighten the connections to the prescribed torque.
Connect battery.
Start the engine and check the belt travel.
Visitor comments